background image

IFM6SA2

IFM6SA2

18

19

ENGLISH

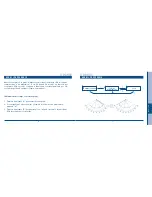
CHRONOGRAPH RESET 

(INCL. AFTER REPLACING BATTERY)

This  procedure  should  be  performed  when  the  chronograph  second  hand  does  not 
return to the Zero position.

1. 

Pull the crown out to the 2nd Click Position.

2. 

Press the button “A” once to set the chronograph second hand to the Zero 
position.

3. 

Press the button “B” once to set the chronograph 1/20 second hand to the Zero 
position. 
* The chronograph hands can be advanced rapidly by continuously pressing 
button “A” or “B”.

4. 

4.Once the hands are set at Zero position, reset the time and return the crown to 
its normal position. 
*The Zero position of the chronograph 1/20 second hand is possible to set 
optional position (360° 60step).

By  virtue  of  the  regulations  pursuant  to  the  handling  of  waste  products 
deriving  from  electronic  and  electrical  equipment,  end  of  lifecycle  watch 
making  products  must  be  selectively  collected  for  processing.  You  may 

therefore dispose of your quartz watch making products at any of our retail outlets 
or any other authorized collection point. The selective collection, processing, rating 
and recycling of these products helps contribute to safeguarding the environment and 
protecting our health. 

Summary of Contents for IFM6SA2

Page 1: ...I F M 6 S A 2 CHRONOGRAPH CALENDAR MANUAL DE INSTRUCCIONES INSTRUCTION MANUAL MANUEL D INSTRUCTIONS BETRIEBSANLEITUNG MANUALE DI FUNZIONAMENTO ...

Page 2: ..._______________________________________________________________13 MANUEL D INSTRUCTION_______________________________________________________________________________________________21 BETRIEBSANLEITUNG_ _____________________________________________________________________________________________________29 MANUALE DI FUNZIONAMENTO_ ___________________________________________________________________...

Page 3: ...______________________________________________________________7 Ajuste de la fecha___________________________________________________________________________________________________________________________7 Uso del cronógrafo_________________________________________________________________________________________________________________________8 Puesta a cero del cronógrafo_ ______________________...

Page 4: ...A 1 Tire de la corona hacia fuera y sitúela en la segunda posición de clic 2 Gara ajustar la manecilla de la hora y el minutero gire la corona en sentido horario 3 Cuando termine de ajustar la hora vuelva a colocar la corona en posición Normal 1 Tire de la corona hacia fuera y sitúela en la primera posición de clic 2 Gire la corona en sentido horario para ajustar la fecha Si ajusta la fecha entre ...

Page 5: ...ronógrafo avanza durante 30 segundos después del inicio y se detiene en la posición de cero Medir el tiempo con el cronómetro 1 Pulse el botón A para iniciar el cronógrafo 2 Pulsando el botón A el cronógrafo se inicia y se detiene 3 Pulse el botón B para poner a cero la hora los minutos y los segundos del cronógrafo Las manecillas de 1 20 de segundo vuelven a la posición cero la hora de alarma Rep...

Page 6: ...e encuentren en posición 0 ponga la hora a cero y devuelva la corona a su posición normal La posición 0 de la manecilla de 1 20 segundos del cronógrafo es posible establecerla en una posición opcional 360 paso 60 En aplicación de la normativa sobre los desechos de equipos eléctricos y electrónicos los productos de relojería de cuarzo que se encuentran al final de su vida útil deben ser sometidos a...

Page 7: ...__________________________________________________________________15 Setting the Date____________________________________________________________________________________________________________________________15 Using the Chronograph______________________________________________________________________________________________________________16 Chronograph reset_____________________________________...

Page 8: ...0 SEC SMALL HAND MINUTE HAND SETTING THE TIME 1 Pull the crown out to the 2nd Click Position 2 Turn the crown clockwise to set hour and minute hands 3 After the time has been set push the crown back to the Normal position 1 Pull the crown out to the 1st Click Position 2 Turn the crown clockwise to set the date If the date is set between the hours of around 9 00PM and 1 00AM the date may not change...

Page 9: ...chronograph 1 20 second hand keeps continuously for 30 seconds after starting and then stops at Zero position Measuring time with the stopwatch 1 Press button A to start the chronograph 2 The chronograph can be started and stopped each time button A is pressed 3 Press button B to reset the chronograph hour minute second and 1 20 second hands return to their Zero position Reset Stop Time Measuremen...

Page 10: ...Once the hands are set at Zero position reset the time and return the crown to its normal position The Zero position of the chronograph 1 20 second hand is possible to set optional position 360 60step By virtue of the regulations pursuant to the handling of waste products deriving from electronic and electrical equipment end of lifecycle watch making products must be selectively collected for proc...

Page 11: ..._______________________________________________________________________________23 Réglage de la date______________________________________________________________________________________________________________________23 Utilisation du chronographe__________________________________________________________________________________________________ 24 Réinitialisation du chronographe__________________...

Page 12: ... DES MILLISECONDES AIGUILLES DES MINUTES RÈGLAGE DE L HEURE 1 Tirez de la couronne jusqu à la position du second clic 2 Tourner la couronne dans le sens horaire pour régler les aiguilles de l heure et des minutes 3 Après avoir réglé l heure réenclenchez la couronne à sa position normale 1 Tirez de la couronne jusqu à la position du premier clic 2 Tourner la couronne dans le sens horaire pour régle...

Page 13: ...rrêter pendant 30 secondes après le démarrage et après elle s arrête et elle revient à la position Zéro Mesurer le temps à l aide du chronomètre 1 Pressez le bouton A pour démarrer le chronographe 2 Le chronographe peut être démarré ou arrêté à chaque fois que le bouton A est pressé 3 Pressez le bouton B pour réinitialiser les aiguilles de l heure des minutes des secondes et des 20es de seconde du...

Page 14: ...outon A ou B pressé 4 Une fois que les aiguilles ont été mises à la position Zéro régler l heure et retourner la couronne à sa position normale À la position Zéro des aiguilles des 20es de seconde du chronographe il est possible de régler des positions optionnelles 360 Étapes de 60 En application de la réglementation sur les déchets des équipements électriques et électroniques les produits horloge...

Page 15: ...________________________________________________________________31 Datum Einstellen_ __________________________________________________________________________________________________________________________31 Chronograph Benutzen_____________________________________________________________________________________________________________32 Chronograph Zurücksetzen__________________________________...

Page 16: ... ZEIGER UTENZEIGER ZEIT EINSTELLEN 1 Die Krone bis zum zweiten Klick herausziehen 2 Die Krone im Uhrzeigersinn drehen um die Stunden und Minutenzeiger einzustellen 3 Wenn die Zeit eingestellt ist die Krone in ihre Ausgangsposition drücken 1 Die Krone bis zum ersten Klick herausziehen 2 Die Krone im Uhrzeigersinn drehen um das Datum einzustellen Wenn das Datum zwischen 21 00 und 01 00 Uhr eingestel...

Page 17: ...denzeiger des Chronographen läuft 30 Sekunden nach dem Start und stoppt dann in der Nullstellung Zeitmessen mit der Stoppuhr 1 Druckknopf A drücken um den Chronograph zu starten 2 Der Chronograph kann immer durch Drücken des Druckknopfs A gestartet und gestoppt werden 3 Druckknopf B drücken um die Stunden Minuten Sekunden und 1 20 Sekundenzeiger in ihre Nullstellung zurückzustellen Zurück setzen S...

Page 18: ... B schnell vorwärtsbewegt werden 4 Wenn die Zeiger wieder auf der Nullstellung stehen die Zeit erneut einstellen und die Krone in ihre normale Position drücken Die Nullstellung des 1 20 Sekundenzeigers des Chronographen ermöglicht die optionale Position 360º 60 Schritte einzustellen Gemäß den Bestimmungen über die Behandlung von Abfällen durch Elektronik und Elektro Altgeräte sind Quarzuhrenproduk...

Page 19: ..._______________________________________________________________39 Impostazione della data_ ___________________________________________________________________________________________________________39 Uso del cronografo_____________________________________________________________________________________________________________________ 40 Reimpostazione cronografo___________________________________...

Page 20: ...la corona per estrarla fino alla posizione del 2º scatto 2 Girare la corona in senso orario per impostare le lancette delle ore e dei minuti 3 Dopo l impostazione del tempo premere la corona per riportarla nella posizione Normale 1 Tirare la corona per estrarla fino alla posizione del 1º scatto 2 Girare la corona in senso orario per impostare la data Se si esegue l impostazione della data tra le o...

Page 21: ... 20 secondi continua a funzionare continuativamente per 30 secondi dopo l avvio e quindi si ferma azzerandosi Misurazione del tempo con il cronografo 1 Premere il pulsante A per avviare il cronografo 2 Il cronografo può essere avviato e fermato di volta in volta premendo il pulsante A 3 Premere il pulsante B per azzerare l ora i minuti i secondi e la lancetta di 1 20 di secondo del cronografo Reim...

Page 22: ... il tempo e riportare la corona nella posizione Normale La posizione di azzeramento della lancetta da 1 20 di secondo del cronografo può essere impostata in una posizione opzionale 360º 60 giri Ai sensi dei regolamenti relativi alla manipolazione dei rifiuti provenienti da assemblaggi elettrici ed elettronici i prodotti d orologeria ormai inutilizzabili devono essere raccolti separatamente per con...

Page 23: ......

Reviews: