0 5 . 0 7 | w o o d c r a f t m a g a z i n e
43
feet on a level surface and clamp it
until the epoxy has set
(Fig. 9)
.
When set, clean away the epoxy
squeeze-out, give the chair a final
sanding and finish with four coats of
Minwax Wipe-on Poly.
Fig. 10
shows
a close-up of a finished miter joint.
Making the seat frame
Mill mortises for 6 x 40mm Dominoes
in the ends of the front and back rails
of the seat frame and in the inner
faces of the frame's side rails. The
back and front rails of the seat frame
are glued between its side rails. I took
the frame to a professional uphol-
sterer to get it upholstered with foam
on elastic webbing and covered with
black leather. There should be
1
/
8
"
clearance on either side of the seat
frame to accommodate the thickness
of the leather.
In order to be certain that the chair
was strong enough to withstand the
stresses of frequent use, it was tested
by placing a board across its side rails
and having three people with a total
weight of 576 lbs. stand on the board.
The rear ends of the side rails were
depressed by ½" under the load, but
sprang back to their original position
when the load was removed, and the
joints remained intact.
w w w
. w
o o d c r a f t
M
a g a z i n e
.
c o M
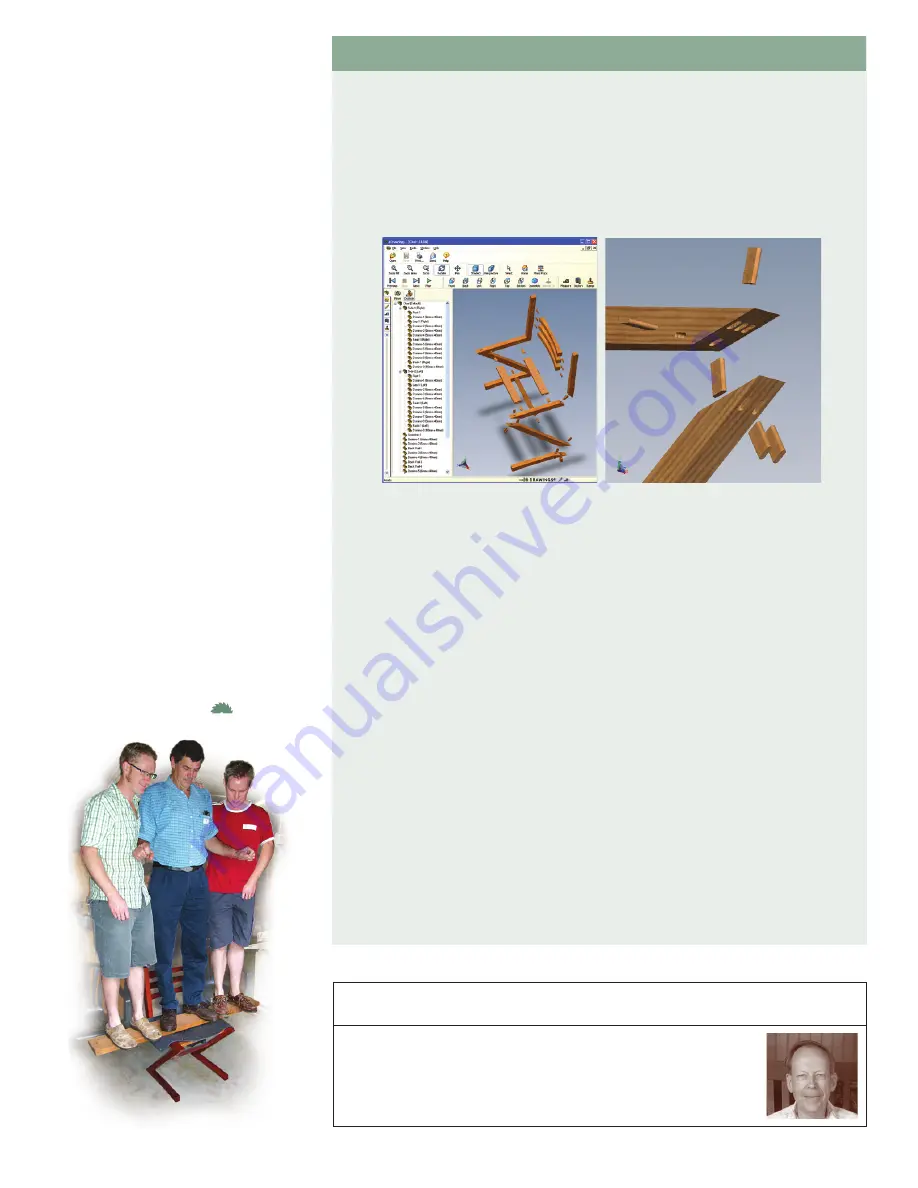
amazing detail with Free soFtware
HAvE you EvEr HAD A HArD tiME
following drawings for projects that you’d like to
build? Are there times when you would like to see hidden details? The eDrawings viewer
is a universal CAD and solid model viewer that will let you open a wide range of two-
and three-dimensional files. One such file, containing the Zigzag dining chair from this
article, is available for you to download at
woodcraftmagazine.com
. The file includes the
viewer as well as the model file, so there is nothing more to install on your computer.
You will be able to rotate, pan, and zoom into the 3-D image with your mouse. You
will also be able to make the project explode and collapse, cut it in half with a section
view, and even take measurements directly off the model!
Navigation tips
• When you need to return the model to its original state, click on the Home button.
• To see the parts outlined because it makes the edges more distinct, go to the View
menu and click on Show Edges When Shaded.
• To rotate your view around the model, click and hold your middle mouse button (or
mouse wheel) as you move the mouse.
• To zoom in and out, move the mouse to the center of what you want to see, and spin
the mouse wheel. If you don’t have a wheel, click on the Zoom button and click-and-
drag the mouse up or down to zoom.
• If you want to see details that are obscured by another part, right-click on the part and
a popup menu will appear. You can make the part transparent or hide it completely.
Parts list, Move, Measure, and Explosion
Open the Feature Manager Tab by clicking the icon on the left side of your screen.
• The items listed are the parts and subassemblies that make up the chair. Clicking on
any of these items will highlight the part or assembly in the model view.
• To see details that are obscured by a part, click on the Move icon, then drag the part
with your mouse. Double-click on the moved part to return to its original position.
• Extract measurements by clicking the Measure icon, and clicking on a part.
• The great thing about the eDrawings viewer is that you can watch the assembly
of parts explode and collapse to match the drawing in the magazine. Click on the
Explode icon. Click it again to bring the chair parts back together.
The eDrawings viewer has many more features, so to learn more, check out the built-
in help file. To download the free viewer separately, visit
solidworks.com
.
Download your free copy of the Zigzag chair and viewer in the projects section at
WoodcraftMagazine.com.
David Dundas
David was an exploration geologist in Tanzania, England, and
Australia. Since retiring in 1995, he has indulged his passion
for furniture making, with a particular interest in designing and
building chairs.


