12
EHL 65 EQ
GB
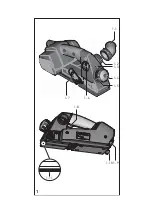
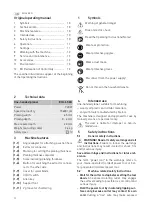
The marking
[1-3]
on the scale
[1-5]
around the ro-
tary knob indicates the planing depth setting.
L
The space between two lines on the scale rep-
resents a change in the planing depth of approx.
0.1 mm .
Recommendation:
do not set a planing thickness
greater than 2.5 mm for planing widths over 40
mm.
7.3
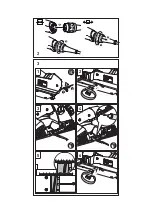
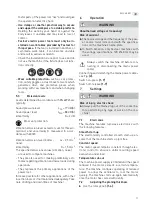
Changing spiral blades [3]
X
Remove the Allen key.
X
Loosen three clamping screws on the planer
shaft.
X
Remove the spiral blade.
X
Clean the blade retaining groove.
X
Insert spiral blade HW65 (488 503) with the la-
belled side facing the rear planer foot.
X
Align the spiral blade using a ruler so that the
face end is flush with the lateral edges of the
front and rear planer foot.
X
Tighten the clamping screws (starting with the
central clamping screw).
7.4
Dust extraction
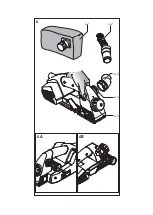
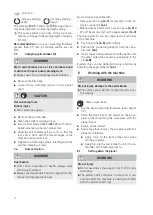
Dust extraction possible with:
– Chip collection bag
[4-1]
(accessory) on the ex-
tractor connector
[4-4]
– Mobile dust extractor with a suction hose
[4-2]
Ø
27 or Ø 36 (accessory) on the angle adapter
[4-3]
The dust extractor can be connected to both sides
of the machine:
X
Push down the
[4-5]
button firmly.
X
Pull out the connecting adapter from the oppo-
site side
[4A]
.
X
Insert the end of the adapter with the button into
the other side of the housing opening up to the
stop
[4B]
Ejected chips can be deflected in any direction by
adjusting the angle adapter
[4-3]
.
8
Working with the machine
X
Set the desired planing thickness (see chapter
7.2).
X
Place the front foot of the planer on the work-
piece without touching the workpiece with the
planer head.
X
Switch on the planer.
X
Guide the planer across the workpiece with the
planer foot laid flat.
X
Apply force to the front planer foot when
starting to plane.
X
Apply force to the rear planer foot for the re-
mainder of the planing process.
8.1
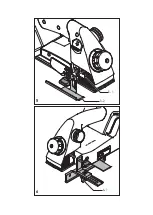
Setting down the planer
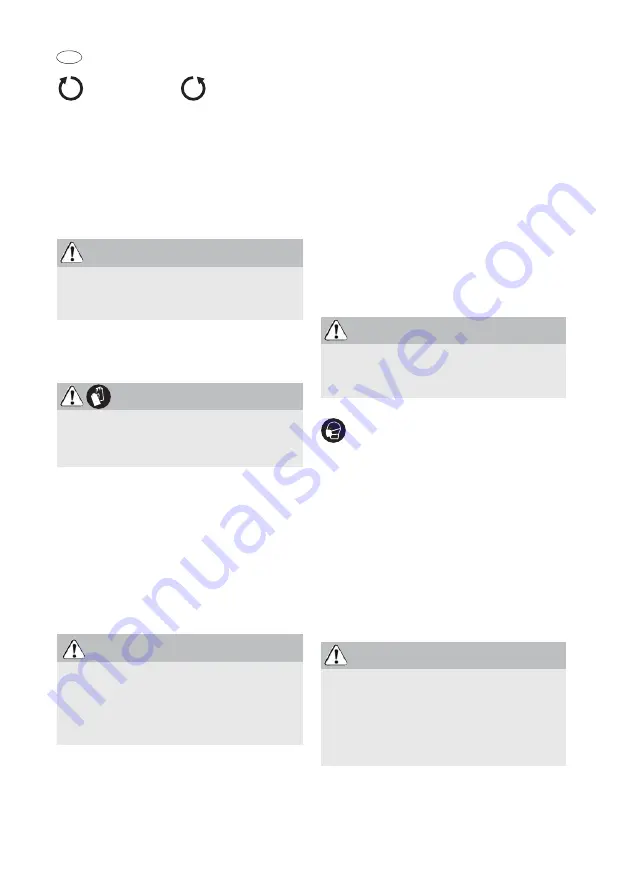
increase planing
depth
decrease planing
depth
WARNING
Worn spiral blades pose a risk of kickback and
could result in poor quality planing work
X
Always use sharp, undamaged spiral blades.
CAUTION
Hot and sharp tools
Risk of injury
X
Wear protective gloves.
WARNING
Dust hazard
X
Dust can be hazardous to health. Always work
with a dust extractor.
X
Always read applicable national regulations be-
fore extracting hazardous dust.
WARNING
Risk of injury, damage to the spiral blade
X
The surface must be free of metal objects prior
to planing!
Wear a dust mask.
WARNING
Risk of injury
X
Do not use unless the support foot [1-10] is fully
functional.
X
The planer shaft continues to rotate for a few
seconds after the machine is switched off. Wait
until the planer shaft stops.


