VN-HK85 130X16-25
11
GB
X
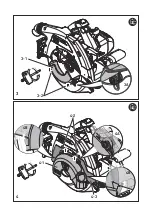
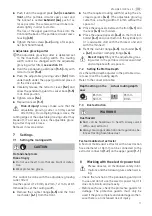
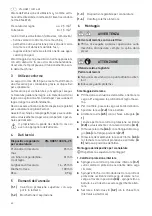
Push it until the support plate
[4-3] is seated in
front
of the portable circular saw's cover and
the locknut is seated
behind it [4A]
push it as
far as possible. The screws will need to be loos-
ened slightly in order to do this.
The tips of the upper guard must hook into the
front and the back of the portable circular saw's
housing
[4B]
.
X
Tighten the two screws
[4-2]
using a Torx span-
ner (left-hand thread).
3. Adjustable grooving cutter
L
The adjustable grooving cutter is delivered set
to the maximum routing width. The routing
width cannot be changed with the adjustable
grooving cutter fitted;
see section 7.1
.
X
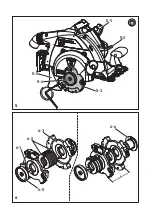
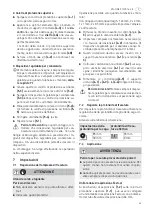
Hold the pendulum guard open
[5-5]
only with
retractor lever
[5-2]
.
X
Push the adjustable grooving cutter
[5-3]
from
underneath under the upper guard and place it
on the drive spindle.
X
Carefully release the retractor lever
[5-2]
and
allow the pendulum guard to swivel back
[5-5]
to its final position.
X
Tighten screw
[5-4]
.
X
Reposition lever
[5-1]
.
Risk of injury!
Always make sure that the
adjustable grooving cutter is firmly seated
after fitting. If a clamping flange is loose, the
cutting edges of the adjustable grooving cutter may
break off; if a screw is loose, the adjustable groov-
ing cutter may work loose.
Removal in reverse order.
7
Settings
7.1
Setting the routing width
This cannot be done with the adjustable grooving
cutter fitted.
Use the spacers (1x 3 mm; 2x 2 mm; 1x 1 mm; 2x 0.5
mm wide) to set the routing width.
X
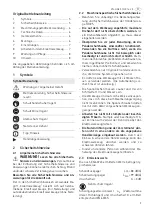
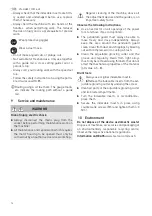
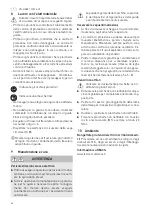
Remove the counter flange
[6-5]
and the front
tool holder
[6-1]
from the front.
X
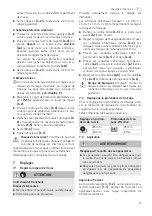
Set the required routing width (x) using the en-
closed spacers
[6-2]
. (The adjustable grooving
cutter has a routing width of 16 mm without the
spacers.)
X
Place these spacers between the front
[6-1]
and
the rear
[6-3]
tool holders.
X
Place the unused spacers
[6-2]
on the front tool
holder
[6-1]
and click them into the cylinder pin
(it is advisable start with the thickest and end
with the thinnest).
X
Refit the counter flange
[6-5]
, tool holder
[6-1]
+ [6-3]
and rear clamping flange
[6-4]
.
Risk of injury!
Only fit the adjustable groov-
ing cutter in the portable circular saw intact
and complete with all spacers.
7.2
Setting the Mortise Depth
Use the cutting depth adjuster in the portable circu-
lar saw to set the routing depth.
Refer to the conversion table:
7.3
Dust extraction
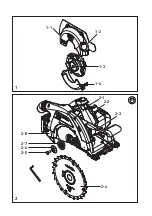
Festool mobile dust extractor
A Festool mobile dust extractor with an extraction
hose diameter of 36 mm can be connected to the
extractor connector
[1-2]
on the upper guard
[1-1]
.
8
Working with the electric power tool
Please observe all mentioned safety infor-
mations and the following rules when work-
ing:
– Check the function of the pendulum guard prior
to use and do not use the electric power tool if it
does not slide in and out easily.
– Before each use, check the protective guards for
damage. The protective guards must only be
used if they are complete and undamaged, other-
wise there is an increased risk of injury.
CAUTION
Hot and sharp tools
Risk of injury
X
Do not use insert tools that are blunt or defec-
tive.
X
Wear protective gloves.
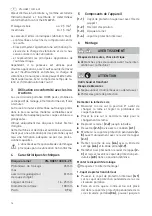
Depth setting on the
saw
Actual routing depth
85 mm
35 mm
50 mm
0 mm
WARNING
Dust hazard
X
Dust can be hazardous to health. Always work
with a dust extractor.
X
Always read applicable national regulations be-
fore extracting hazardous dust.

