2/19/09
MR15554
17
BOX SCRAPER SERVICE (continued)
READ AND UNDERSTAND ALL SAFETY STATEMENTS
Read all safety decals and safety statements in all manuals prior to operating or
working on this equipment. Know and obey all OSHA regulations, local laws,
and other professional guidelines for your operation. Know and follow good work
practices when assembling, maintaining, repairing, mounting, removing, or
operating
this
equipment.
REPLACEMENT OF CUTTING EDGES
1. Park your prime mover on a level surface with this product properly attached.
2. Place your prime mover’s transmission in “Park” and engage the parking brake.
3. With the ripper shanks fully lowered and locked into position, lower end plates of the main frame
of this product onto pre-placed blocking as specified below:
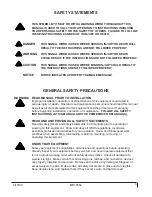
WARNING! Failure to obey the following procedures could result in death or
serious
injury.
• Do not use blocking made of concrete blocks, logs, buckets, barrels or any other
material that could suddenly collapse or ship positions. Do not use wood or steel
blocking that shows any signs of material decay. Do not use blocking that is
warped, twisted, or tapered.
4. Shut off your prime mover’s engine, remove the starter key, wait for all moving parts to come
to a stop, and relieve all pressure in the hydraulic lines.
5. Make sure that this product is completely stable on the blocking. If the blocking appears to
be unstable or is even of questionable stability, restart your prime mover, raise this product off
the blocking, and move away from the blocking. After the blocking has been repositioned in a
more stable fashion, repeat steps 1 through 5 until a completely stable condition exists.
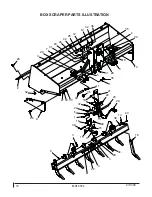
6. TWO WORKERS ARE REQUIRED to remove a cutting edge. From the rear of this product,
reach under the rear cutting edge, loosen and remove the center five nuts, then remove the
corresponding bolts.
7. Loosen the remaining two nuts. While the first worker holds up one end of the cutting edge, the
second worker must remove the nut and bolt from that end so that the first worker can lower that
end of the cutting edge to the surface below. Repeat this process for the remaining bolt.
8. The cutting edge can then be turned end for end and be reinstalled or, if both edges are worn
out, the old cutting edge should be properly discarded. Whether reversing the cutting edge or
installing a new one, replacement of all bolts is recommended. Replacement of all locknuts and
any damaged or worn bolts is required.
9. Reverse the removal process in Step 7 and loosely secure the cutting edge with two bolts: one in
each end hole. Install the other five bolts, then gradually and uniformly tighten all the bolts to
100
ft. lbs. + or - 6.0 ft. lbs., drawing the cutting edge into the proper operating position.
10. If necessary, repeat steps 6 through 9 for the second cutting edge.

