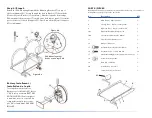
PARTS / PIÈCES
Missing numbers have already been installed by the factory. / Les numéros
manquants ont déjà été installés par l’usine.
No.
Description
QTY
1
Main Frame / Cadre principal
1
8
Left Leg Tube / Tube de jambe gauche
1
9
Right Leg Tube / Tube de jambe droite
1
10a
Right-side Handrail /Rampe droite
1
10b
Left-side Handrail / Rampe Gauche
1
11
Front Handrail / Rampe avant
1
13
Monitor / Moniteur
1
15
8 x10 mm Bolts / Boulons 8 x10 mm
4
16
4 x10 mm Screws / Vis 4 x10 mm
12
17
Monitor Mounting Bracket / Support de moniteur 1
18
Sensor Cap / Capuchon
1
19
Allen Key / Clé Allen
1
20
Screwdriver / Tournevis
1
21
Twister Part / Partie “Twister”
1
21
2
3
1
7
5
4
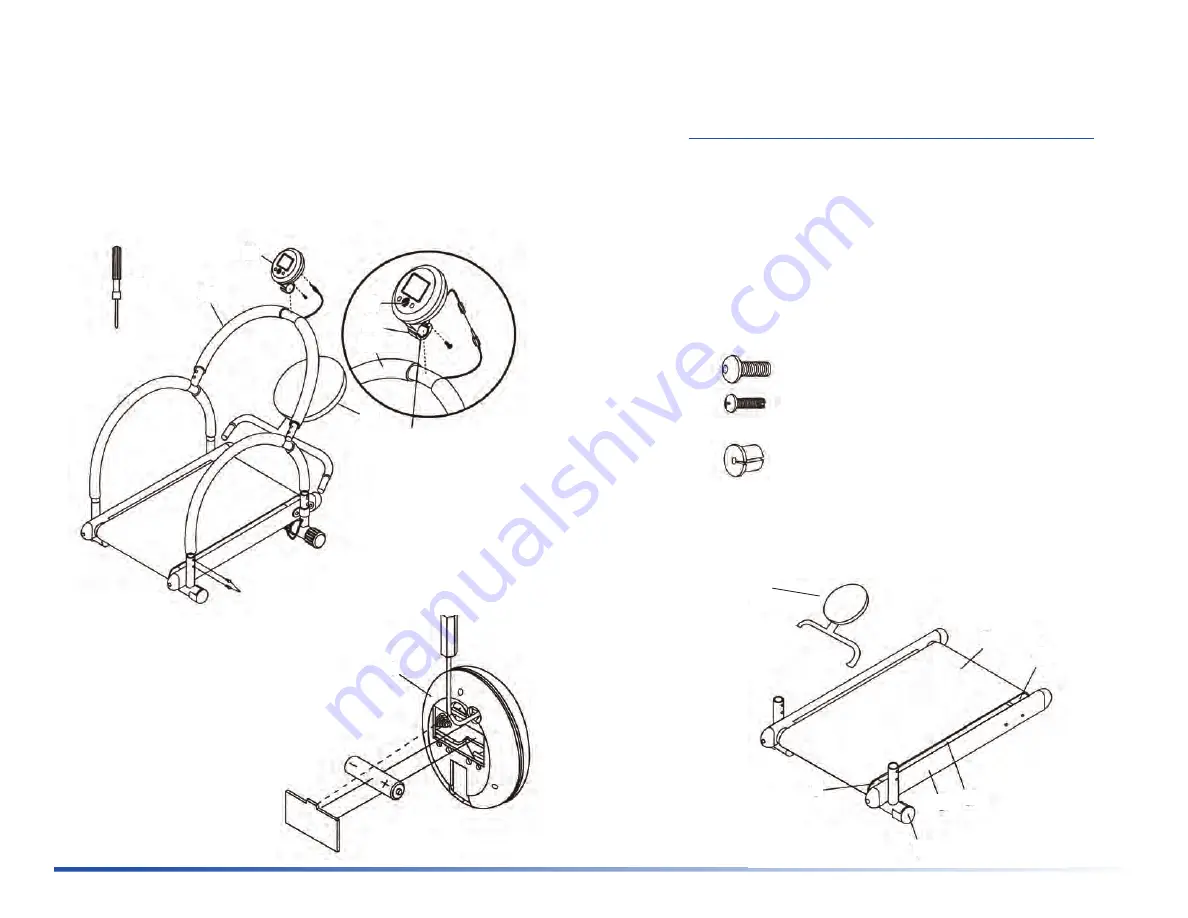
Step 4 / Étape 4
Attach the EVA Mounting Strip with the Mounting Bracket (17) on top of
the Front Handrail (11). Secure through the hole in Bracket (17). Attach the
Monitor (13) onto Bracket (17) as shown. / Attacher la bande de montage
EVA au support de montage (17) sur le dessus de la rampe avant (11) et faites
passer à travers l’orifice du support (17). Fixer le moniteur (13) sur le support
(17) tel qu’indiqué.
Battery Installment /
Installation de la pile
To set up the monitor, remove
Battery cover of Monitor (13). Insert
1 “AA” battery as shown. BATTERY
NOT INCLUDED. / Pour configurer
le moniteur, retirer le couvercle du
compartiment à pile, insérer une
pile “AA” tel qu’indiqué. PILE NON
INCLUSE.
Figure 4b
Figure 4a
EVA Mounting Strip /
Bande de montage EVA
20
21
11
17
13
13
11
13


