Farmer-Helper 25 & 27G
9
Revision06/2017
Operating the Spreader
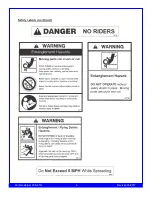
Before proceeding with operation of the spreader, review all safety statements
as provided in Section 1 of this manual.
WA R N IN G : To prevent serious personal injury, ensure that ALL safety shields are in place on the
spreader before starting operation. NEVER operate the spreader without ALL safety shields in place.
AT T E NT ION / C A U TIO N : In order to obtain proper, aggressive spreading action,
the spreader ground
speed must reach a minimum o f 3.0 miles per hour—the equivalent o f a comfortable walking pace.
(Note that the wheels drive the beater action.) However, spreading at speeds over 5.0 miles per hour (i.e.
Similar to a very brisk walking pace) can cause excessive wear or damage to the equipment, which may void
Your warranty.
1.
Ensure that the spreader (and towing vehicle) are in a stopped position (i.e. N OT in motion).
2.
Lif t the manual end gate.
(Optional equipment)
3.
Engage the right lever tostart the beater.
4.
Engage the left lever to start the action of the apron floor chain (moving the material towards the rear
of the spreader).
5.
Begin moving forward, and ensure that you are reaching the optimal operating speed for spreading
(at least 3.0 mph, but not more than 5.0 m ph). Remember that this optimal speed is similar to a
comfortable walking ace.
6.
When the spreader is almost empty and there is very little manure pushing against the beater,
disengage the right spreader lever (which controls the beater rotation).
7.
Allow the apron chain to run the remaining manure out the back o f the spreader.
8.
When completely unloaded, disengage the left spreader lever to stop the action o f t he apron
chain.
9.
Ifyour spreader is equipped with a manual end gate, return the end gate to the closed (down) position.
10.
Refer to Section 3 in this manual for maintenance to be performed following operation of the spreader.
IMPORTANT! After afew hours o f initial operation, watch and listen for any loose components.
Be aware that it may he necessary to re-tighten hitch hardware and/or wheel bolts: please refer to
Section 3 in this manual for the proper torque specifications.
Summary of Contents for FH-25G
Page 6: ...Farmer Helper 25 27G 6 Revision06 2017...
Page 18: ...Exploded View of 25G Manure Spreader Farmer Helper 25G 18...
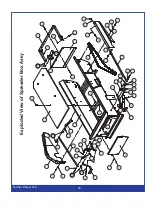
Page 20: ...Exploded View of Spreader Box Farmer Helper 25G 20...
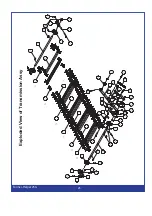
Page 23: ...Exploded View of Transmission Assy Farmer Helper 25G 23...
Page 26: ...Exploded View of Tire Assy Farmer Helper 25G 26...
Page 28: ...Exploded View of Widespread Shaft Assy Farmer Helper 25G 28...
Page 30: ...Exploded View of Chain Tension Assy Farmer Helper 25G 30...
Page 32: ...Exploded View of Hitch Assy Farmer Helper 25G 32...


