g
eneral
InFormatIon
1.1 I
dentIFIcatIon
data
oF
tHe
manuFacturer
and
tHe
compressor
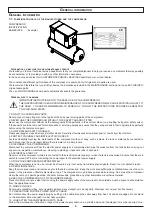
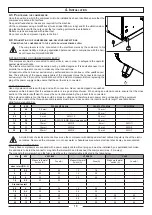
COMPRESSOR
IDENTIFICATION
NAMEPLATE (Example)
I
nFormatIon
on
macHIne
tecHnIcal
/
maIntenance
servIce
We remind you that our technical service department is at your complete disposal to help you resolve any problems that may possibly
be encountered, or to provide you with any other information necessary.
In the case of need contact Our CUSTOMER TECHNICAL SERVICE department or your local dealer.
The constant and efficient performance of the compressor is ensured only if original spare parts are used.
We recommend therefore that you strictly observe the indications provided in the MAINTENANCE section and to use EXCLUSIVELY
original spare parts.
The use of NON ORIGINAL spare parts automatically annuls the guarantee.
g
eneral
saFety
warnIngs
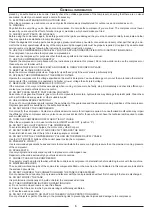
IMPORTANT INSTRUCTIONS FOR THE SAFE USE OF THE COMPRESSOR
THE INAPPROPRIATE USE AND POOR MAINTENANCE OF THIS COMPRESSOR MAY CAUSE PHYSICAL INJURY TO
THE USER. YOU ARE RECOMMENDED TO CAREFULLY FOLLOW THE INSTRUCTIONS PROVIDED HEREAFTER
TO AVOID SUCH RISKS.
1. DO NOT TOUCH MOVING PARTS
Never put your hands, fingers or other parts of the body near moving parts of the compressor.
2. NEVER USE THE COMPRESSOR WITHOUT THE SAFETY GUARDS FITTED
Never use the compressor without all the safety guards fitted perfectly in their correct place (i.e. panelling, belt guard, safety valve).
If these parts are to be removed for maintenance or servicing purposes, ensure that they are put back in their original place perfectly
before using the compressor again.
3. ALWAYS WEAR SAFETY GOGGLES
Always wear goggles or equivalent eye protection means. Never direct compressed air towards any part of your body or that of others.
4. PROTECT YOURSELF AGAINST ELECTRIC SHOCKS
Avoid accidentally touching the metal parts of the compressor with your body, such as pipes, the tank or metal parts connected to
earth. Never use the compressor where there is water or in damp rooms.
5. DISCONNECT THE COMPRESSOR
Disconnect the compressor from the electric power supply and completely discharge the pressure from the tank before carrying out
any service, inspection, maintenance, cleaning, replacing or inspection jobs of each part.
6. ACCIDENTAL START-UP
Never move the compressor while it is connected to the electrical power supply or when the tank is pressurised. Ensure that the main
switch is turned OFF before connecting the compressor to the electrical power supply.
7. STORE THE COMPRESSOR APPROPRIATELY
When the compressor is not in use, it must be stored in a dry room away from atmospheric agents. Keep it out of children’s reach.
8. OPERATIONAL AREA
Keep the work area clean and remove any tools that are not required. Keep the work area sufficiently ventilated. Never use the com-
pressor in the presence of flammable liquids or gas. The compressor may produce sparks while running. Do not use the compressor
where there may be paints, gasoline, chemical compounds, glues and any other flammable or explosive material.
9. KEEP THE COMPRESSOR OUT OF CHILDREN’S REACH
Prevent children or anyone else from touching the power supply cable of the compressor. All outsiders must be kept at a safe distance
from the operational area.
10. WORK CLOTHES
Do not wear unsuitable clothing, ties or jewellery as these may get caught up in moving parts. Wear caps to cover your hair if necessary.
11. PRECAUTIONS FOR THE POWER SUPPLY CABLE
Do not disconnect the power supply plug by pulling on the cable. Keep the cable away from heat, oil and sharp edges. Do not stand
on the electrical cable or squash it under heavy weights.
12. LOOK AFTER THE COMPRESSOR WITH CARE
Follow the maintenance instructions. Inspect the power supply cable on a periodic basis and if damaged it must be repaired or re-
4
g
eneral
InFormatIon
Summary of Contents for New Silver Series
Page 20: ...7 Wiring diagram 20 7 Wiring diagram ...
Page 21: ... 21 7 Wiring diagram ...
Page 22: ... 22 7 Wiring diagram ...
Page 23: ... 23 7 Wiring diagram ...
Page 24: ... 24 7 Wiring diagram ...
Page 25: ... 25 7 Wiring diagram ...
Page 26: ... 26 7 Wiring diagram ...
Page 27: ... 27 7 Wiring diagram ...
Page 28: ... 28 7 Wiring diagram ...
Page 29: ... 29 7 Wiring diagram ...
Page 30: ... 30 7 Wiring diagram ...
Page 31: ... 31 7 Wiring diagram ...
Page 32: ... 32 7 Wiring diagram ...
Page 33: ... 33 7 Wiring diagram ...
Page 34: ... 34 7 Wiring diagram ...
Page 35: ... 35 7 Wiring diagram ...
Page 36: ... 36 7 Wiring diagram ...
Page 37: ...37 7 Wiring diagram 7 Wiring diagram ...
Page 38: ...38 7 Wiring diagram ...
Page 39: ...39 7 Wiring diagram ...
Page 40: ...40 7 Wiring diagram ...
Page 41: ...41 7 Wiring diagram ...
Page 42: ...42 7 Wiring diagram ...
Page 43: ...43 7 Wiring diagram ...
Page 44: ...44 7 Wiring diagram ...
Page 45: ...45 7 Wiring diagram ...
Page 46: ...46 7 Wiring diagram ...
Page 47: ...47 7 Wiring diagram ...
Page 48: ...48 7 Wiring diagram ...
Page 49: ...49 7 Wiring diagram ...
Page 50: ...50 7 Wiring diagram ...
Page 51: ...51 7 Wiring diagram ...
Page 52: ...52 7 Wiring diagram ...
Page 53: ...53 7 Wiring diagram ...
Page 54: ...54 7 Wiring diagram ...
Page 55: ...55 7 Wiring diagram ...
Page 56: ...56 7 Wiring diagram ...
Page 59: ...59 9 Maintence Schedule ...
Page 60: ...Cod 1127340124_02 2017 ...


