2/13
21689_r03
INSTRUCTION FOR USE
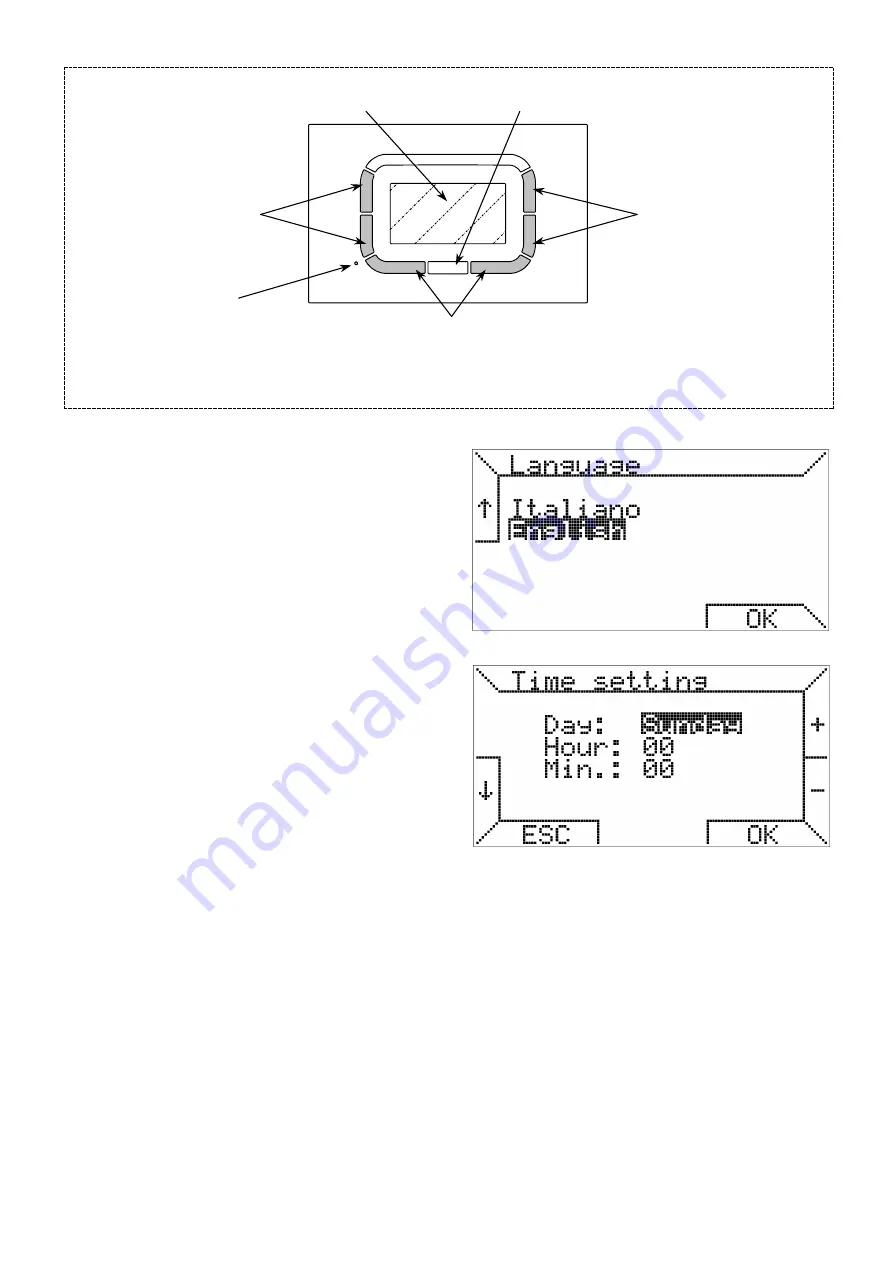
The FIAMMA OT11 provides the user with a graphic LCD
dot-matrix, a series of buttons in silicon rubber, and an LED
indicator located below a button plastic transparent to
display the parameters and interact with the heating
system. Figure 1.
The buttons have any versatile utilization depending on the
selected menu.
The use of buttons is facilitated by the indications with text,
icons and other graphics that appear on the display.
The vertical buttons on the left of the display are typically
used to navigate the setup menu or to select the
parameters.
The vertical buttons on the right of the display are used to
vary temperature and the classical function increase /
decrease (+ / -).
To facilitate the change of set values, the long press of
these buttons accelerates the increase or decrease.
The horizontal buttons at the bottom serve to confirm or
cancel the settings, or to enter and exit the submenus.
The center button to used for special functions as the
unlock of the boiler.
Under the center button there is an LED:
•
LED with color red continuous: error or no
communication with the boiler;
•
LED with color red intermittent: boiler lockout;
•
LED with color yellow intermittent: anomaly;
•
LED
with
color
green
continuous:
the
chronothermostat is resuming work after a power
failure.
The most frequently used functions by the user are
available in the main menu.
It is possible to quickly browse through the pages to set, for
example, environment temperature or the domestic hot
water temperature.
The first time or after a reset of the OT11, appears the
language menu, as shown in the figure below.
Pushing buttton OK, you confirm the selection.
This choice can be changed later, if necessary, through the
"SETTING MENU".
Then the current time can be entered.
Also in this case the buttons to the left allow you to select
the various menu items, while the right buttons are used to
change the values, the OK button stores the settings while
the ESC button allows you to continue without changing the
data time.
If you press ESC, the subsequent reconnection of the
cronothermostat (for example power down) you will again
be prompted to select the language and set the current
time.
Figure 1:
description of the remote control unit
graphic display (LCD)
hole for
access to the
reset button
function buttons
(the active command is indicated on the graphic display)
multifunction button with LED
buttons to
increase and
decrease
temperatures and
parameters
buttons to select
or change the
function
parameters


