9
Note:
These values are specific to your network. If the default values of these
fields are not sufficient consult your network administrator to determine the
correct values.
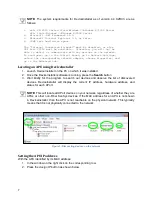
Figure 6:
IP Settings screen
9. Click the
Assign
button to apply the entered setting to the APU. This may take some
time to complete.
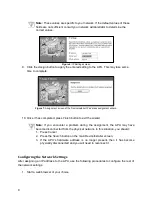
Figure 7:
Assignment screen of the DeviceInstaller IP address assignment wizard.
10. Once it has completed, press
Finish
button to exit the wizard.
Note:
If you encounter a problem during the assignment, the APU may have
become disconnected from the physical network. In this situation, you should:
1. Press
Cancel
2. Press the
Search
button on the main DeviceInstaller screen.
3.
If the APU’s hardware address is no longer present, then it has become
physically disconnected and you will need to reconnect it.
Configuring the Network Settings
After assigning an IP address to the APU, use the following procedures to configure the rest of
the network settings.
1. Start a web browser of your choice


