Connecting
Aggregate
Fiber
Connection
A
Neutrik™
opticalCON
DUO
connector
provides
a
bi
‐
directional
singlemode
fiber
interface
to
the
aggregated
I/O
of
the
CWDM.
This
optical
signal
carries
the
data
using
all
16(8)
wavelengths
internally
allocated
to
the
16(8)
external
SFP
cages.
Due
to
its
broad
wavelength
content,
this
optical
signal
is
not
compatible
with
single
wavelength
passive
or
active
optical
devices
such
as
passive
splitter,
optical
transceiver
modules,
etc.
The
opticalCON
DUO
provides
for
both
a
tactical
connection
using
a
mating
opticalCON
DUO
cable
or
a
standard
connection
with
LC
terminations.
Making
a
Tactical
Connection
A
tactical
fiber
connection
can
be
achieved
by
simply
utilizing
a
Neutrik™
opticalCON
DUO
fiber
cable
assembly
for
the
aggregate
fiber
run.
The
opticalCON
cable
connector
will
simply
‘push’
into
place.
Disconnecting
the
cable
requires
grasping
the
cable
connector
with
your
full
hand
and
pulling
back
the
release
ring
with
your
thumb
and
fore
finger
while
pulling
the
connector
straight
out.
See
Neutrik™
documentation
for
more
information.
Making
a
Standard
LC
Connection
Standard
singlmode
LC
connections
can
be
made
by
simply
plugging
the
LC
cable
connectors
directly
into
the
Neutrik™
opticalCON
connector
on
the
WDM16(8).
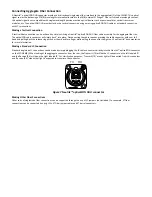
When
looking
at
the
aggregate
connector
from
the
rear,
the
Transmit
(TX)
will
be
the
LC
connector
on
the
left
labeled
‘A’
and
the
Receive
(RX)
will
be
on
the
right
labeled
‘B’.
For
clarification
purposes,
‘Transmit
(TX)’
means
light
will
be
emitted
from
this
connector
and
‘Receive
(RX)’
means
that
light
is
expected
to
travel
into
the
connector.
RX
TX
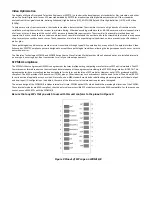
Figure
7
Neutrik™
opticalCON
DUO
connector
Making
Other
Fiber
Connections
Other
sorts
of
singlemode
fiber
connections
can
be
supported
through
the
use
of
LC
jumpers
(not
included).
For
example,
ST
fiber
connections
can
be
supported
by
using
LC
to
ST
fiber
jumper
cables
and
ST
barrel
connectors.
Summary of Contents for WDM16
Page 1: ...USER MANUAL Active Wave Division Multiplexer WDM16 WDM8A WDM8B...
Page 2: ......
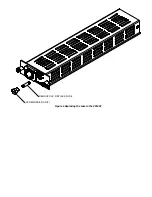
Page 13: ...REMOVE CAP REPLACE FUSE SCREWDRIVER SLOT Figure 6 Replacing the Fuse in the PSMAC...
Page 19: ......
Page 23: ......


