background image

Field of View GeoSnap Basic Manual                                                                                                                         34 

A-2: GEOSNAP PPK UPGRADE STEP BY STEP WALKTHROUGH 

1.


Download the GeoSnap PPK Upgrade file (.asc) provided by Field of View. 

2.


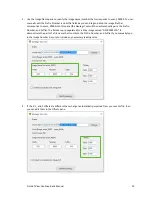
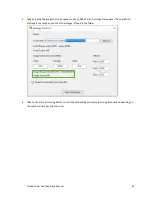
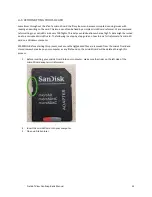
Look at the serial number found in the name of the .asc file (see below image for reference) and make 
sure that it matches the serial number of the GeoSnap Basic that you are trying to upgrade. If they do not 
match, please contact Field of View for further instructions. 


3.


If the serial numbers do match, proceed to copy and paste the .asc file to the root directory of the 
microSD card. 

4.


Insert the microSD card into the GeoSnap Basic and power it on 

5.


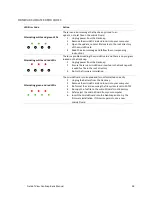
The GeoSnap will go through its normal bootup LED sequence. If the upgrade is successful, the blue and 
white LEDs will start flashing and the GeoSnap will start beeping. This indicates that a new GeoSnap PPK 
CONFIG file has been generated and needs to be reviewed. 

6.


Power off the GeoSnap, remove the microSD card, and insert it into your computer 

7.


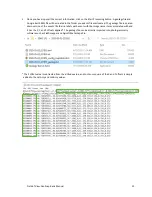
If the subscription was successful, you will notice that the GeoSnap PPK Upgrade file (.asc) is gone and a 
file called ppk_upgrade_status.txt will be present. Open the ppk_upgrade_status.txt file. 

8.


Inside the ppk_upgrade_status

.txt file there will be a success message (i.e. “

This unit has successfully 

been upgraded to a GeoSnap PPK.

”).


9.


Delete the ppk_upgrade_status

.txt file from the microSD card’s directory


10.


Open the CONFIG file and edit the appropriate settings for your flight. When finished, save the CONFIG 
file back to the microSD card 

11.


You can now safely eject the microSD card from the computer, and reinsert it back into the GeoSnap  

12.


Download the GeoSnap PPK manual at 

https://www.fieldofviewllc.com/downloads/geosnap-ppk


13.


Proceed with GeoSnap PPK operation 


Summary of Contents for GeoSnap Basic

Page 1: ...1st 2021 Important Note This is a general manual for the GeoSnap Basic It should be used in conjunction with one of the integration guides If you have any questions regarding this manual please contact support by emailing support fieldofviewllc com or calling 1 701 203 3757 ext 3 ...

Page 2: ...Reset 10 Operation Procedure 10 GeoSnap Basic Files 11 File Folder Structure 11 Configuration File 11 Trigger Mode 12 Trigger Control 13 PWM Behavior 14 GPIO Behavior 15 Offsets 16 Settings Reviewed 17 Events file 17 Configuration File Snapshot 18 GeoTags tool 18 Generate an uncorrected Geotags File KML File 19 Embed Coordinates Into Image Exif 22 Updating the GeoSnap Basic Firmware 27 Firmware Up...

Page 3: ...Field of View GeoSnap Basic Manual 3 A 2 GeoSnap PPK Upgrade step by step walkthrough 34 ...

Page 4: ...ing the GeoSnap Basic for the first time be sure to watch Operation Overview GeoSnap PPK and GeoSnap Basic https www youtube com watch v TpfOQX8rbSU this video was recorded using firmware 1 6 X the firmware 1 12 X documented in this manual has slight variations in the CONFIG file and Events File Note Many of the videos have links in their description to additional videos that provide more details ...

Page 5: ...5V On board connector Molex 43650 0200 Mating connector Molex 43645 0200 Auxiliary connector 6 pin Only used for MicaSense Rededge MX and custom integrations On board connector JST SM06B ZESS TB Mating connector JST ZER 06V S Camera connector 8 pin Camera hotshoe trigger and PWM GPIO interface On board connector JST SM08B ZESS TB Mating connector JST ZER 08V S microUSB port Used to connect the Geo...

Page 6: ... from the GeoSnap Remove the microSD card then use a computer to read the system_info txt file that was written to the microSD card s root directory POWERING THE GEOSNAP SYSTEM Battery Information Two Turnigy 9XR 2200mAh 11 1V Li Po batteries are included for powering the system These batteries have built in undervoltage protection which means that power will be cut from the output leads if any ce...

Page 7: ...f each cell as it charges Charging a fully depleted battery takes about 2 hours and 30 minutes 4 Once the battery is fully charged the charger will display FUL and begin to beep At this point you should disconnect the battery and unplug the AC adapter from the wall Purchasing Additional Batteries Additional batteries charger voltage checkers and AC adapters can be purchased directly via the links ...

Page 8: ...gging White Illuminates whenever the system writes data to the microSD card GNSS Green 1 flash searching for satellites event FixStatus logged as NO 2 flash at least 1 satellite is being tracked event FixStatus logged as NO 3 flash 3D fix with accuracy estimate over 3 m event FixStatus logged as 3D 3 Solid 3D fix with accuracy estimate under 3 m event FixStatus logged as 3D Trigger Amber Flashes w...

Page 9: ...em Flashing blue white green red LEDs w speaker beep There is a problem with the microSD card It is not seated properly or it is corrupted 1 Try re seating the microSD card 2 Try re formatting the microSD card using a computer check out section A 1 of the appendix for a guide on how to do this Flashing blue LED w speaker beep Communication with the GNSS receiver was temporarily interrupted 1 Syste...

Page 10: ... double flash in less than 30 seconds indicating that it is tracking at least one satellite 6 If the GeoSnap Basic s antenna has an unobstructed view of the sky then the green GNSS LED should begin to triple flash within 1 minute indicating that it is has a 3D fix 7 If distance or overlap trigger modes are set to Auto start the first trigger command will automatically be sent immediately after the...

Page 11: ... file is an HTML file used to configure the settings of the GeoSnap Basic Each time the GeoSnap boots or starts a new session it searches the root directory of the microSD card for the CONFIG file and reads the settings If a CONFIG file is not present the GeoSnap will generate a default CONFIG file in this case the blue and white LEDs will flash beep for 10 seconds at boot up letting you know that...

Page 12: ...ap mode sets the system to trigger at specific interval to maintain a desired frontal overlap percentage between images This requires the input of various values including the desired overlap percentage the Above Ground Level altitude the mission will be flown at the focal length your camera s lens and the camera sensor dimensions Only the Height value of the sensor dimension is used in the overla...

Page 13: ...minute after the system first acquired a 3D fix whichever comes first Press and hold the Control button on the GeoSnap to start triggering an audible beep will sound to confirm the triggering sequence started Press and hold the Control button on the GeoSnap to stop triggering an audible double beep will sound to confirm the triggering sequence has been stopped A PWM input on the white wire of the ...

Page 14: ... a low pulse width to a high pulse width will start triggering If the GeoSnap is already triggering then a transition from a low pulse width to a high pulse width will stop triggering If the GeoSnap is not triggering then a transition from a high pulse width to a low pulse width will start triggering If the GeoSnap is already triggering then a transition from a high pulse width to a low pulse widt...

Page 15: ...eoSnap to properly interpret the GPIO signal Behavior Description If the GeoSnap is not triggering then a transition from a low GPIO signal to a high GPIO signal will start triggering If the GeoSnap is already triggering then a transition from a low GPIO signal to a high GPIO signal will stop triggering If the GeoSnap is not triggering then a transition from a high GPIO signal to a low GPIO signal...

Page 16: ...e antenna A rough estimate 2cm is sufficient since any error in the X and Y offset measurements tend to get averaged to near 0 when performing grid mapping missions Keep in mind that the all the offsets need to be entered into the CONFIG file in meters 2 The Z offset is more critical to measure accurately Add the following distances to get the Z offset value when using the GeoSnap dZ antenna L1 ph...

Page 17: ...deg 46 904083939 Latitude in decimal degrees Lon deg 96 811011085 Longitude in decimal degrees Alt WGS84 m 258 305 Altitude above the WGS84 ellipsoid in meters Omega deg 0 Omega angle in degrees This column is necessary for a Pix4D compatible log The value will always be zero as this data isn t available Phi deg 0 Phi angle in degrees This column is necessary for a Pix4D compatible log The value w...

Page 18: ...g_snapshot html file is an HTML file that contains the parameters used for the session While the original CONFIG file is in the root directory and is used to change GeoSnap settings the CONFIG file snapshot cannot be changed and is found in every session folder that gets generated Note that an internet connection is not required to view the CONFIG file snapshot GEOTAGS TOOL The Geotags Tool is a s...

Page 19: ...s Tool application in the session folder with your mission data 2 The application automatically finds the events file in the folder it was launched from and populates it in the top bar you also have the option to browse for a different events file Upon finding a valid events file the application will display the Event Range and Event Count ...

Page 20: ...his pane the Geotags Tool will then automatically parse the Prefix Number and Suffix The fields are pre populated for a Sony image named DSC00001 JPG to demonstrate the parts of a file name that constitute the Prefix Number and Suffix If you manually type in the image Number be sure to include any neccessary leading zeros 4 If the X Y and Z offsets are different than what got automatically importe...

Page 21: ...eotags file is a pared down version of the events file that re labels each event with the image name it was associated with and it has the X Y and Z offsets applied The geotags file can be directly imported into photogrammetry software such as Pix4Dmapper and Agisoft Metashape Pro The Z offset value is subtracted from the altitude value and root sum square of the X and Y offsets is simply added to...

Page 22: ...available information for it Embed Coordinates Into Image Exif 1 To help speed up the process we recommend moving your images from your camera s SD card to a folder on your computer The number of images in the folder needs to exactly match the number of events in your event file 2 Launch the Geotags Tool by double clicking the Geotags Tool application in the session folder with your mission data ...

Page 23: ... application automatically finds the events file in the folder it was launched from and populates it in the top bar you also have the option to browse for a different events file 4 Click on the check box called Embed Coordinates Into Image Exif ...

Page 24: ...esponds to event_00001 into the Image Name pane The application will report the range and count of the images it found in the folder 6 Click on the Start Processing button to start the embedding process processing time varies depending on the number of images and their size ...

Page 25: ...Field of View GeoSnap Basic Manual 25 7 Once the process is complete you can verify that geotags were successfully embedded by right clicking on the image and clicking on Properties ...

Page 26: ...Field of View GeoSnap Basic Manual 26 8 In the Properties window click on the Details tab and then scroll down to the GPS section ...

Page 27: ...into the GeoSnap and power on the system 8 Wait until the firmware loading process is complete the white green and red LEDs will be rapidly blinking throughout the firmware update process Firmware loading is complete when the blue and white LEDs start flashing with a beep indicating it has detected a default config file 9 Unplug power from the GeoSnap 10 Remove the microSD card and insert into you...

Page 28: ...he microSD card and there is no program loaded on the GeoSnap 1 Unplug power from the GeoSnap 2 Ensure there is a microSD card inserted in the GeoSnap with a valid fvx file in the root directory 3 Re try the firmware installation Alternating green and red LEDs The microSD card is corrupted and or not formatted correctly 1 Unplug the battery from the GeoSnap 2 Remove the microSD card and insert int...

Page 29: ...Ingress Protection IP30 not waterproof or water resistant 1 Includes antenna main module hotshoe module and cables GNSS Specifications Maximum event rate 1 image every 0 3 seconds GNSS signals received GPS L1CA L1P GNSS data rate 10 Hz Accuracy 2 2 3 meters 2 Horizontal RMS accuracy at the antenna Depends on multipath environment number of satellites in view satellite geometry and ionospheric acti...

Page 30: ...Field of View GeoSnap Basic Manual 30 All dimensions are in millimeters ...

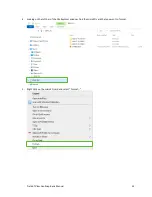
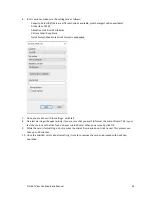
Page 31: ...might be ruined due to a corrupted microSD card The following is a step by step guide on how to do a full reformat of a microSD card on a Windows computer WARNING Before starting this process make sure that all desired files are removed from the microSD card and stored somewhere else on your computer as any file found on the microSD card will be deleted through this process 1 Before inserting your...

Page 32: ...Field of View GeoSnap Basic Manual 32 4 Looking on the left bar of the File Explorer window find the microSD card that you want to format 5 Right click on the microSD card and select Format ...

Page 33: ...rmat is unchecked 7 Once you are done with the settings click Start 8 One last warning will appear asking if you are sure that you want to format the microSD card This is your last chance to save the files found on your microSD card When you are ready click OK 9 While the card is formatting do not remove the microSD card and do not click Cancel This process can take up to 30 minutes 10 Once the mi...

Page 34: ...ll start beeping This indicates that a new GeoSnap PPK CONFIG file has been generated and needs to be reviewed 6 Power off the GeoSnap remove the microSD card and insert it into your computer 7 If the subscription was successful you will notice that the GeoSnap PPK Upgrade file asc is gone and a file called ppk_upgrade_status txt will be present Open the ppk_upgrade_status txt file 8 Inside the pp...

Reviews: