EN
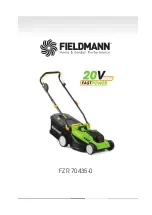
CORDLESS LAWN MOWER
USER’S MANUAL
Assembly
15
5. ASSEMBLY
5.1 MOUNTING THE HANDLE
Note
:All mounting steps must be performed on both sides
P. 4, item 3
Release the clamping lever (14).
Fold the bottom part of the handle bar (3) over as shown.
Observe the installation direction: Lugs (15) must engage as shown.
Press the clamping lever towards the handlebar.
If the clamping lever does not safely clamp: open the clamping lever again in a clockwise direction and
tighten it to the limit stop.
If the clamping lever cannot be tightened to the limit stop: open the clamping lever, make a counter-clockwise
revolution, and tighten it to the limit stop.
P. 5, item 4
Screw the handle (2) using the carriage bolts (16) and tensioning lever nuts (17) onto the handle under
section.
Press the clamping lever towards the handlebar.
If the clamping lever does not safely clamp: open the clamping lever again in a clockwise direction and
tighten it to the limit stop.
If the clamping lever cannot be tightened to the limit stop: open the clamping lever, make a counter-clockwise
revolution, and tighten it to the limit stop.
MOUNTING THE COLLECTION BOX
P. 5, item 5
Insert the carry handle (20) into the collection basket upper (19) until it engages.
Attach the collection bag (18) to the collection basket upper (19).
Press the rubber lip as far as possible into the guide!
5.2 USING FOR THE FIRST TIME
CHARGING THE BATTERY PACK
WARNING!
Risk of injury!
Comply with all safety instructions when handling rechargeable devices.
NOTICE!
Risk of damage to the unit!
Do not allow the battery pack to deep discharge.
Note
: The Li-Ion battery pack can be charged at any time without affecting the lifetime of the unit.
Interrupting the charging process will not damage the battery pack
The battery pack must be charged prior to the fi rst start-up (charging time: Technical data – p. 18).
Press in the locking button (11) and remove the battery from the device.
Insert the battery pack into the charger.
Plug the charger into the power supply.
The charging status is displayed by the control lights (12).
Slot the battery pack into the device and make sure it clicks into place correctly.
Summary of Contents for FZR 70435-0
Page 1: ...FZR 70435 0 ...
Page 2: ...EN 2 FZR 70435 0 English 1 22 Čeština 23 38 Slovenčina 39 54 Magyarul 55 70 Polski 71 86 ...
Page 3: ...EN CORDLESS LAWN MOWER USER S MANUAL 3 1 2 3 6 4 5 7 1 2 9 12 13 10 11 8 ...
Page 4: ...EN 4 FZR 70435 0 3 14 15 ...
Page 5: ...EN CORDLESS LAWN MOWER USER S MANUAL 5 ...
Page 6: ...EN 6 FZR 70435 0 12 ...
Page 7: ...EN CORDLESS LAWN MOWER USER S MANUAL 7 7 23 1 24 25 26 25 27 ...
Page 38: ...CZ 38 FZR 70435 0 ...
Page 54: ...SK 54 FZR 70435 0 ...
Page 70: ...HU 70 FZR 70435 0 ...
Page 86: ...PL 86 FZR 70435 0 ...
Page 87: ......
Page 88: ......
Page 90: ......
Page 91: ......
Page 92: ......


