background image

4.0 INSTALLA TION

UL S2203 

Cheetah Xi Install ation  Manual 

4-1

FM 

P/N: 06-356 

Rev 9, 10/2016

4.1 

SYSTEM INSTALLATION SEQUENCE

This section provides general instructions that should be adhered to when installing the Cheetah Xi system.
Refer to the installation instruction sheets supplied with each component for specific installation instructions.

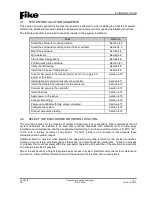
The following checklist is provided to assist the installer during system installation:

Task 

Refer to

Select the enclosure mounting location. 

Section 4.2

Select the enclosure mounting option (flush or surface). 

Section 4.3

Mount the enclosure. 

Section 4.4

Wire Selection 

Section 4.5

Circuit Class Designations 

Section 4.6

Pull field wiring into enclosure. 

Section 4.7

Verify the field wiring. 

Section 4.8

Install the AC power transformer(s). 

Section 4.9

Connect AC power to the transformer(s),

but do no t apply AC

power at this time

.

Section 4.10

Install optional circuit modules onto the controller. 

Section 4.11

Install the Cheetah Xi controller into the enclosure. 

Section 4.12

Connect AC power to the controller. 

Section 4.13

Install batteries. 

Section 4.14

 Apply power to the panel. 

Section 4.15

Connect field wiring. 

Section 4.16

Power-up controller with field wiring connected. 

Section 4.17

Configure the system. 

Section 4.18

Conduct acceptance testing. 

Section 4.19

4.2 

SELECT THE ENCLOSURE MOUNTING LOCATION

The mounting location for the Cheetah Xi system enclosure(s) is very important.  Fike recommends that all
system  enclosures  be  installed  in  an  area  that  is  readily  accessible  with  sufficient  room  to  allow  easy
installation and maintenance, and that is capable of maintaining a nominal room temperature of 0°-49°C / 32°-
120°F,  with  a  relative  humidity  of  93  percent.  Do  NOT  install  in  an  environment  that  exceeds  these
temperature and humidity ranges.

 Additional  items  to  consider  when  selecting  the  appropriate  mounting  location  for  the  enclosure  includes:

vibration, dust, moisture, electromagnetic interference, and radio frequency interference.  These are all types
of problems that could adversely effect the successful operation and useful life of the electronic components
and should be avoided if possible.

Mount the enclosure at a height that allows easy access to system electronic components for maintenance
and service.  Allow sufficient clearance around the enclosure for the outer door to swing freely.

Summary of Contents for 10-068

Page 1: ...sure Protection Pressure Activation Pressure Activation Installation Manual Installation Manual 10 10 068 068 Ch Cheetah eetah Xi Xi A Ad dd dr res ess sabl able Fi e Fir re Sup e Supp pr res ess si io on n Co Con nt tr ro ol l Sy Sys st tem em P N 06 356 P N 06 356 Rev 9 O Rev 9 Oct ctob ober 2016 er 2016 ...

Page 2: ......

Page 3: ...ANTY WARRANTY Fike provides a Fike provides a one year limited one year limited manufacturer s w manufacturer s warranty on arranty on this product this product All All warranty returns warranty returns must be returned must be returned from an authorized from an authorized Fike Distributor Fike Distributor Contact Contact Fike s Marketing department for further Fike s Marketing department for fur...

Page 4: ...8 Release Release of of 20 20 Zone Zone Remote Remote Annunciator Annunciator 4 4 1 1 2 2 3 3 6 6 8 8 03 2010 03 2010 Added Added IRM IRM Compatibility Compatibility 5 5 All All Sections Sections 04 2012 04 2012 Separated manual into separate Separated manual into separate Installation Operation and Programming Installation Operation and Programming Manuals updated compatible peripheral Manuals up...

Page 5: ...olarity Module Module RPM RPM 3 9 3 9 3 4 6 3 4 6 RS485 RS485 Network Network Module Module 3 9 3 9 3 4 7 3 4 7 Fiber Fiber Optic Optic Network Network Module Module 3 10 3 10 3 5 3 5 Periphe Peripheral ral Bus Bus Devices Devices 3 11 3 11 3 5 1 3 5 1 Fourteen Fourteen Button Button Remote Remote Display Display Unit Unit 3 11 3 11 3 5 2 3 5 2 Ten Ten Button Button Remote Remote Display Display U...

Page 6: ... 3 11 2 Hand Held Programmer 3 25 3 11 3 C Linx Software 3 25 3 11 4 Interface Cable 3 25 3 11 5 Interface Converter 3 25 3 11 6 Interface Cable USB to RS232 3 25 3 11 7 Interface Cable USB 3 25 3 12 Batteries and Battery Enclosures 3 26 3 12 1 Battery Assemblies 3 26 3 12 2 Batteries 3 26 3 12 3 Battery Enclosures 3 26 3 12 3 1 33 AH Battery Enclosure 3 26 3 12 3 2 75 AH Battery Enclosure 3 26 4 ...

Page 7: ...ring 4 14 4 16 4 Auxiliary Power Wiring 4 15 4 16 5 SLC Wiring 4 16 4 16 5 1 Class B 4 16 4 16 5 2 Class A 4 17 4 16 5 3 Class X 4 17 4 16 5 4 Remote LED Wiring 4 17 4 16 6 Notification Appliance Circuit Wiring 4 18 4 17 Initial Power Up with Field Wiring Connected 4 19 4 18 Configure System 4 19 4 19 Acceptance Test 4 19 Appendix A Battery Calculation Form A 1 Appendix B System Operation Posting ...

Page 8: ...9 3 16 CRPM 3 9 3 17 RS485 Network Module 3 9 3 18 Fiber Optic Network Module 3 10 3 19 Fourteen Button Remote Display Unit 3 11 3 20 Ten Button Remote Display Unit 3 11 3 21 Two Button Remote Display Unit 3 12 3 22 Ethernet Module 3 12 3 23 Multi Interface Module 3 12 3 24 Graphic Annunciator Intelligent 3 13 3 25 Twenty Zone Remote Annunciator 3 13 3 26 Relay Control Assembly 3 13 3 27 HPM4 Rela...

Page 9: ...ansformer Mounting Location 4 5 4 4 Transformer Mounting 4 5 4 5 Connect AC Power to Transformer 4 6 4 6 Connect AC Power to Primary and Secondary Transformer 4 6 4 7 Mounting Locations for Optional Modules 4 7 4 8 Controller Mounting Location in Standard Enclosure 4 8 4 9 Mounting the Controller 4 9 4 10 AC Power Connections 4 10 4 11 Battery Connections 4 11 4 12 Cheetah Xi Board Terminal Connec...

Page 10: ...Each distributor sells installs and services Fike equipment Look on the inside of the door left side there should be a sticker with an indication of the distributor who sold the system If you can not locate the distributor please call Fike Customer Service for locating your nearest distributor or go to our web site at www fike com If you are unable to contact your installing distributor or you sim...

Page 11: ...ured properly connected and responding properly The system remains in normal state until a trouble condition occurs Notification Appliance A fire alarm system component such as a bell horn speaker light or textual display that provides audible tactile or visible output or any combination thereof The device notifies building occupants of system status This manual interchanges the terms notification...

Page 12: ...6 367 Intelligent Graphic Annunciator Product Manual 06 231 Twenty Zone Remote Annunciator P N 10 2667 Product Manual 06 453 Relay Control Assembly P N 10 2777 Installation Instructions 06 580 HPM4 Relay Module P N 10 2770 Installation Instructions 06 443 Relay Card P N 10 2785 Installation Instructions 06 586 3 Card Remote Equipment Enclosure P N 10 2780 Installation Document 06 590 5 Card Remote...

Page 13: ...1 0 INTRODUCTION 1 4 Cheetah Xi Installation Manual UL S2203 Rev 9 10 2016 P N 06 356 FM Reserved for future use ...

Page 14: ...vices Each Cheetah Xi is capable of being networked up to 128 panels total providing 130 048 devices total EXTERNAL BATTERIES DACT LAPTOP PC 10 1874 CABLE UP TO 253 PROGRAMMABLE ZONES REMOTE DISPLAYS LED GRAPHIC ETHERNET MODULE MULTI INTERFACE PEER TO PEER NETWORK TO REMOTE FACP 128 NODES MAX 24V DC AUX POWER RESETTABLE 24V DC AUX POWER CONTINUOUS FIRE MM MMM SCM RM APS CONTROL NAC SOLENOID IDC SL...

Page 15: ... Two 24V DC 2A continuous auxiliary power outputs expandable to 5 circuits with SPS One 24V DC 2A resettable auxiliary power output Supports up to 75 AH of batteries expandable to 150 AH using SPS SIGNALING LINE CIRCUIT Address devices with Infrared IR tool similar to remote control device non listed Two addressable loops expandable to four 254 devices per loop maximum 1016 devices Loops can be wi...

Page 16: ...ng Systems NFPA 13 Sprinkler Systems NFPA 15 Water Spray Fixed Systems NFPA 16 Deluge Foam water and Foam water Spray Systems NFPA 70 National Electrical Code NEC NFPA 70 Article 300 Wiring Methods NFPA 70 Article 760 Fire Protective Signaling Systems NFPA 72 National Fire Alarm and Signaling Code NFPA 101 Life Safety Code NFPA 110 Emergency Standby Power Systems NFPA 750 Standard on Water Mist Fi...

Page 17: ...4 Relay Module O O O O O Y Y 10 2254 CRPM Reverse Polarity Module O O Y O O Y Y 10 2482 Network Module RS485 O O O O O Y Y 10 2624 Multi Mode Fiber Optic Network Module O O O O O Y Y 10 2792 Note 3 Class A Peripheral Bus Card O O O O O Y Y 10 2646 14 Button Remote Display O O O O O Y Y 10 2631 10 Button Remote Display O O O O O Y Y 10 2630 2 Button Remote Display O O O O O Y Y 68 023 VESDA Open Pr...

Page 18: ... O O Y Y 63 1061 EBI Detector Base 4 inch Isolator Version O O O O O Y Y 63 1064 EBS Sounder Base 6 inch O O O O O Y Y 63 1063 EBR Relay Base 6 inch O O O O O Y Y 55 045 Note 1 MMM Mini Monitor Module O O O O Y Y Y 55 050 Note 1 MMM Mini Monitor Module Isolator Version O O O O Y Y Y 55 041 Note 1 MM Monitor Module 4 inch O O O O Y Y Y 55 046 Note 1 MM Monitor Module 4 inch Isolator Version O O O O...

Page 19: ...2 0 SYSTEM OVERVIEW 2 6 Cheetah Xi Installation Manual UL S2203 Rev 9 10 2016 P N 06 356 FM Reserved for future use ...

Page 20: ...stem is the controller P N 10 2542 See Exhibit 3 3 The system controller consists of a printed circuit board PCB that incorporates a 6 amp primary power supply with battery charger system microprocessors hardware interface terminals and system display The controller is the central hub for communication between the systems intelligent addressable field devices that are connected to the panel s sign...

Page 21: ...ed in order of terminal block designation P on the following pages Exhibit 3 4 Cheetah Xi Controller Terminal Locations Controller Specifications Controller Dimensions H x W x D 8 in x 11 in x 3 in 20 3 cm x 27 9 cm x 7 6 cm Display Dimensions H x W 7 in x 6 25 in 17 8 cm x 15 9 cm Weight 1 2 lbs 0 54 kg Power Output 2 Amps Normal Standby 6 Amps Alarm with 10 2474 p SPS 4 Amps Normal Standby 12 Am...

Page 22: ...d Batteries larger than 18 AH must be mounted in external battery enclosure Use 14 AWG minimum wire max length of 10 ft 3m to connect batteries to controller P2 Alarm Relay 1 Terminals C NC NO SPDT Form C relay contact DC Operation 2 amps 30 VDC pf 35 AC Operation 0 5 amps 120 VAC pf 35 Default alarm operation configurable All connections shall be power limited or non power limited not both Superv...

Page 23: ...ed Connects to RS485 peripheral devices 31 peripheral devices maximum Typical circuit voltage will vary between 0 1 VDC It should never be a constant voltage or 0 VDC Peripheral devices must be configured as supervised if 2 way communication is required RS485 wiring Belden 9841 or equal Use Belden 82841 82842 or 89841 for plenum applications Maximum wire length of 4000 ft 1219m 9600 bps 5 VDC 1mA ...

Page 24: ...er be a constant 0 VDC FM Approved Deluge and Pre action Sprinkler operation requires initiating device circuits be Class A and wired to FM Listed Approved devices 12 000 ft 3657m maximum wire length from panel to last device using 14 AWG Shielded cable should be used for electrically noisy environments Maximum resistance 70Ω 35Ω per leg Maximum capacitance 0 60uF If using Class X wiring the first...

Page 25: ... Section 4 11 P17 For Fike use only P18 For Fike use only P19 Controller display interface keypad and LEDs P20 Provides connection point for an optional RS485 network module P N 10 2482 or Fiber Optic network module P N 10 2624 If P13 is occupied by a CRM4 or RPM module the P20 terminal is not available See Section 4 11 P21 No Connection P22 Controller display interface LCD only TP1 Cheetah Xi con...

Page 26: ... steel with baked on enamel finish Each enclosure is suitable for surface or flush mounting Numerous conduit knockouts are provided in the back box for easy access to the cabinet during system installation Press studs supplied in enclosure back box for easy installation of system components i e Cheetah Xi control board transformers DACT etc The removable exterior door mounts on the left side of th...

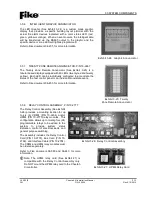
Page 27: ...Supervisory Monitor Alarm System Fault AC Failure and Low Battery These inputs can be used in place of the intelligent RS485 connection to provide simple alarm monitoring where the receiving station is not capable of receiving point ID information Refer to Fike document 06 479 for further more information 3 4 1 1 DACT KEYPAD PROGRAMMER P N 10 2477 BOSCH FMR DACT KEYPAD This DACT Programmer See Exh...

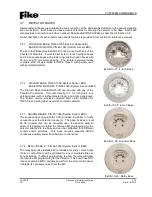
Page 28: ... up to two CRM4 modules if other options are not used at main controller P12 and P13 Each Relay may be wired across Normally Open or Normally Closed contacts Refer to Fike document 06 345 for more information 3 4 5 REVERSE POLARITY MODULE RPM P N 10 2254 The Reverse Polarity Module See Exhibit 3 16 provides two individual non supervised reverse polarity contacts intended for connection to a polari...

Page 29: ...n other network devices The network is designed to operate with 128 network nodes panels which operate in a peer to peer communication The communication protocol is designed using fiber communication with repeaters in each fiber optic network module It interfaces to P20 using four standoffs supplied with the Fiber Optic Network Module Refer to Fike document 06 387 for more information Exhibit 3 18...

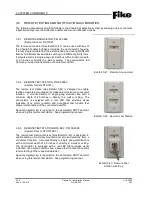
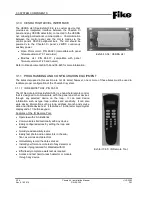
Page 30: ... Switch functions are protected by the unit s integral security access key In addition the RDU is equipped with an internal piezo and five status LEDs that provide instant audible and visual notification of system status changes Refer to Fike document 06 610 for more information Note This unit can only be used on systems with panel firmware V3 0 or higher 3 5 2 TEN BUTTON REMOTE DISPLAY UNIT P N 1...

Page 31: ...e the Cheetah Xi enclosure or it can be mounted remotely by ordering the custom mounting enclosure Refer to Fike document 06 388 for more information 3 5 5 MULTI INTERFACE MODULE P N 10 2583 MULTI INTERFACE MODULE W ENCLOSURE P N 10 069 The Multi Interface Module See Exhibit 3 23 provides an interface point that allows connection of the following ancillary devices to the host control panel 1 Cheet...

Page 32: ...the host control panel or an individual zone state event Refer to Fike document 06 453 for more information 3 5 8 RELAY CONTROL ASSEMBLY P N 10 2777 The Relay Control Assembly See Exhibit 3 26 provides a mounting location for up to six 6 CRM4 P N 10 2204 and or HPM4 P N 10 2770 relay modules This configuration allows up to twenty four 24 programmable relays to be added to the system to provide sys...

Page 33: ... Refer to Fike document 06 586 for more information 3 5 10 CLASS A PERIPHERAL BUS CARD P N 10 2792 The Class A Peripheral Bus Card See Exhibit 3 29 provides a means of wiring the panel s RS485 peripheral bus and 24 VDC power output to the connected peripheral devices in a Class A format The card can be mounted within the Cheetah Xi enclosure or ordered as part of an assembly that allows the card t...

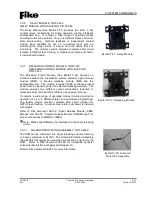
Page 34: ...or electronics are rated 32 120 F 0 49 C 10 93 relative humidity unless otherwise noted 3 6 1 PHOTOELECTRIC SMOKE DETECTOR P N 63 1052 PHOTOELECTRIC SMOKE DETECTOR WITH ISOLATOR P N 63 1058 The Photoelectric Smoke Detector See Exhibit 3 30 is an intelligent spot type smoke detector that utilizes the light obscuration principle to detect smoke The detector includes a tri color LED for instant indic...

Page 35: ...ance Note Photo element of detector can be programmed as Supervisory and Heat element for Alarm 3 6 4 HEAT DETECTOR P N 60 1039 HEAT DETECTOR WITH ISOLATOR P N 60 1040 The Heat Detector See Exhibit 3 33 is a spot type detector designed to be programmable for a set point range of 135 174 F 57 2 78 9 C for ordinary detection or 175 190 F 79 4 87 8 C for intermediate detection Detectors in the ordina...

Page 36: ... Night Sensitivity Note Photo Duct Detector can be programmed as a Supervisory input as required by some Local Authority Having Jurisdictions AHJ 3 6 5 1 DUCT DETECTOR HOUSING P N 63 1158 The Duct housing See Exhibit 3 35 is equipped with an integral base for mounting either the P N 63 1057 or P N 63 1062 duct detectors The housing provides a remote alarm output for use with auxiliary devices such...

Page 37: ... specific requirements FAAST provides multiple levels of alarm allowing for the implementation of strategic response plans and ample time to address a smoke event before it escalates into an actual fire and causes damage and downtime FAAST connects directly to the Cheetah Xi panel s signaling line circuit without the need for any additional hardware or software This allows the detector to intellig...

Page 38: ...e Exhibit 3 38 can be used with any of the Cheetah Xi detectors It mounts directly to 3 1 2 inch and 4 inch octagon boxes with or without plaster rings and single gang boxes The isolator version provides complete short circuit isolation for NFPA Class X wiring when used with an isolator detector 3 7 3 SOUNDER BASE P N 63 1064 System Sensor EBS The sounder base See Exhibit 3 39 provides the ability...

Page 39: ... duct smoke detectors from a convenient location It mounts directly to single gang electrical box with a minimum depth of 2 5 inches or directly to a wall or ceiling The annunciator is equipped with a red LED that provides visual indication of an alarm condition and a magnetic test function that allows remote testing of the connected detector Special programming is required on the associated DUCT ...

Page 40: ...ration and available programming features Refer to installation and maintenance instructions supplied with each module for more information Note Module electronics are rated 32 120 F 0 49 C 10 93 relative humidity unless otherwise noted 3 9 1 MINI MONITOR MODULE P N 55 045 MINI MONITOR MODULE WITH ISOLATOR P N 55 050 The Mini Monitor Module See Exhibit 3 44 can be used to monitor normally open or ...

Page 41: ...s when interfaced with the Cheetah Xi addressable loop The isolator version provides complete short circuit isolation for NFPA Class X wiring A module cover plate not shown is included with the module In addition to interfacing with notification appliances the SCM can also be used to operate either of the following interfaces 3 9 5 1 SOLENOID PROTECTION ASSEMBLY P N 10 2360 The SCM can be connecte...

Page 42: ...he addressable loop The module requires 24VDC continuous output power from the panel to power the selected releasing device s The module provides two different output connections solenoid or release module of which ONLY ONE can be used per module It contains a wide range of operating modes including multi zone operation of up to 4 different states and multi state programming The isolator version p...

Page 43: ... used to facilitate proper configuration of the Cheetah Xi system 3 11 1 IR REMOTE TOOL P N 55 051 The IR Remote tool See Exhibit 3 55 is a hand held remote control that is designed to communicate with the panel and other devices through any selected device on the loop It can read device information such as type loop address and sensitivity It can also write device information such as loop address...

Page 44: ... when connecting the C Linx Software to the Cheetah Xi using a computer with a DB9 serial com port 3 11 5 INTERFACE CONVERTER P N 02 11139 The 02 11139 interface converter See Exhibit 3 58 consists of a USB to DB9 converter only This converter is included in the 10 1874B interface cable shown below It should be used when connecting the C Linx Software to the Cheetah Xi using a computer with a USB ...

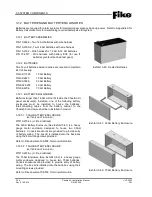
Page 45: ...panel enclosure s therefore one of the following battery enclosures must be installed to house the batteries Interconnecting cables from the battery cabinet to the Cheetah Xi enclosure shall be in installed in conduit 3 12 3 1 33AH BATTERY ENCLOSURE BATTERIES NOT INCLUDED P N 10 2154 c c Red or Black The 33AH Battery Enclosure See Exhibit 3 61 is a heavy gauge metal enclosure designed to house two...

Page 46: ...batteries Section 4 14 Apply power to the panel Section 4 15 Connect field wiring Section 4 16 Power up controller with field wiring connected Section 4 17 Configure the system Section 4 18 Conduct acceptance testing Section 4 19 4 2 SELECT THE ENCLOSURE MOUNTING LOCATION The mounting location for the Cheetah Xi system enclosure s is very important Fike recommends that all system enclosures be ins...

Page 47: ...nock out openings Conduit knock outs are provided for two distinct conduit sizes Removing just the inside hole creates a one half inch 1 2 opening Removing the entire opening provides a three quarter inch 3 4 opening Note Unless otherwise detailed in this manual or in other documents relating to this control panel the technician shall utilize published standards and references such as NFPA 70 Nati...

Page 48: ...hown in Exhibit 4 2 may be used to estimate the appropriate wire size Completely review the System Components section for planning the appropriate wiring for each circuit and device Size AWG Strands Diameter Uncoated Copper Coated Copper in mm ohm kFT ohm km ohm kFT ohm km 18 1 0 040 1 02 7 77 25 5 8 08 26 5 18 7 0 046 1 16 7 95 26 1 8 45 27 7 16 1 0 051 1 29 4 89 16 0 5 08 16 7 16 7 0 058 1 46 4 ...

Page 49: ...nterface P5 Fike Guard Interface P6 RS 485 Peripheral Buss P7 Auxiliary Power P8 P9 Signaling Line Circuits 1 2 P10 P11 Notification Appliance Circuits 1 2 P12 P13 CRM4 relay or Reverse Polarity modules Non power limited circuits include P1 AC Power Supply and Batter Input P21 Supplemental Power Supply AC Power Input Connected to power limited or non power limited field wiring but not both When in...

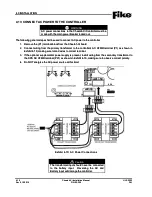
Page 50: ... power 120 VAC or 240 VAC 50 60 Hz must originate from a dedicated circuit at the main building power distribution center The circuit breaker shall be equipped with a lockout mechanism and be clearly labeled as a FIRE ALARM circuit Route the power to the system through the dedicated grounded metallic conduit Caution Ensure the power supplied is compatible with the transformer assembly 120VAC or 24...

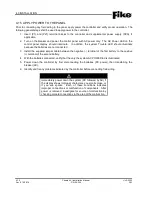
Page 51: ...oller 4 Install the AC ground wire G under the transformer onto the mounting stud identified with a grounding sticker This connection provides lightning and transient protection for the panel and must make a good mechanical connection to the enclosure Where multiple power transformers are installed in the same enclosure only one grounding termination shall be made 5 Tighten the hex nuts to secure ...

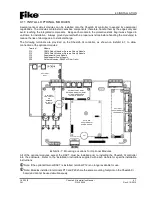
Page 52: ...e P13 CRM4 Relay Module or Reverse Polarity Module P15 Supplemental Loop Module P16 Supplemental Power Supply P20 Network Modules RS485 or Fiber Optic All of the optional modules except the DACT must be installed prior to installing the Cheetah Xi controller into the enclosure Refer to the installation instructions supplied with each module for specific installation instructions Note If the option...

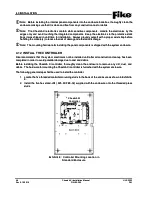
Page 53: ...e system enclosure 4 12 4 12 INSTALL TH INSTALL THE E CONTRO CONTROLL LLER ER Fike recommends that the system electronics not be installed until after all construction cleanup has been Fike recommends that the system electronics not be installed until after all construction cleanup has been completed in order to avoid potential damage due to dust and debris completed in order to avoid potential da...

Page 54: ... the four corners of the ners of the controller board controller board with the stand of with the stand offs and fs and secure in place using the four hex nuts supplied with the enclosure as shown in Exhibit 4 9 secure in place using the four hex nuts supplied with the enclosure as shown in Exhibit 4 9 Do NOT Do NOT install a hex nut install a hex nut on the center stand off on the center stand of...

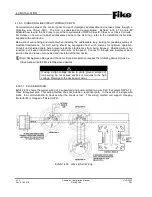
Page 55: ...t to the controller s AC X roller s AC XFMR terminal P FMR terminal P1 as shown 1 as shown in in Exhibit 4 10 making sure to land wires to Exhibit 4 10 making sure to land wires to correct terminal correct terminal 3 3 If the If the optional supplemental power optional supplemental power supply is present supply is present install wiring install wiring from the from the secondary transfo secondary...

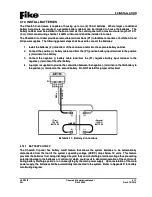
Page 56: ...ble lead from the P lead from the P1 negative battery 1 negative battery input terminal to the input terminal to the negative terminal of the other battery negative terminal of the other battery 4 4 A jumper is supplied t A jumper is supplied to provide the con o provide the connection between the nection between the negative term negative terminal on the first inal on the first battery to battery...

Page 57: ...he batteries are not connected 3 Install the supplied jumper cable between the negative terminal of the first battery to the positive terminal of the second battery 4 With the batteries connected verify that the only the system AC POWER led is illuminated 5 Power down the controller by first disconnecting the batteries DC power then transferring the breaker AC 6 Identify and fix any problems indic...

Page 58: ...NALING LINE CIRCUIT 1 P1 BATTERY CONNECTIONS P1 AC POWER CONNECTIONS KEYPAD LEDs CONNECTORS DISPLAY CONNECTORS P9 SIGNALING LINE CIRCUIT 2 P10 NOTIFICATION APPLIANCE CIRCUIT 1 P11 NOTIFICATION APPLIANCE CIRCUIT 2 P7 24VDC AUX POWER CIRCUIT CONTINUOUS P7 24VDC AUX POWER CIRCUIT CONTINUOUS P7 24VDC AUX POWER CIRCUIT RESETTABLE P16 SUPPLEMENTAL POWER SUPPLY OPTION CONNECTORS P20 NETWORK OPTION MODULE...

Page 59: ...ng the C Linx software Programming cable 10 1874A must be used for this connection P4 dedicated for connection to a VESDA network via a VESDA HLI interface A 20 ft 6 1m serial cable 02 15802 is provided with the HLI for connection to the controller The HLI is considered a permanent connection to the RS232 port P4 and shall be located within 20 ft 6 1m from the control panel P5 dedicated for connec...

Page 60: ...detectors some duct detectors beam detectors etc It is rated at 2 amps maximum and is supervised The remaining two sets of power outputs on P7 are power limited 24VDC non resettable power outputs This power output is used for addressable output modules graphic annunciators remote displays etc Each circuit is rated at 2 amps maximum and is supervised Shielded wire is not required but if used land o...

Page 61: ...hielded cable help prevent electrical interferences from being induced Shielded wire is not required but if used install the outgoing drain wire at the panel Connect it through and insulate at each junction box and leave unconnected and insulated at the last device Note FM Approved Deluge and Pre action Sprinkler operation requires that initiating device circuits be Class A and wired to FM Listed ...

Page 62: ...he signaling line circuit If protecting the entire loop an isolator device must be installed within 20 feet 6 1 m of the control panel on both the outgoing and return wiring In addition the wiring between the panel and the first and last isolator devices must be installed in conduit Isolator devices can also be used to electrically isolate a zone of detectors and or modules from the remainder of t...

Page 63: ...igured to initiate the Gentex Commander Series or System Sensor SpectrAlert Series sync protocol This allows all devices strobes and horns connected to the circuit to operate in unison It also allows configuration for the audible devices to be silenced while the visual signals remain operational or silence both audible and visual devices This is accomplished without requiring purchase and installa...

Page 64: ...guration requirements Refer to Fike Document 06 651 Cheetah Xi Programming Manual for specific details on how to configure the system 4 19 ACCEPTANCE TEST Once the system has been wired configured and any faults corrected all installed components should be tested as a system to insure proper operation and to verify compliance with applicable NFPA standards Testing should be conducted by a factory ...

Page 65: ...4 0 INSTALLATION 4 20 Cheetah Xi Installation Manual UL S2203 Rev 9 10 2016 P N 06 356 FM Reserved for future use ...

Page 66: ...dby Current per Unit Amps Qty Total System Standby Current per Unit Amps Alarm Current per Unit Amps Qty Total System Alarm Current per Unit Amps 1 10 2542 System Controller CSC 0 275 x 1 0 275 0 275 x 1 0 275 2 10 2204 CRM4 Note 7 0 011 x 0 040 x 3 10 2254 Reverse Polarity Module NA x NA NA 0 060 x 4 10 2482 RS485 Network Module 0 050 x 0 050 x 5 10 2624 FO Network Module 0 050 x 0 050 x 6 10 247...

Page 67: ... the following systems Standard System 24 hours Voice Evacuation 24 hours Pre Action Deluge Release 90 hours 4 NFPA 72 requires that at the end of the 24 hour standby period the secondary power supply shall have sufficient capacity to operate all alarm notification appliances used for evacuation or to direct aid to the location of an emergency for 5 minutes 0 083 hr standard 15 minutes for emergen...

Page 68: ... 0 109 x 19 10 2204 CRM4 Relay Note 5 0 011 x 0 040 x 20 10 2770 HPM4 Relay Note 5 NA x NA NA 0 086 x 21 10 2785 Relay Card Note 5 0 032 x 0 256 x 22 10 2792 Class A Peripheral Card 0 057 x 0 057 x 23 10 2814 LOC Digital Paging 0 103 x 0 140 x 24 10 2616 Keltron Printer 0 200 x 1 200 x 25 10 2277 VESDA OP HLI 0 245 x 0 245 x 26 10 2946 VESDA MB HLI 0 101 x 0 101 x Total Aux Power Standby Current A...

Page 69: ...7 x 18 x 19 x 20 x 21 x 22 x 23 x 25 x 26 x 27 x 28 x 29 x 30 x 31 x 32 x 33 x 34 x 35 x 36 x 37 x 38 x Total NAC Power Standby Current Amps Total NAC Alarm mA 1000 A Total Insert totals in Section 1 Line Item 9 Section 4 Notes 1 Include current draw of all notification appliances connected to the Cheetah Xi s two on board notification appliance circuits NAC 1 2 and to SCMs that are receiving 24vd...

Page 70: ...e Cheetah Xi system The completed System Operation Posting shall either be mounted on the cabinet front or framed and located adjacent to the control unit It can be downloaded from Fike s Customer Portal web page document P N 06 653 For a detailed description of the operation of the Cheetah Xi system refer to Fike document 06 356 2 Cheetah Xi Operation and Maintenance Manual for more details ...

Page 71: ...APPENDIX B B 2 Cheetah Xi Installation Manual UL S2203 Rev 9 10 2016 P N 06 356 FM Reserved for future use ...

Page 72: ...ration Trouble Condition Activation of a trouble signal under normal operation indicates a problem with the system not an alarm that requires immediate attention Contact your local service representative In most trouble conditions the fire suppression system continues to provide protection to the building and its occupants however trouble conditions should not be allowed to remain and should be in...

Page 73: ... also indicate a Trouble and Supervisory event when a zone is disabled Turns off when the panel is reset or the zone is enabled Abort Yellow LED that flashes when the panel enters the Abort state Illuminates steady after you acknowledge or silence the event Turns off if the abort condition clears and no other abort events are present Ground Fault Yellow LED that illuminates steady when a ground fa...

Page 74: ...enclosure for external mounting 10 2474 p Supplemental Power Supply SPS p 1 120V 2 240V 10 2473 Supplemental Loop Module SLM adds 2 loops 254 devices each 10 2204 1 Relay Module CRM4 10 2254 Reverse Polarity Module RPM 10 2482 RS485 Network Module 10 2624 Fiber Optic Network Module PERIPHERAL BUS DEVICES 10 2646 14 Button Expanded Protocol Remote Display Unit 10 2631 10 Button Expanded Protocol Re...

Page 75: ... 1040 Heat Detector 135 190 F 57 88 C Fixed Temp Rate of Rise with Isolator 63 1060 EBFI Detector Base 6 inch with Isolator System Sensor 63 1061 EBI Detector Base 4 inch with Isolator System Sensor 63 1057 Photo DUCT detector 63 1062 Photo DUCT detector with Isolator 63 1158 DUCT Detector Housing must be used with 63 1057 or 63 1062 68 140 FAAST XM Aspirating Smoke Detector 68 302 FAAST XT Aspira...

Page 76: ...evices non listed 10 2648 Hand Held Programmer non listed 06 327 C Linx Software non listed 10 1874A Interface Cable for C Linx Software DB9 to RJ11 10 1874B USB to DB9 Converter 02 11139 with 10 1874A interface cable Provides ability to use USB serial port on laptop USB DB9 RJ11 02 11139 USB to DB9 Converter 02 11139 without 10 1874A interface cable 10 2629 USB A B Cable for configuration of Chee...

Page 77: ...81 Transformer 120VAC 02 10882 Transformer 240 VAC 02 4040 Battery Lithium Coin Cell 3V 10 2625 Monitor Control Module EOL Assembly 39K 10 2530 14KΩ Series Resistor for Monitor Module Short Circuit detection 10 2570 End of Line Resistor 1 2 K for NAC 1 2 02 4174 Fuse 15 Amp Mini Auto Fast Acting For F1 F2 Little fuse p n 297015 02 11412 Fuse 4 Amp Mini Auto Fast Acting For F3 5 Little fuse p n 297...

Page 78: ...tall ation Manual D 1 FM P N 06 356 Rev 9 10 2016 D 1 BATTERY CUTOFF Exhibit D 1 below shows the components used to facilitate the battery cutoff arrangement for Fike s Cheetah Xi control panel Exhibit D 1 Battery Cutoff Wiring Diagram ...

Page 79: ...APPENDIX D D 2 Cheetah Xi Installation Manual UL S2203 Rev 9 10 2016 P N 06 356 FM Reserved for future use ...

Page 80: ......

Reviews: