STARTING WORK (PRO VERSION)
The machine can be used in the following work modes:
• ECO MODE, see “
• MANUAL MODE, see “
”;
PROGRAM ZONE MODE (PRO VERSION)
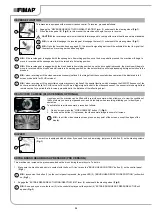
As an example, we will look at the program mode. To begin working in this mode, proceed as follows:
1. Make all the checks listed in “
”.
2. Sit on the driver’s seat.
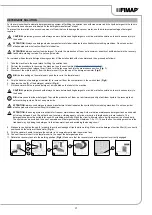
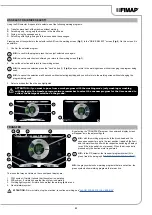
3. Insert the key (1) into the main switch on the control panel. Set the main switch to "I" (
Fig.1
).
4. Select the desired work zone and press one of the three “ZONE” buttons (2) on the control panel (see “
”) (
Fig.2
).
5. Open the detergent solution passage in the machine water system, move the knob (3) upwards (
Fig.3
).
6. Press the drive pedal (4) to begin moving the machine (
Fig.4
).
7.
The squeegee and brush head lower until they touch the floor, as soon as the drive pedal is pressed, the traction motor, brush head motor
and suction motor will start working. As a result, the solenoid valve will also be activated and detergent solution will be dispensed onto the
brushes. During the first few metres, check that there is sufficient solution and that the squeegee is drying correctly.
8.
The machine will now begin to work with full efficiency until the battery is flat or until the detergent solution has finished.
2
2
1
1
4
3
3
4
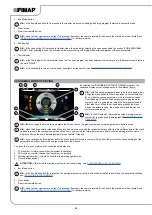
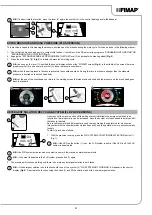
13. Make sure the vacuum tube (7) is correctly connected to the sleeve in the squeegee body. If this is not the case, connect it (
Fig.9
).
14. Remove the recovery tank cover (8) (
Fig.10
).
15.
Remove the floating guard (9) by turning it clockwise (
Fig.11
). Make sure the filter-float (10) is correctly connected and is clean, if not, clean
CLEANING THE RECOVERY TANK FILTERS
”).
16.
Make sure the filter-strainer (11) is correctly connected and is clean (
Fig.12
). If it isn't, clean it (see “
9
7
12
11
11
9
10
7
5
10
8
6
8
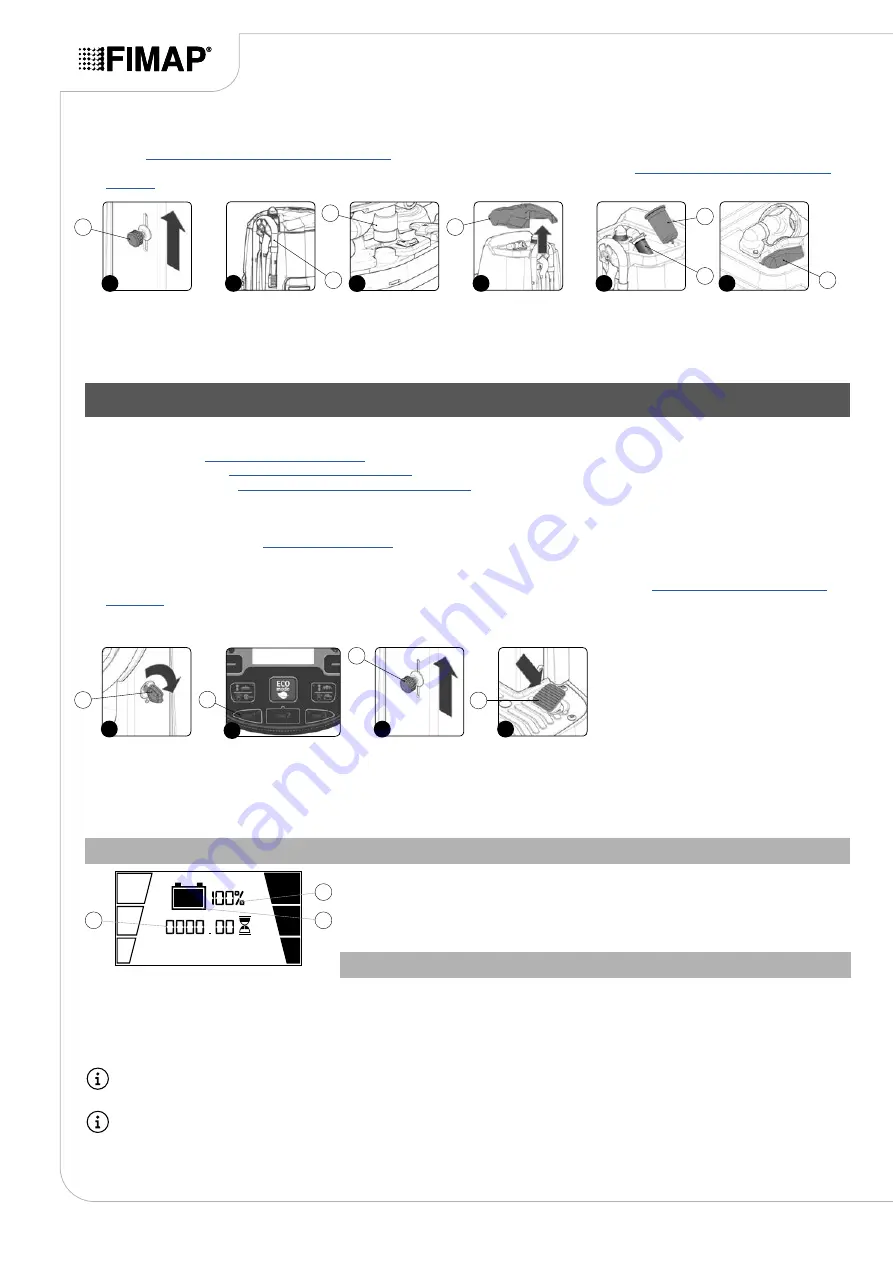
HOUR METER
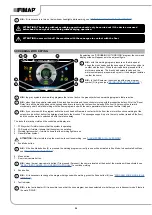
The machine control panel contains the control display, which shows the total usage time via a
series of numbers (1). The numbers before the letter “h” identify the hours, while the numbers
before the letter “m” identify the tenths of an hour (a tenth of an hour corresponds to six
minutes). The flashing “:” symbol indicates that the hour meter is counting the machine
functioning time.
BATTERY CHARGE LEVEL INDICATOR
The command display is in the control panel, at the centre you can see the battery charge level.
The indicator is composed of two charge level symbols, the first represented by a graphic symbol (2), the second by a number that indicated the
charge percentage (3). The indicator is composed of 5 charge levels, each of which represents about 20% of residual charge. With a residual
charge of 20% the graphic symbol starts to flash and after a few second it will appear in larger dimensions in the middle of the screen, under
these conditions take the machine to the usual place to charge the batteries
N.B.:
a few seconds after the battery charge level reaches 20%, the brush motor switches off automatically. With the remaining charge it
is still possible, however, to complete the drying process before recharging
N.B.:
a few seconds after the battery charge level reaches 10%, the suction motor switches off automatically. With the remaining charge,
it is still possible, however, to move the machine to the location designated for its recharging.
3
2
1
20


