24
CHECKING AND CLEANING THE RECOVERY TANK
Proceed as follows to empty the recovery tank:
1. Take the appliance to the dedicated waste water drainage area.
ATTENTION:
The place this operation is carried out should
comply with current environmental protection regulations.
2. Take all necessary steps to ensure that the device is in a safe
condition (see “
MACHINE SAFETY
’”).
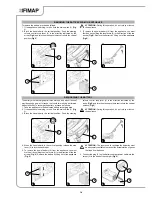
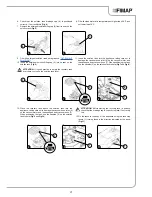
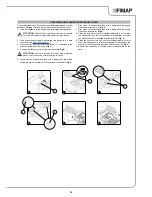
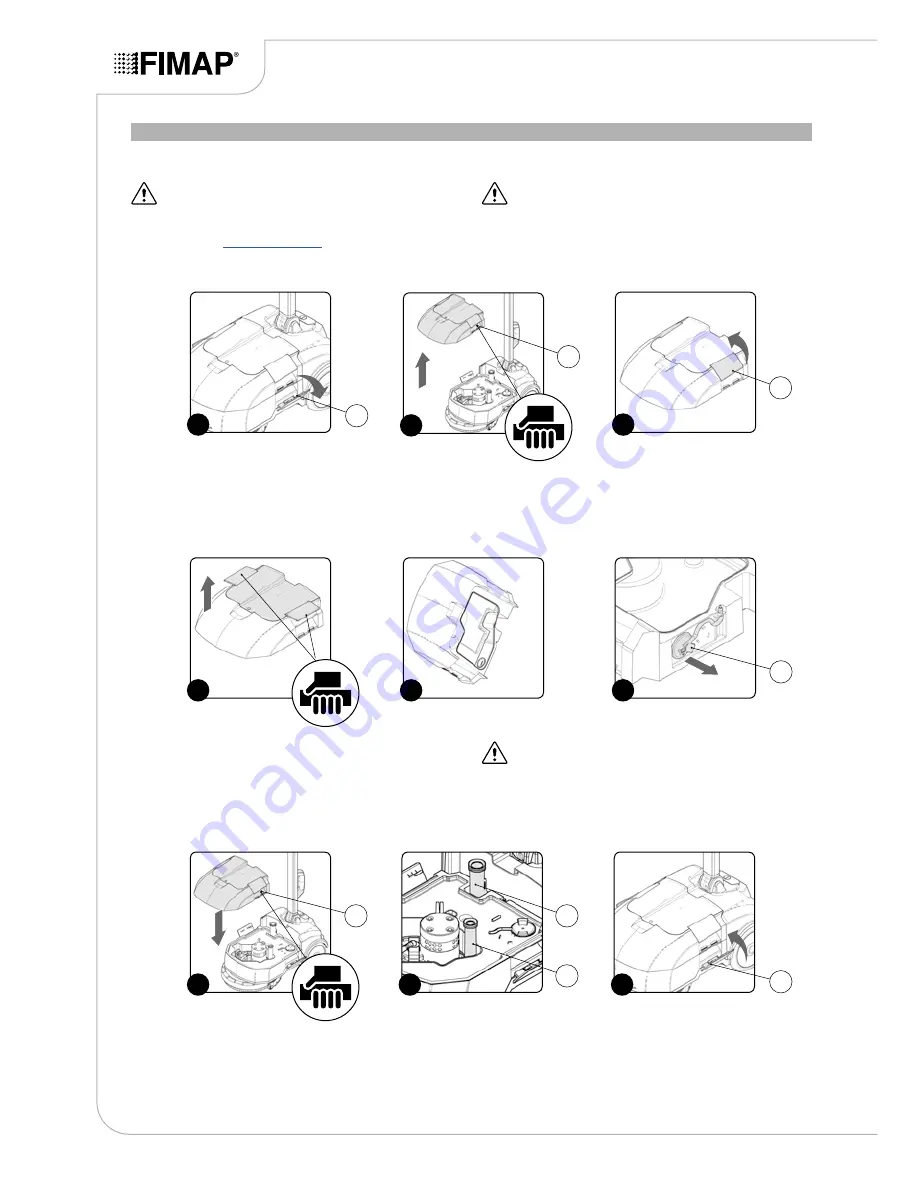
3. Disconnect the tank stop levers (1), and rotate in the direction
indicated by the arrow (
Fig.1
).
4. Remove the recovery tank using the handles (2) present on the
tank (
Fig.2
). Gently place on the floor.
ATTENTION:
Users are advised to always wear protective
gloves, to avoid the risk of serious injury to hands.
5. Disconnect the vacuum cover stop levers (3), and rotate in the
direction indicated by the arrow (
Fig.3
).
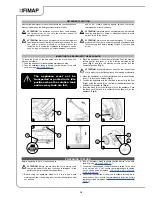
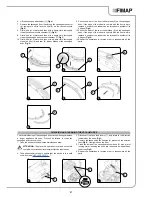
9. Rinse the inside with a jet of water, if necessary use a spatula
to remove the sludge that has accumulated at the bottom of the
tank.
6. Remove the vacuum cover using the stop levers. Gently lay on
the ground (
Fig.4
).
7. Emptying the tank (
Fig.5
).
8. Remove the drainage cap (4) from the hole on the rear of the tank
(
Fig.6
) and empty the tank completely.
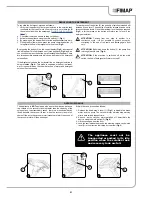
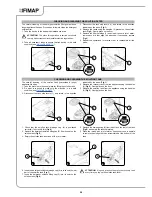
10. Replace the drainage cap on the rear of the tank (4).
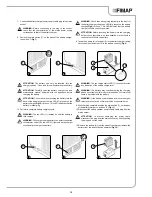
11. Place the recovery tank above the solution tank into the
appliance, taking care not to damage the vacuum hose inlet (5)
on the vacuum motor, and the squeegee body vacuum hose (6).
When positioning the tank, use the handles (2) on the solution
tank to help (
Fig.7
and
Fig.8
).
ATTENTION:
Before placing the recovery tank in position,
check that the drainage cap (4) is correctly in place; if not,
rectify this.
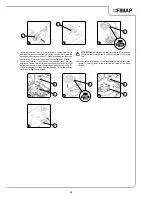
12. Fix the tanks to the body of the appliance using the tank stop
levers (1), turning these in the direction indicated by the arrow
(
Fig.9
).
3
1
3
1
2
2
4
5
6
4
7
8
2
5
6
9
1

