background image

ADJUSTMENT 

AND 

INSPECTION 

MAGNA 65-70-75-83 

Doc. 10004978 

Issued 27/03/2008 

Rev. 00 

P a g .  

8  d i  19 


Chopper card setting  

1.


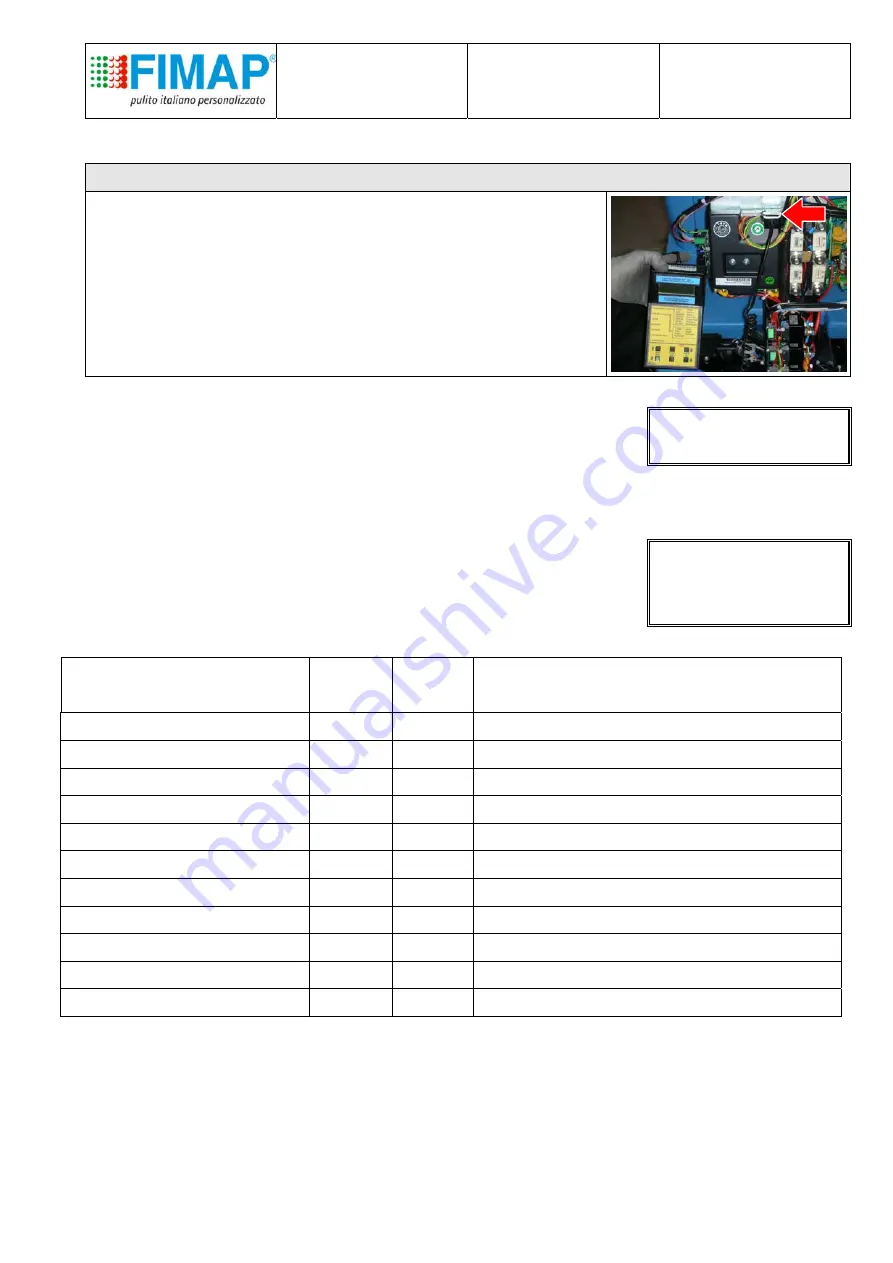
Switch OFF the general key and plug in the special 

connector

. The OFF condition is necessary to save the 

memory card from loss of data).  

2.


Switch ON the general key  


3.


The model of the card (name, volts and  amps) and the chopper 

working hours appear on the display  

MX         v.2.1  

HOURS     .0


4.


press ENTER to get the main menu 

5.


you read the first option of the main menu: PROGRAM= CHANGE  

PARAMETERS 


6.


press ENTER again to enter in this first branch of the main menu 

where you can check and eventually modify the parameters of the 

card. To move through the parameters use the button ROLL and 

check if you have the situation below  mentioned: 

* SELECT  MENU * 

1-          PROGRAM


CHOPPER MX   

BASIC 

PROFY/ 
KLINIK 


1.


ACCELERATION DELAY 

6 6 

ACCELERAZIONE  SECONDI 

2.


CUTBACK SPEED 1 

9 0 

I  RIDUZIONE DI VELOCITA'            % VOLT 

3.


CUTBACK SPEED 2 

6 6 

II RIDUZIONE DI VELOCITA'            % VOLT 

4.


COMPENSATION 

9 4 

COMPENSAZIONE DI POTENZA         % AMP 

5.


TRACTION IMAX 

9 9 

CORRENTE MASSIMA                       % AMP 

6.


BRAKING 

5 5 

FRENATURA IN RALLENTAMENTO      % AMP 

7.


RELEASE BRAKING 

2 2 

FRENATURA A RILASCIO                  % AMP 

8.


INVERSION BRAKING 

1 1 

FRENATURA INVERSIONE MARCIA    % AMP 

9.


MAX SPEED FORW 

9 9 

MASSIMA VELOCITA' AVANTI           % VOLT 

10.


MAX SPEED BACK 

8 8 

MASSIMA VELOCITA' INDIETRO       % VOLT 

11.


CREEP SPEED 

1 1 

VELOCITA' MINIMA  DI PARTENZA    % VOLT 


Summary of Contents for MAGNA 65

Page 1: ...one of the most common electronic devices such as mobile phones The sequence to follow always for the console connection is 1 SWITCH OFF THE GENERAL KEY of the machine 2 take off the connector E from...

Page 2: ...the electric characteristics traction motor voltage state of power switch closed open are showed in this menu SAVE this permits once the parameters have been changed to enter the new setting in a sto...

Page 3: ...PROGRAM VACC enter out Program for setting pedal accelerator MOTOR data enter out R O L L R O L L enter out enter SAVE enter out LIST OF free locations Write on on a FREE location enter enter RESTORE...

Page 4: ...the chopper card carried out both on rest as in drive verifies an anomaly Possible causes the logic of the chopper card is damaged Actions replace the chopper card 1 EEPROM DATA KO The data of the ho...

Page 5: ...he first check recognises a voltage VMN lower than the 25 of the battery voltage Possible causes wrong connections on the motor motor current leakage to the ground Actions check that the motor termina...

Page 6: ...out correctly Actions check the correct sequence to get traverse check the continuity of connections between the potentiometer accelerator and chopper card re program the chopper card with PROGRAM VA...

Page 7: ...ses the driver is defected Actions replace the chopper card 32 permanent blink BATTERY LOW Battery level too low the chopper card cuts the power to the traction motor for its safeguard Actions check t...

Page 8: ...where you can check and eventually modify the parameters of the card To move through the parameters use the button ROLL and check if you have the situation below mentioned SELECT MENU 1 PROGRAM CHOPPE...

Page 9: ...ers please find out the menu RESTORE PARAM by using the ROLL button SELECT MENU 4 RESTORE 1 Press ENTER 2 SELECT the program Mod 03 or the memory where the list has been stored with the SAVE program U...

Page 10: ...shed VACC SETTING 4 8 4 8 12 Press ENTER again to be ready to teach to the chopper card the new stroke 13 Now you can start your operations 0 0 0 0 14 Select the forward drive direction and press down...

Page 11: ...he functioning of the seat microswitch the direction micriswitch on the pedal assembly and of the direction selector switch WARNING Be sure that the traction wheel is lifted up before performing this...

Page 12: ...conditions and the connector that supply the chopper card Verify the motor voltage The value you can read is the voltage on the motor at the reading moment If the machine is steady the motor voltage...

Page 13: ...heck switch with signal lamp and solenoid valve running with the machine check switch with signal lamp and suction motor check the efficiency of the floating tap on the recovery tank with the suction...

Page 14: ...th 5 Fill the recovery tank and check the sealing 6 Check that the hose and the exhaust plug do not have any leakages 7 On the solution pump inlet the flow passes through an adjustable narrow neck to...

Page 15: ...two bolts the distance in the upper most has to be about 187mm 7 36 inches 2 On the left side the length of the two rods has to be the lowest should be about 198mm 7 67 inches between the centre of t...

Page 16: ...activated only if the brushes are not assembled and the basement is lowered to much in order to avoid that the actuator is blocked Adjust the micro in the way that the shaft does not come out more th...

Page 17: ...imit stop microswitch will be automatically switched on at the right position when the squeegee will be lowered 3 When the cam switches on the microswitch the distance between the metal lever and the...

Page 18: ...heel has to turn freely brake uniformly and the pedal must be locked in the parking brake condition Just in case of a not balanced brake effect or no operating parking brake condition please set prope...

Page 19: ...t the machine functions Fill the tank with water and check if there are any leakages Check the tightness of the water system and that the water outflow on both brushes is regularly Adjust the inclinat...

Reviews: