PREPARATION OF THE MACHINE
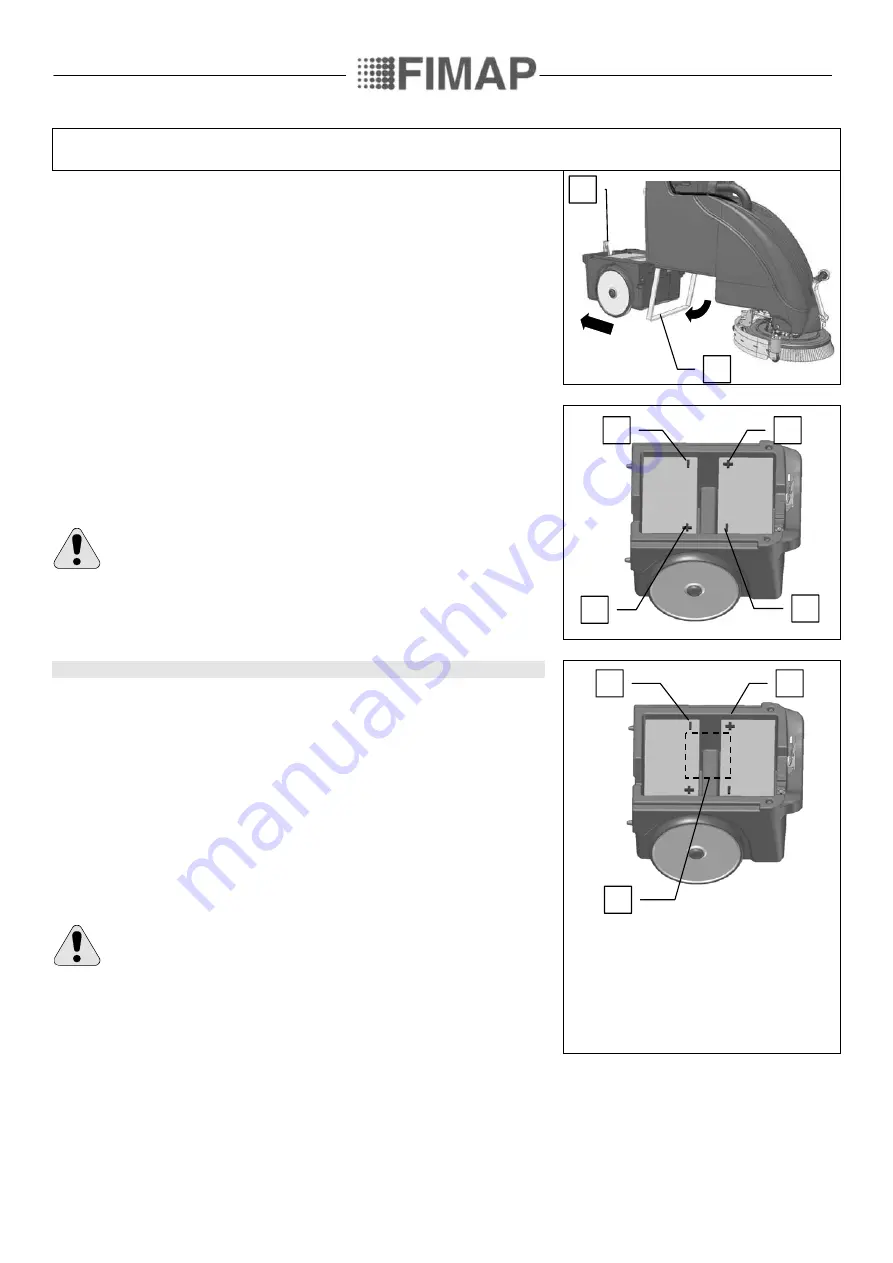
Figure 7
For battery installation proceed as follows:
1.
Release the hook on the back and extract the battery tray (1)
2.
A support (2) comes down automatically as the battery tray is pulled out
Figure 8
3.
Accommodate the batteries.
4.
Connect the connectors of the cable with connector in pos.01 (fig.8)
5.
Connect the connectors of the jumper cable in pos.02 (fig.08)
6.
Insert the battery tray back in place and fasten it with the previously released hook
(fig.7)
ATTENTION: This procedure must be carried out by skilled personnel.
Inappropriate or wrong connection of battery cables may cause serious damage to
persons and goods.
CONNECTING THE BATTERY CHARGER
Figure 9
If the model you have purchased is provided with battery charger, no other connection is
needed, otherwise proceed as follows:
Place the battery charger inside the compartment on the fastening brackets (optional)
between the batteries (1).
Connect the eye terminal of the red cable, coming out of the battery charger, on the “+”
terminal screw of the cable with connector (2).
Connect the eye terminal of the black cable, coming out of the battery charger, on the “-”
terminal screw of the cable with connector (3).
2
1
2
2
1
1
There’s no need to connect the remaining yellow cable (if necessary, fasten it with a
plastic band to prevent any accidental contact with other electrical components).
Pull out the supply cable and the cable with connector from the back.
Push the battery tray back in place underneath the tank and fasten it with the related hook
(fig.7)
ATTENTION: This procedure must be carried out by skilled personnel.
Inappropriate or wrong connection of battery cables may cause serious damage to
persons and goods.
1
2
3
8


