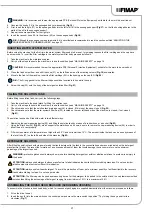
2. Carry out the steps to ensure the machine is in a safe condition (read “MACHINE SAFETY” on page 14.
ATTENTION:
Park the appliance in an enclosed place, on a flat surface; near the appliance there must be no objects that could either
damage it, or be damaged through contact with it.
ATTENTION:
the room used to recharge the batteries must be adequately ventilated to prevent the accumulation of gases that leak from
batteries.
3. Grip the handle (5) and raise the recovery tank to the maintenance position (
Fig.5
).
To recharge the batteries without the built-in battery charger, proceed as follows:
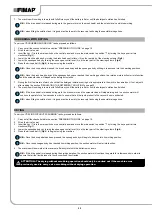
• Disconnect the electrical system connector (13) from the battery connector (12) (
Fig.13
).
ATTENTION:
the following operations must be carried out by qualified personnel. An incorrect connection of the connector may cause a
malfunction of the device.
• Connect the external battery charger cable to the battery connector.
N.B.:
the coupling connector of the battery charger is consigned inside the bag containing this instruction booklet, and must be assembled
on the cables of the battery charger as indicated in the instructions.
ATTENTION:
before connecting the batteries to the battery charger, make sure it is suitable for the batteries used.
N.B.:
carefully read the use and maintenance instructions of the battery charger that is used for charging.
WARNING:
keep the recovery tank open for the duration of the battery recharging cycle to allow gas fumes to escape.
• Once the recharge cycle has been completed, disconnect the battery charger's cable from the battery connector.
• Connect the electrical system connector (13) to the battery connector (12) (
Fig.13
).
• Grip the handle (5) and turn the recovery tank to its working position.
To recharge the batteries with the on-board battery charger proceed as follows:
ATTENTION:
the following operations must be carried out by qualified personnel. An incorrect connection of the connector may cause a
malfunction of the device.
N.B.:
carefully read the use and maintenance instructions of the battery charger that is used for charging.
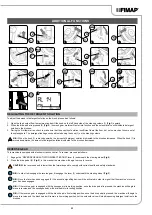
• Remove the cap (14) from the battery charger socket (
Fig.14
).
• Connect the connector of the battery charger power cable to the socket (15) in the charger itself (
Fig.15
).
• Plug the battery charger cable into the mains socket.
WARNING:
before connecting the batteries to the battery charger, make sure it is suitable for the batteries used.
WARNING:
Before inserting the battery charger power cable into the socket (15), check that there is no condensate or other forms of
liquids.
N.B.:
the battery charger power cable is delivered inside the bag containing this instruction booklet.
WARNING:
keep the recovery tank open for the duration of the battery recharging cycle to allow gas fumes to escape.
• When the recharge cycle is complete, disconnect the battery charger cable from the mains.
• Disconnect the battery charger's power cable from the socket on the battery charger itself.
• Apply the cap (14) to the battery charges socket (
Fig.14
).
• Grip the handle (3) and turn the recovery tank to its working position.
ASSEMBLING THE SQUEEGEE BODY
For packaging reasons, the squeegee body comes disassembled from the machine. In order to mount it on the squeegee support, do the
following:
1. Sit on the driver’s seat.
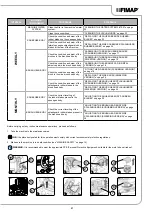
2. Insert the key (2) into the main switch on the control panel. Bring the main switch to the "I" position, making a quarter turn clockwise with the
key (2) (
Fig.7
).
3. Turn the squeegee control lever (7) anti-clockwise (
Fig.9
) to raise the squeegee body off the floor.
4. Once the squeegee body has arrived in its resting position, perform the procedure for securing the machine (see the section entitled
16


