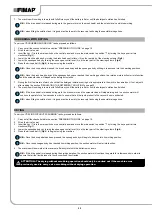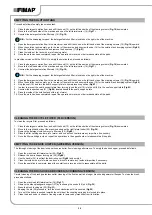
HOUR METER
The command display is located on the control panel (
Fig. 4
), and the second screen that appears after the start-up screen displays the
machine's total usage time (6).
N.B.:
The digits that precede the "." symbol identify hours, whilst the digit that follows it indicates hour decimals (an hour decimal
corresponds to six minutes).
N.B.:
When the “hour glass” symbol (7) is flashing, it indicates that the hour meter is counting the appliance operating time (
Fig.4
).
N.B.:
In the first screen the nominal battery voltage programmed into the control board is displayed on the left of the screen, and on the
right, the minimum inhibit temperature appears (
Fig.3
).
N.B.:
The second screen displays the hours of work completed by the machine (
Fig.4
).
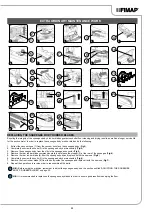
5. Turn the brush head control lever (3) clockwise (
Fig.5
); in this manner, the brush head body will be positioned in contact with the floor.
6. Turn the squeegee control lever (4) anti-clockwise (
Fig.6
); in this manner, the squeegee body will be positioned in contact with the floor.
7. Press the drive pedal (5) to begin moving the machine (
Fig.7
).
N.B.:
As soon as the drive pedal is pressed, the traction motor, brush head motor and suction motor will start working. As a result, the
solenoid valve will also be activated and detergent solution will be dispensed onto the brushes. During the first few metres, check that
there is sufficient solution and that the squeegee is drying correctly.
N.B.:
The machine will now begin to work with full efficiency until the battery is flat or until the detergent solution has finished.
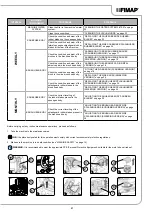
BATTERY CHARGE LEVEL INDICATOR
The command display is located on the control panel (
Fig. 4
), and the second screen that appears after the start-up screen displays the
percentage of charge of the batteries (8).
N.B.:
When the minimum remaining charge is reached, the graphic symbol (8) will start to blink, and will turn off after a few seconds, after
which the symbol (9) will start to blink. Under these conditions, the machine must be brought to the battery charging area.
N.B.:
A few seconds after the battery charge reaches the critical level, the brush motors switch off automatically. With the remaining
charge it is possible to complete the drying process before starting the recharge.
N.B.:
A few seconds after the battery charge reaches the discharge level, the suction motor switches off automatically.
WORKING PROGRAMS
SCRUBBING WITHOUT DRYING
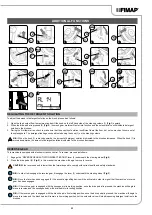
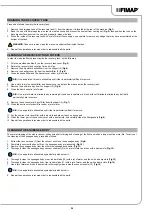
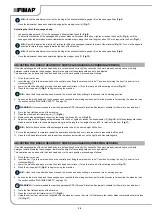
To carry out “SCRUBBING WITHOUT DRYING” tasks, proceed as follows:
1. Carry out all the checks listed in the section “PREPARING TO WORK” on page 19.
2. Sit on the driver’s seat.
3. Insert the key (1) into the main switch on the control panel and move the main switch to position "I" by turning the key a quarter turn
clockwise (
Fig.1
).
4. Lower the brush head body by turning the brush head control lever (2) on the rear part of the steering column (
Fig.2
).
5. Press the drive pedal (3) (
Fig.3
) to begin moving the machine.
N.B.:
Once the drive pedal has been pressed, the brush head body will begin to descend into its working position.
N.B.:
Once the brush head body has reached its working position, the corresponding gear motors will begin to function and the solenoid
valve will begin to dispense the detergent solution.
6.
During the first few meters of work, check that the detergent solution coming out is appropriate to the work to be carried out; if not, adjust it
after reading the section “REGULATING THE DETERGENT SOLUTION” on page 23.
21
1
2
4
3
1
4
3
2


