N.B.:
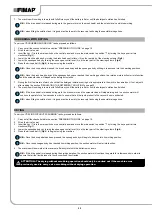
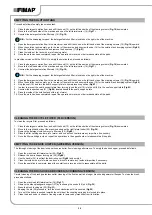
Check the adjustment is correct by looking at the horizontal bubble gauge (6) on the squeegee body (
Fig.6
).
• Once the adjustment has been completed, engage the stopper lever (4) (
Fig.7
).
Adjusting the tilt of the squeegee body:
• Loosen the stopper knob (7) for the squeegee's tilt adjustment knob (8) (
Fig.8
).
•
To adjust the inclination of the squeegee body rubber blades with respect to the floor, tighten or loosen the knob (8) (
Fig.9
), until the
squeegee body rubber blades are bent towards the outside evenly along the entire length by about 30° with respect to the floor (
Fig.11
).
N.B.:
Figure 9 indicates the direction of rotation for tilting the squeegee towards the rear of the machine (
Fig.10
). Turn it in the opposite
direction to rotate the squeegee towards the front of the machine.
N.B.:
Check the adjustment is correct by looking at the horizontal bubble gauge (9) on the squeegee body (
Fig.6
).
• Once the adjustment has been completed, tighten the stopper knob (7) (
Fig.12
).
ADJUSTING THE BRUSH HEAD BODY SIDE SPLASHGUARDS (SCRUBBING VERSION)
If the side splashguards of the brush head body are not positioned correctly they cannot do their work properly, namely convey the dirty
detergent solution towards the squeegee, therefore the height of the splashguard needs to be adjusted.
This operation can be done with the brush head body in the work position, proceeding as follows:
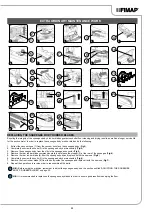
1. Sit on the driver’s seat.
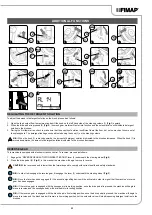
2. Insert the key (1) into the main switch on the control panel. Bring the main switch to its "I" position by turning the key (1) a quarter turn
clockwise (
Fig.1
).
3. Lower the brush head body by turning the brush head control lever (10) on the rear part of the steering column (
Fig.13
).
4. Press the drive pedal (3) (
Fig.3
) to begin moving the machine.
N.B.:
Once the drive pedal has been pressed, the brush head body will begin to descend into its working position.
5. As soon as the brush head and the squeegee have reached their working positions, perform the procedure for securing the machine (see
the section entitled “MACHINE SAFETY” on page 14).
WARNING:
It is recommended to wear the appropriate PPE (Personal Protective Equipment), suitable for the work to be carried out.
6. Go to the front left-hand side of the machine.
7. Open the machine's left lateral carter (11) (
Fig.14
).
8. Remove the side splashguard support by loosening the knobs (12) on it (
Fig.15
).
9.
Adjust the height of the splashguard with respect to the floor; tighten or loosen the handwheels (13) (
Fig.16
), until the splashguard rubber
blade is bent outwards, to the same degree along its entire length, at an angle of around 30° in relation to the floor (
Fig.11
).
N.B.:
Both the front and rear of the splashguard need to be at the same height off the floor.
10. Once the adjustment is complete, repeat the operations described above in reverse order to reassemble all the parts.
11. Close the left-hand lateral carter and repeat the operations just carried out on the right-hand side splashguard.
ADJUSTING THE BRUSH HEAD BODY SIDE SPLASHGUARDS (SWEEPING VERSION)
If the side splashguards of the brush head body are not positioned correctly they cannot do their work properly, namely convey the dirty
detergent solution towards the squeegee, therefore the height of the splashguard needs to be adjusted.
This operation can be done with the brush head body in the work position, proceeding as follows:
1. Sit on the driver’s seat.
2. Insert the key (1) into the main switch on the control panel. Bring the main switch to its "I" position by turning the key (1) a quarter turn
clockwise (
Fig.1
).
3. Lower the brush head body by turning the brush head control lever (10) on the rear part of the steering column (
Fig.13
).
4. Press the drive pedal (3) (
Fig.3
) to begin moving the machine.
N.B.:
Once the drive pedal has been pressed, the brush head body will begin to descend into its working position.
5. As soon as the brush head and the squeegee have reached their working positions, perform the procedure for securing the machine (see
the section entitled “MACHINE SAFETY” on page 14).
WARNING:
It is recommended to wear the appropriate PPE (Personal Protective Equipment), suitable for the work to be carried out.
6. Go to the front left-hand side of the machine.
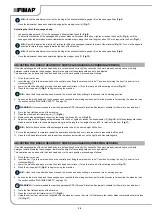
7. Open the machine's left lateral carter (11) (
Fig.14
).
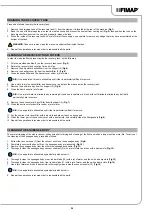
8. Using the correct tool, which is not supplied with the machine, loosen the nuts (14) that secure the rubber blade compression plate in place
(15) (
Fig.17
).
36

