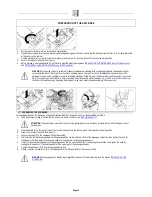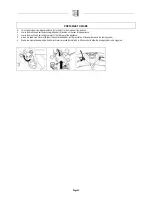
PREPARATION OF THE APPLIANCE
12.
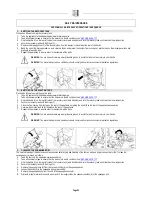
When the recharge cycle is complete, disconnect the battery charger power supply cable from wall plug.
13.
Disconnect the battery charger cable from the charger socket.
14.
Close the drawer.
11.
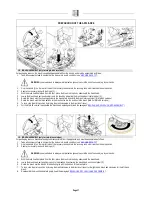
HOUR METER
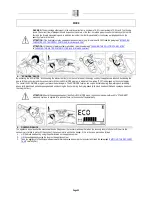
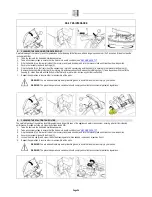
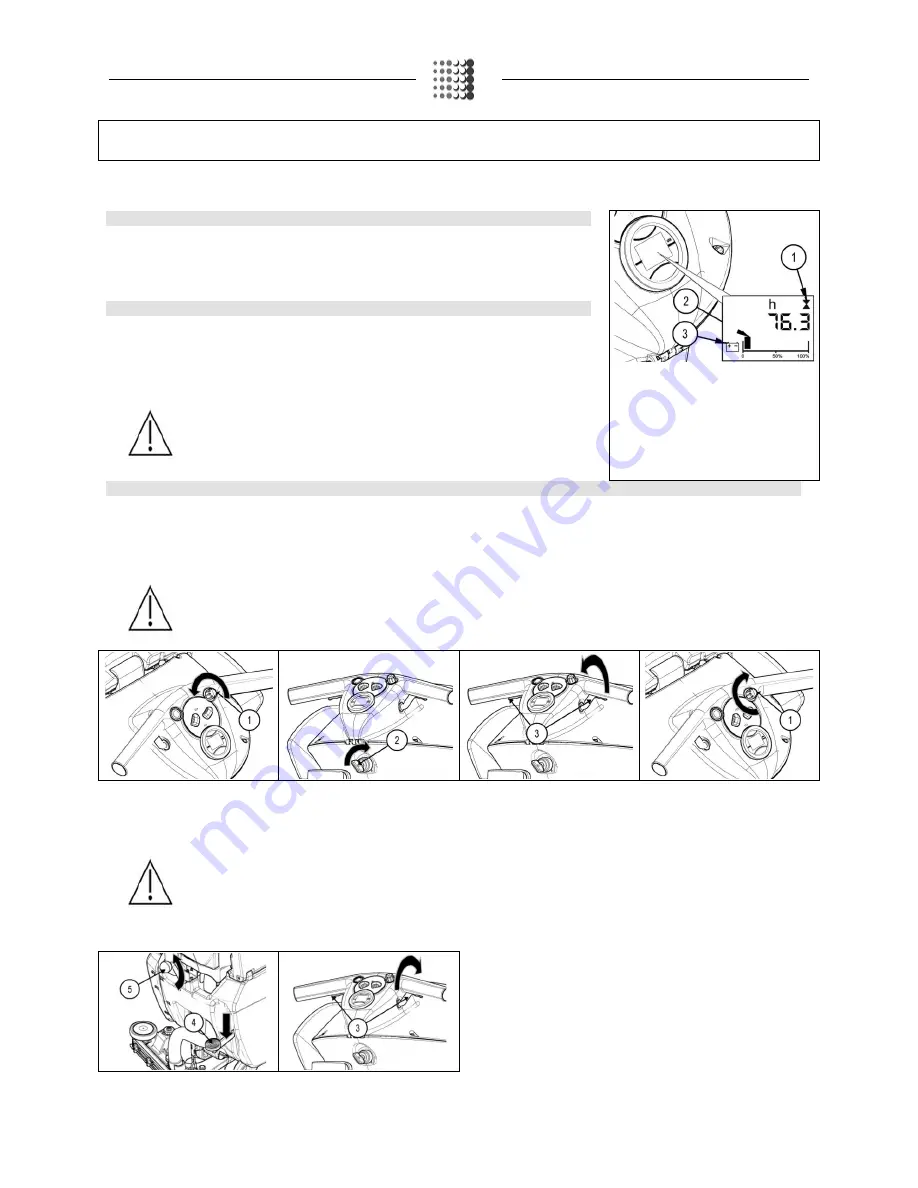
The control display is on the rear of the appliance. The second screen that appears after it is switched on
shows the appliance's total usage time. The digits that precede the "." symbol identify hours, whilst the digit
that follows it indicates hour decimals (an hour decimal corresponds to six minutes). The flashing hourglass
symbol (1) indicates that the hour meter is counting the machine's operation time.
12.
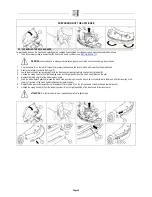
BATTERY CHARGE LEVEL INDICATOR
The control display is on the rear of the appliance. The graphic symbol that identifies the charge level of
batteries appears at the bottom of the control display. The indicator consists of charge level indicators.
With the minimum remaining charge is reached, the graphic symbol (2) will start to blink and will switch off
after a few seconds and then the symbol (3) will start to blink. Under these conditions, take the device to
the battery charge area.
ATTENTION: A few seconds after the battery charge level reaches the critical level (1),
the brush motor switches off automatically. With the remaining charge it is possible to
complete the drying process before starting the recharge.
ATTENTION: A few seconds after the battery charge level reaches the discharge level
(2), the vacuum motor switches off automatically. With the remaining charge, however,
it is still possible to take the appliance to its dedicated recharging area (BT versions).
13.
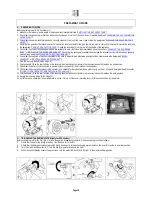
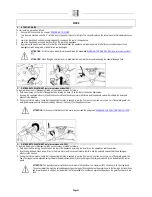
FORWARD MOVEMENT AT WORK SPEED (only for BT system)
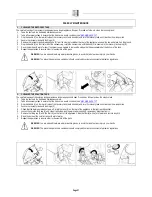
This appliance is equipped with electronic traction control. To move the appliance, follow the steps detailed below:
1.
Check that the potentiometer adjustment knob (1) is set to minimum; if this is the case, fully turn it anti-clockwise.
2.
Turn the main machine switch (2) to "I"; turn the key by a quarter turn to the right.
3.
Engage the dead man's levers (3) on the handlebars.
4.
Adjust the desired forward speed by turning the knob (1) gradually to the right.
ATTENTION: The device will not start to move (either forward or backward) if the potentiometer adjustment knob (1) is set to
minimum.
ATTENTION: Forward speed can be increased by turning the potentiometer's knob (1) clockwise.
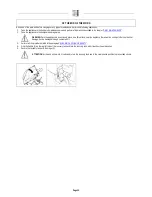
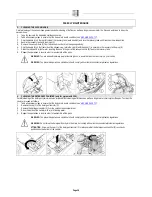
To reverse, proceed as follows:
1.
Check that the brush head unit is raised from the floor, if necessary turn the pedal (4) at the bottom of the device anticlockwise.
2.
Check that the squeegee unit is raised from the floor; if necessary action the lever (5) at the rear of the device.
3.
Engage the dead man's levers (3) on the handlebars in order to start the appliance's' movement.
ATTENTION: The reverse speed is lower than the forward speed to comply with current health and safety standards. If the
potentiometer is adjusted while reversing, the adjustment of the forward speed will be automatically changed.
ATTENTION: It is impossible to reverse if the squeegee body touches the floor. In order to reverse, lift the squeegee body from the
floor using the relevant lever on the back of the appliance.
Page 14


