


DAILY MAINTENANCE
PERFORM ALL MAINTENANCE OPERATIONS IN SEQUENCE
1.
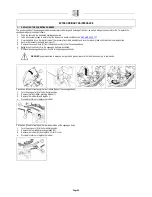
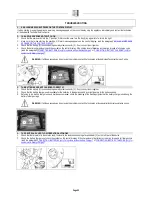
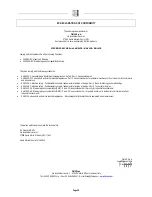
EMPTYING THE RECOVERY TANK
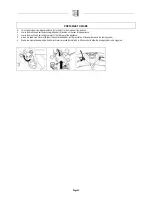
Proceed as follows to empty the recovery tank:
1.
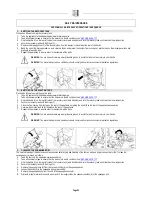
Take the appliance to the dedicated waste water drainage area.
2.
Take all necessary steps to ensure that the device is in a safe condition (see “
MACHINE SAFETY
”)
3.
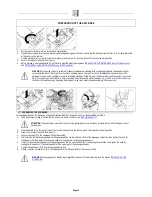
Grip the handle (1) on the rear left side of the recovery tank (work direction) and turn the recovery tank until it reaches the work position.
4.
Secure the recovery tank with the hinge (2).
5.
Remove the drainage hose (3) of the recovery tank from the clamps; it is located at the rear of the device.
6.
Bend the end of the drainage tube, so as to create a choke and prevent the content from coming out, put the tube on the discharge surface and
gradually release the tube.
7.
Repeat the operations in reverse order to reassemble all the parts.
WARNING: You are advised to always wear protective gloves, to avoid the risk of serious injury to your hands.
WARNING: The place this operation is carried out should comply with current environmental protection regulations.
2.
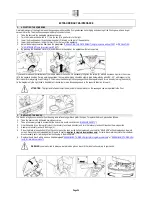
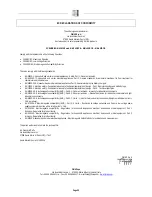
EMPTYING OF THE SOLUTION TANK
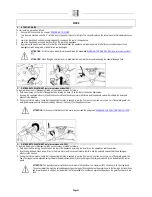
Proceed as follows to empty the solution tank:
1.
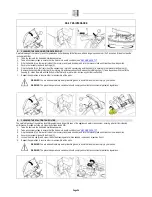
Take the appliance to the dedicated waste water draining area.
2.
Take all necessary steps to ensure that the device is in a safe condition (see “
MACHINE SAFETY
”)
3.
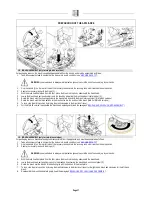
Grip the handle (1) on the rear left side of the recovery tank (work direction) and turn the recovery tank until it reaches the work position.
4.
Secure the recovery tank with the hinge (2).
5.
Close the flow coming from the tap on the rear of the appliance by turning the knob (3) on the rear of the appliance downwards.
6.
Unscrew the solution tank lid (4) located on the rear of the appliance.
7.
Repeat the operations in reverse order to reassemble all the parts.
WARNING: You are advised to always wear protective gloves, to avoid the risk of serious injury to your hands.
WARNING: The place this operation is carried out should comply with current environmental protection regulations.
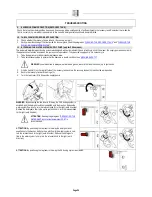
3.
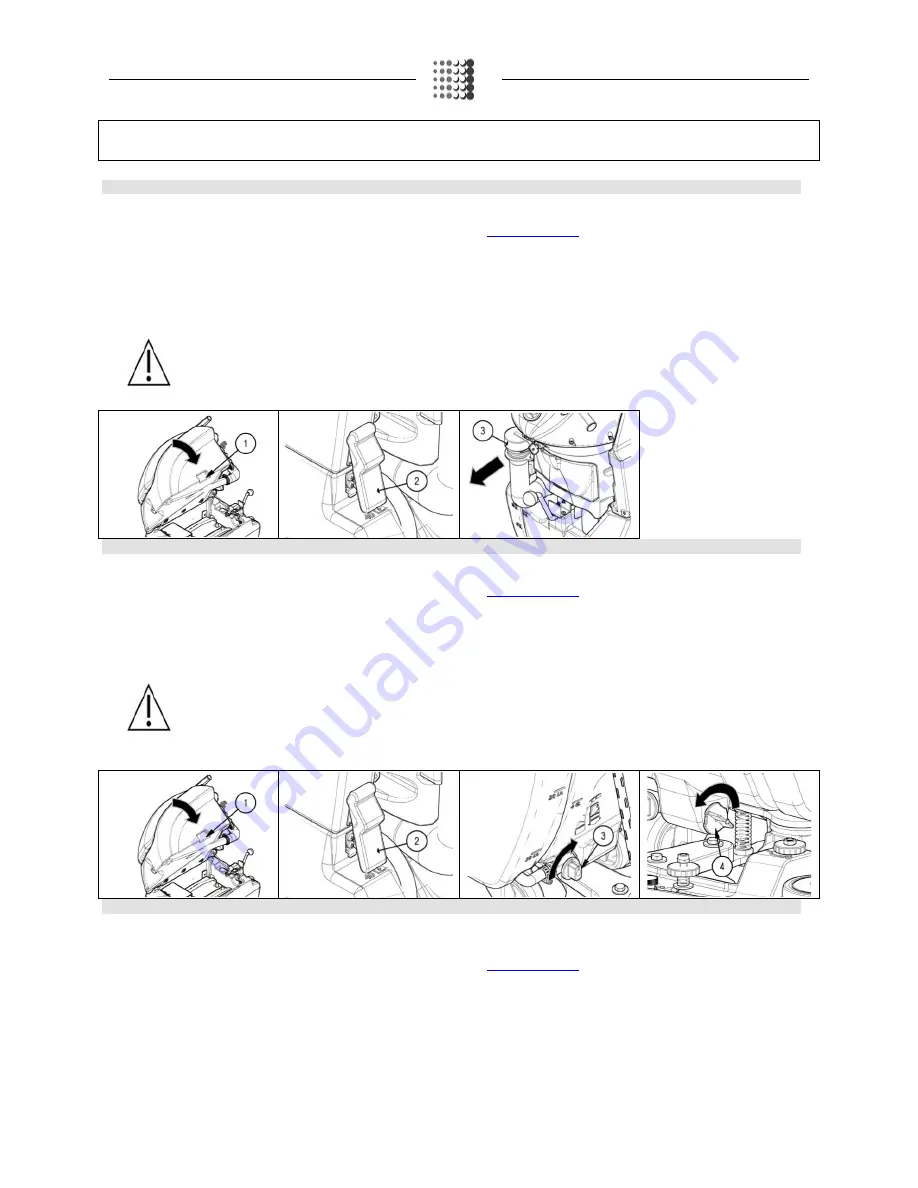
CLEANING THE SQUEEGEE BODY
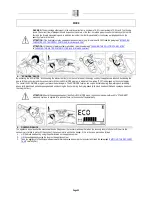
The careful cleaning of the whole vacuum unit ensures better drying and cleaning of the floor as well as a longer vacuum motor life. To clean the
squeegee unit, proceed as follows:
1.
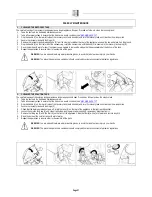
Take the device to the dedicated maintenance area.
2.
Take all necessary steps to ensure that the device is in a safe condition (see “
MACHINE SAFETY
”)
3.
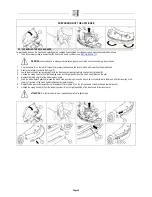
Grip the handle (1) on the rear left side of the recovery tank (work direction) and turn the recovery tank until it reaches the work position.
4.
Secure the recovery tank with the hinge (2).
5.
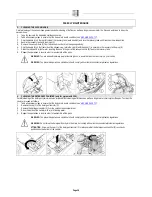
Remove the vacuum hose (3) from the vacuum nozzle (4) on the squeegee body.
6.
Loosen the knobs (5) in the squeegee body pre-assembly.
7.
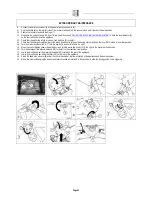
Remove the squeegee body from the slits in the squeegee connector.
8.
First with a jet of water and then with a damp cloth, thoroughly clean the vacuum chamber (6) of the squeegee unit.
Page 24


