16
MACHINE PREPARATION
17. REGULATING
THE
DETERGENT
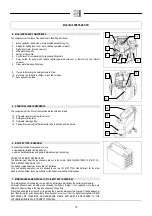
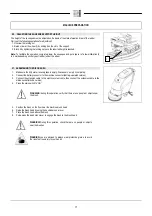
To regulate the flow of detergent solution, push the tap rod lever (1) on the rear left side of the solution
tank (push the lever to increase the flow of solution onto the brush); when you press the dead man's
levers, the brush is enabled and the machine begins to move. During the first few meters check that the
amount of solution is sufficient to wet the floor, but not excessive to exit the splash guard. Bear in mind
that the correct amount of solution is always depends on the nature of the floor, the degree of dirt and the
forward speed.
WARNING: Make sure the solution tap is turned off by pulling the tap rod lever
(1) after using the machine; otherwise, the detergent solution will continue
coming out (versions without the optional solenoid valve kit).
The solution flow can be mechanically limited by modifying the position of the elastic ring (3) on the lever
(1). To do this, remove the rear casing (2). The flow varies in the following way:
Current position: the detergent solution flow is 108 litres/min
Position 4: the detergent solution flow is 60 litres/min
Position 5: the detergent solution flow is 36 litres/min
18. ASSEMBLING THE SQUEEGEE
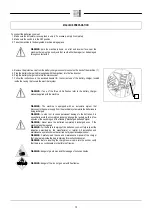
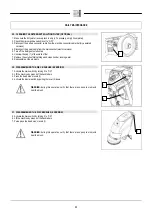
The squeegee, that for reasons of packaging comes disassembled from the machine, must be
assembled while assembling the machine. Proceed as follows for assembly:
1.
Check the main machine switch (1) is set to “OFF”
2.
Check the squeegee connection is raised from the floor; if necessary, lift it by means of lever (2)
3.
Lift the squeegee and fit the left stud (3) in the left-hand slot on the squeegee connection
4.
Rotate the squeegee, then fit the right stud (4) in the right-hand slot on the squeegee connection,
keeping the spring and washer above the connection; this operation can be simplified by first
loosening the handwheel on the pin.
5.
Then retighten the handwheel to block the squeegee in place.
6.
Insert the suction tube (5) in the appropriate sleeve in the squeegee.
WARNING: these operations must be carried out using protective gloves to
avoid any possible contact with the edges or tips of metal objects
19. SQUEEGEE
INCLINATION
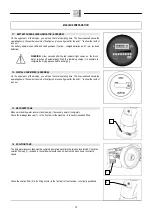
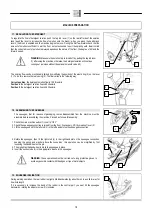
During working operation, the rear rubber is slightly tilted backwards (by about 5mm) in a uniform way for
its whole length.
If it is necessary to increase the bend of the rubber in the central part, you must tilt the squeegee
backwards, rotating the adjuster screw (1) clockwise.
1
2
3
4
5
1
3
4
5
1
2

