19
PREPARATION OF MACHINE
20.
RECOVERY TANK
Make sure the recovery tank is empty, otherwise empty it completely.
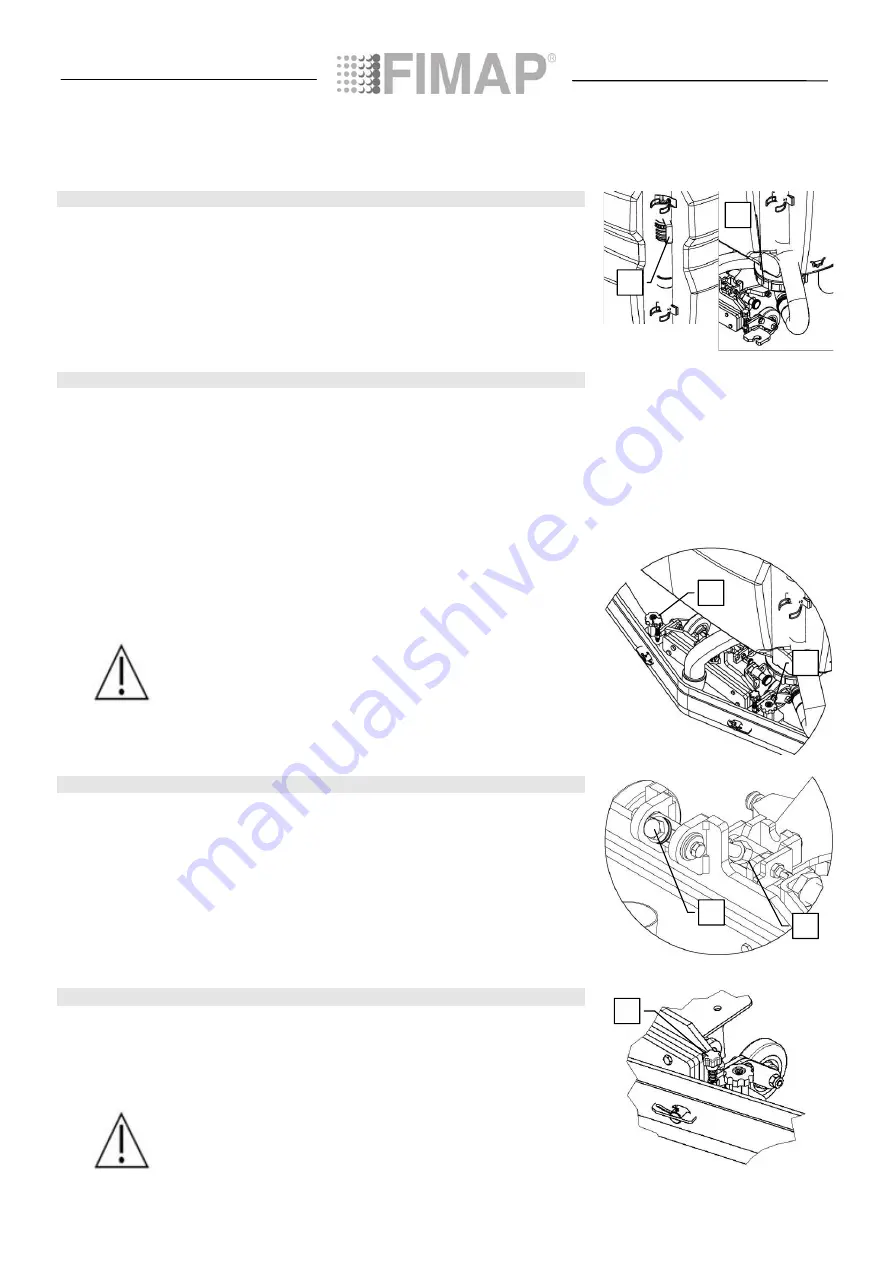
Check the cap of the drainage hose (1) (on the rear of the machine) is correctly closed.
Check that the drain pipe cap (2) at the rear of the machine is correctly closed.
21.
ASSEMBLING THE SQUEEGEE
The squeegee, that for reasons of packaging comes disassembled from the machine, must be assembled
while assembling the machine. Proceed as follows for assembly:
1.
Check that the squeegee support is raised
2.
Turn the main switch key anticlockwise to the “0” position
3.
Engage the parking brake
4.
Remove the key from the instrument panel
5.
Loosen the studs (1) and (2) in the squeegee pre-assembly
6.
First insert the left-hand pin of the squeegee into the left-hand slot of the squeegee connection and
screw the stud (1) on to the pin, making sure that it fits tightly into its seat on the squeegee support
7.
Insert the right-hand pin of the squeegee into the right-hand slot of the squeegee connection and screw
the stud (2) on to the pin, making sure that it fits tightly into its seat on the squeegee support
8.
Insert the vacuum hose into the squeegee sleeve
ATTENTION: these operations must be carried out using protective gloves to
avoid any possible contact with the edges or tips of metal objects.
22.
ADJUSTING THE SQUEEGEE INCLINATION
During working operation, the rear rubber blade is slightly tilted backwards (by about 5mm) in a uniform
way for its whole length. If you need to increase the bend of the rubber in the central part, you must tilt the
squeegee unit. To do this, proceed as follows:
1.
Loosen the locknut (1)
2.
Turn the screw (2) anticlockwise to increase the bend of the rubber in the central part of the squeegee.
To increase the bend of the rubber at the sides of the squeegee, turn the screw (2) clockwise.
3.
When fully adjusted, fix the locknut (1)
23.
ADJUSTING THE SQUEEGEE HEIGHT
The height of the squeegee must be adjusted on the basis of the state of wear and tear of the rubber
blades. To do this, turn the knob (1) anticlockwise to raise the squeegee, and clockwise to lower it.
Remarks: the right and left wheels must be adjusted to the same level, so the squeegee can work parallel
to the floor.
ATTENTION: these operations must be carried out using protective gloves to
avoid any possible contact with the edges or tips of metal objects.
1
2
1
2
1
1
2


