23
AT THE END OF THE WORK
31.
AT THE END OF THE WORK
At the end of the work, and before carrying out any type of maintenance, perform the following operations:
1.
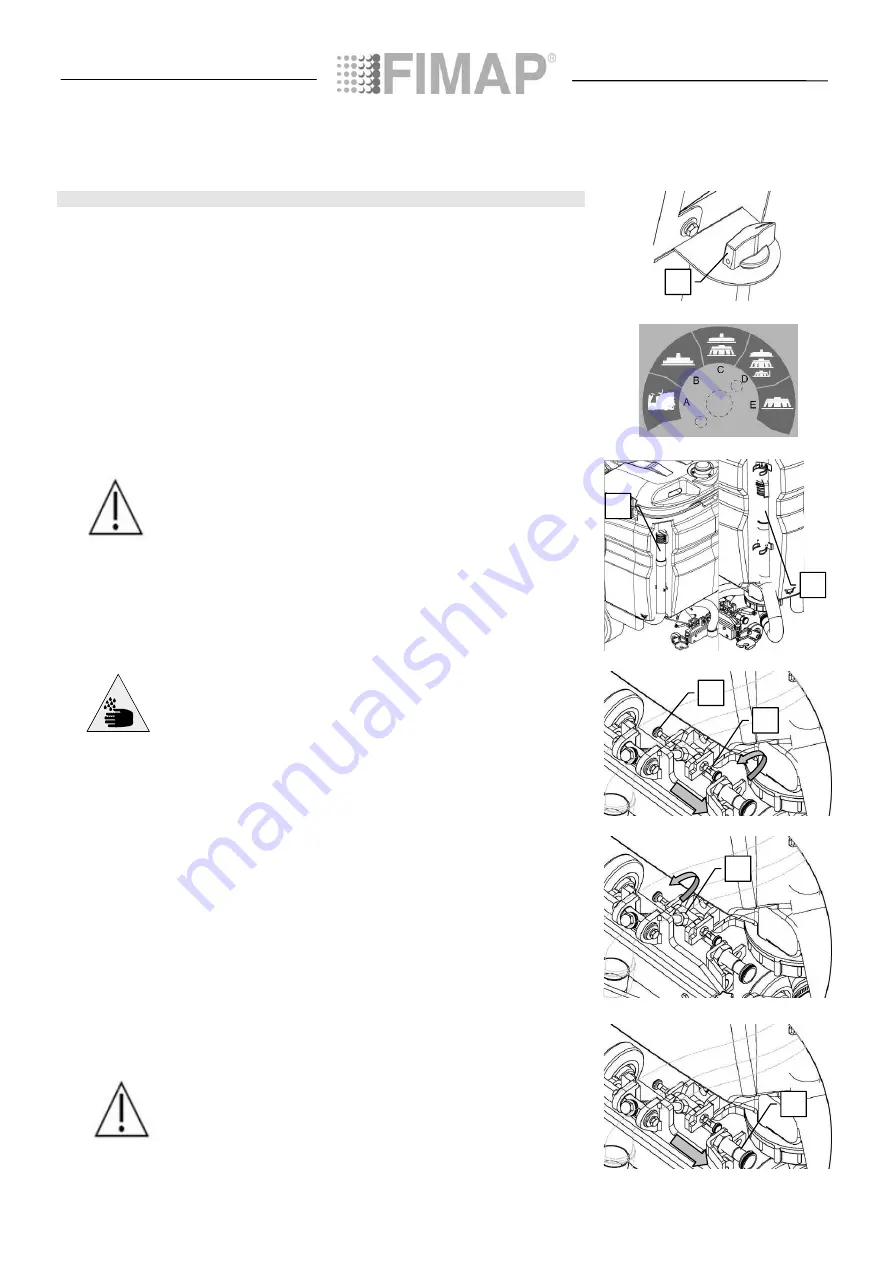
Fully rotate the tap lever (1) in a clockwise direction, completely closing the passage of the detergent
solution.
2.
Turn the I-DRIVE selector to the “Transfer” position. Both the brush head and the squeegee rise and
after a few seconds the suction motor will turn off.
3.
Bring the machine to the place provided for draining the water
4.
Turn the machine off by turning the key a quarter turn anticlockwise (to the “0” position) and remove it
from the instrument panel
5.
Engage the parking brake
6.
Raise the seat support plate and disconnect the electrical system connector from the battery connector
ATTENTION: Before performing any maintenance, remove the keys from the
panel and disconnect the battery connector.
7.
Disconnect the recovery tank drain hose (2) from its housing, unscrew the drain cap and empty the
recovery tank
8.
Disconnect the solution tank drain hose (3) from its housing, unscrew the drain cap and empty the
solution tank
9.
Detach the vacuum hose from the nozzle on the squeegee body
ATTENTION: This operation must be carried out wearing gloves to protect
against contact with dangerous solutions.
10.
Remove the pins (4) for the squeegee rotation retainer. To remove it pull the knob towards the
outside of the machine and turn it in anticlockwise direction
11.
Remove the squeegee rotation retainer (5), lift it to remove it
12.
Rotate the squeegee body in a clockwise direction and lock it in position using the pin (6)
13.
Clean the squeegee unit and the rubber blades thoroughly with a jet of water
14.
After cleaning the squeegee and rubbers, replace the squeegee by turning it anticlockwise, returning
it to its original position, making sure that the squeegee rotation retainer (4) is returned to its normal
position
15.
Connect the electrical system connector to the battery connector, lower the seat support to the work
position
16.
Turn the machine on by turning the key a quarter turn clockwise (to the “1” position) and remove it
from the instrument panel.
17.
Disengage the parking brake
18.
Park the machine in a closed place, in an area where it cannot cause damage to people or other
property, but also be protected from an accidental fall of objects
19.
Engage the parking brake
20.
Turn the key switch a quarter turn anticlockwise (position “0”) and remove the key
21.
Raise the seat support and disconnect the electrical system connector from the battery connector
ATTENTION: do not leave the machine unattended without first removing the
start-up switch key and applying the parking brake. In addition, do not park the
machine in open places or on sloping floors.
3
2
4
5
6
4
1


