30
EXTRAORDINARY MAINTENANCE
4.
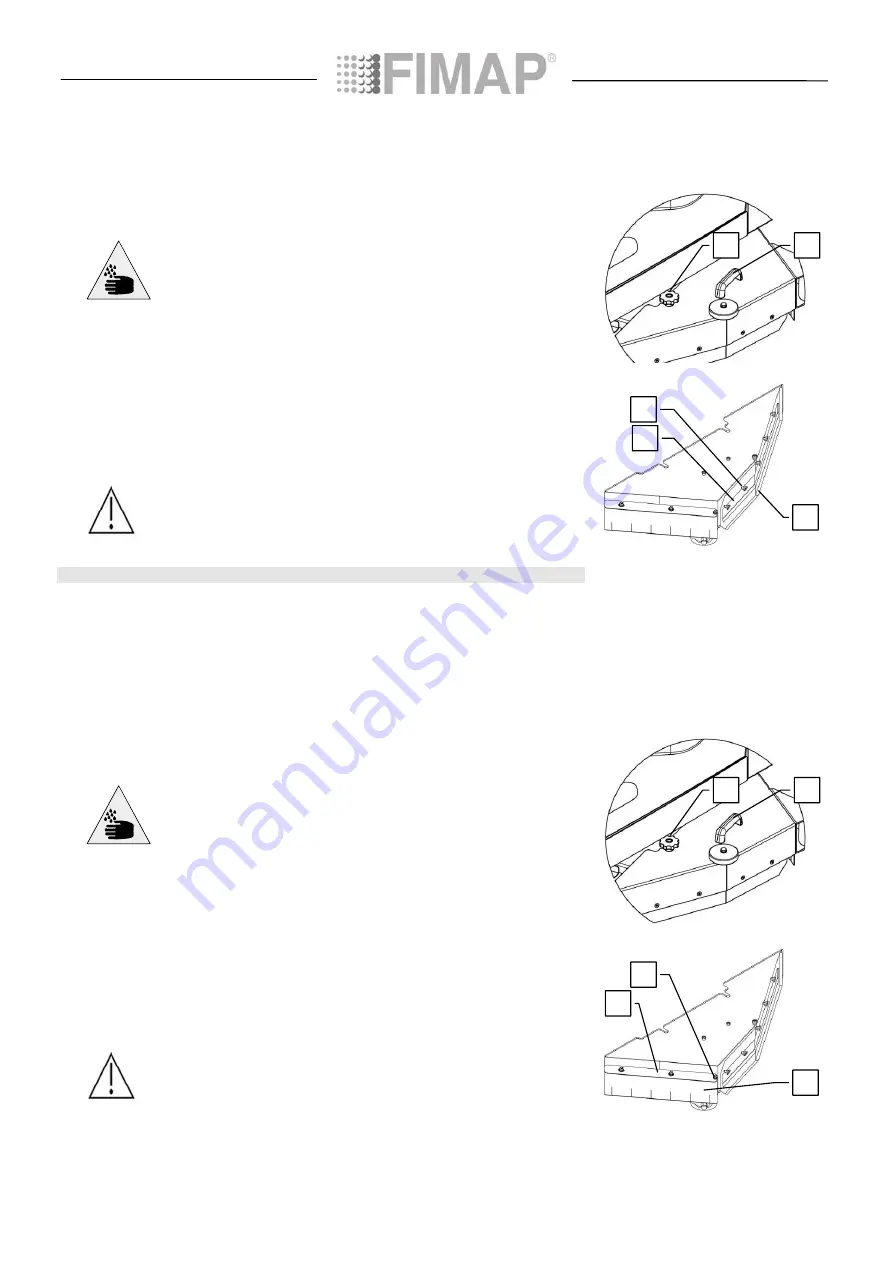
Turn the knobs (1) in an anti-clockwise direction
5.
Use the handle (2) to remove the right splash guard cover
ATTENTION: This operation must be carried out using gloves to protect
against contact with dangerous solutions.
6.
Use suitable equipment to remove the rubber-pressing blade (3) from inside the side cover, and
unscrew the screws (4) which fasten it to the splash guard support
7.
Remove the rubber (5) to replace it or rotate it
8.
To replace the rubber, proceed in reverse order
9.
Adjust the height of the splash guard rubber according to the rubber itself (refer to “ADJUSTING THE
HEIGHT OF THE SIDE SPLASH GUARDS”)
ATTENTION: The right side splash guard is depicted in the figures here, proceed
in the same way when working on the left one.
42.
REPLACING THE FRONT SPLASH GUARD RUBBER ON THE SIDE COVER OF THE BRUSH HEAD
If the rubber on the front splash guard of the brush head side cover is worn, its capacity to conduct water to
the squeegee is compromised. The containment border can be replaced using one of the 4 edges of
rubber. This operation can be done with the brush head carter removed, proceeding as follows:
1.
Check that the parking brake is engaged, and if not, engage it
2.
Check that the electrical system connector is disconnected from the battery connector, and if not,
disconnect it
3.
Check the main switch is on “0” (turn it to this position if necessary)
4.
Turn the knobs (1) in an anti-clockwise direction
5.
Use the handle (2) to remove the right splash guard cover
ATTENTION: This operation must be carried out using gloves to protect
against contact with dangerous solutions.
6.
Use suitable equipment to remove the rubber-pressing blade (3), and unscrew the screws (4) which
fasten it to the splash guard support.
7.
Remove the rubber (5) to replace it or rotate it
8.
To replace the rubber, proceed in reverse order
9.
Adjust the height of the splash guard rubber according to the rubber itself (refer to “ADJUSTING THE
HEIGHT OF THE SIDE SPLASH GUARDS”)
ATTENTION: The right side splash guard is depicted in the figures here, proceed
in the same way when working on the left one.
2
1
2
1
3
4
5
3
4
5


