Page 4
Step 4
Step 5
The tank lid has an 8” lanyard attached to it.
Slide the lanyard through the hole in the tab
at the top of the tank. This is so the lid can
‘hang’ or be retained onto the tank while
you are filling or rinsing the tank out. This
should help prevent loss or
damage of the lid.
Screw the lid onto the tank. Hand-tight
should be sufficient.
Using Teflon tape or plumbers thread sealant, screw the pres-
sure gauge into the manifold. Hand tight should be sufficient.
Step 6
Step 7
Remove the (2) handgun clips and (2) screws from the parts bag. Use a phillips head screwdriver to screw them onto
the tank. Do not over tighten. These clips are where the spray gun is secured to the tank, while not in use.
NOTE:
The spray gun should already be attached to the 15 foot hose prior to assembly.
*** The Sprayer should now be ready for use ***
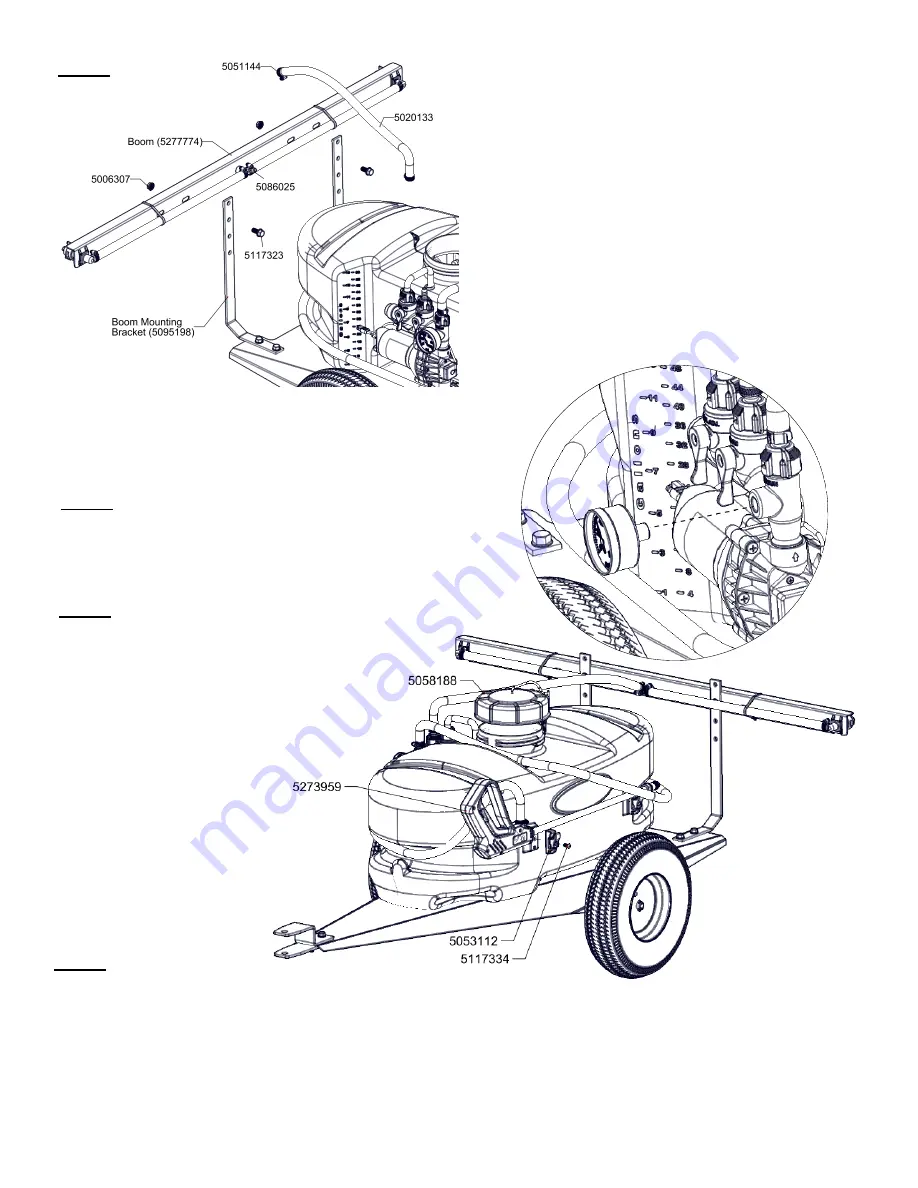
Assembly Procedure (LG-1500-304)
Remove the 2-nozzle boom assembly from the carton.
Using (2) bolts and (2) whiz nuts, bolt the boom to the
upright boom mounting brackets. There are four holes
in the boom brackets, so you can choose the most
optimal (height) position for your spraying purposes.
Tighten the hardware down, using a 1/2” socket or
wrench.
Find the 3/8” hose (30” long) and place hose clamps
loosely onto each end of the hose. Connect this hose
to the ‘TEE’ fitting on the boom and to the ‘Boom’ line
on the manifold. Tighten the hose clamps snugly.
The boom is now installed.