


Page 8
Troubleshooting the Pump:
Motor does not run:
Check for loose wiring connection(s).
Make sure the 'ON/OFF' switch in the lead wire assem-
bly is in the 'ON' position. “I" is the 'ON' position and 'O'
is the 'OFF' position.
Check for defective pressure switch. Make sure you are
connected to a good 12 volt power source. Make sure
any on/off switches are in the 'on' position.
Remove the cap to the pressure switch. Pull both red
wires off of their terminals, and touch the two ends to-
gether. If your pump runs when you do this, your pres-
sure switch will need to be replaced.
Check the fuse.
Check for low voltage at the power supply.
Pump does not prime:
Check for air leaks in supply line.
Check for debris in the check valve assembly.
Check for defective check valve.
Check for clogged strainer/filter.
Check for cracks in the pump housing.
Check for empty product supply.
DO
Clean and rinse your pump after each use with Fimco Tank
Neutralizer
Winterize your pump or sprayer by rinsing, draining and
running RV Antifreeze through it before storing for the winter.
Use clean water for your spray mixture
Store inside a building when not in use.
DON’T
Pulsating flow (surging):
Check for defective pressure switch.
Check for leaks in the discharge line.
Check for restriction in the discharge line.
Check for debris in nozzle orifice.
Discharge hose may be too long.
Check for clogged strainer.
Motor continues to run after discharge is shut off:
Check for empty product supply.
Check for open bypass valve. (if equipped)
Check for low voltage.
Check for leak in discharge line.
Check for defective or dirty check valve.
Check for defective pressure switch.
Use to pump bleach.
Use with Flammable or Combustible Liquids
Store Flammable or Combustible Liquids
Leave your pump sit with spray mixture in it for extended
periods
Use dirty or unfiltered water for spraying
6
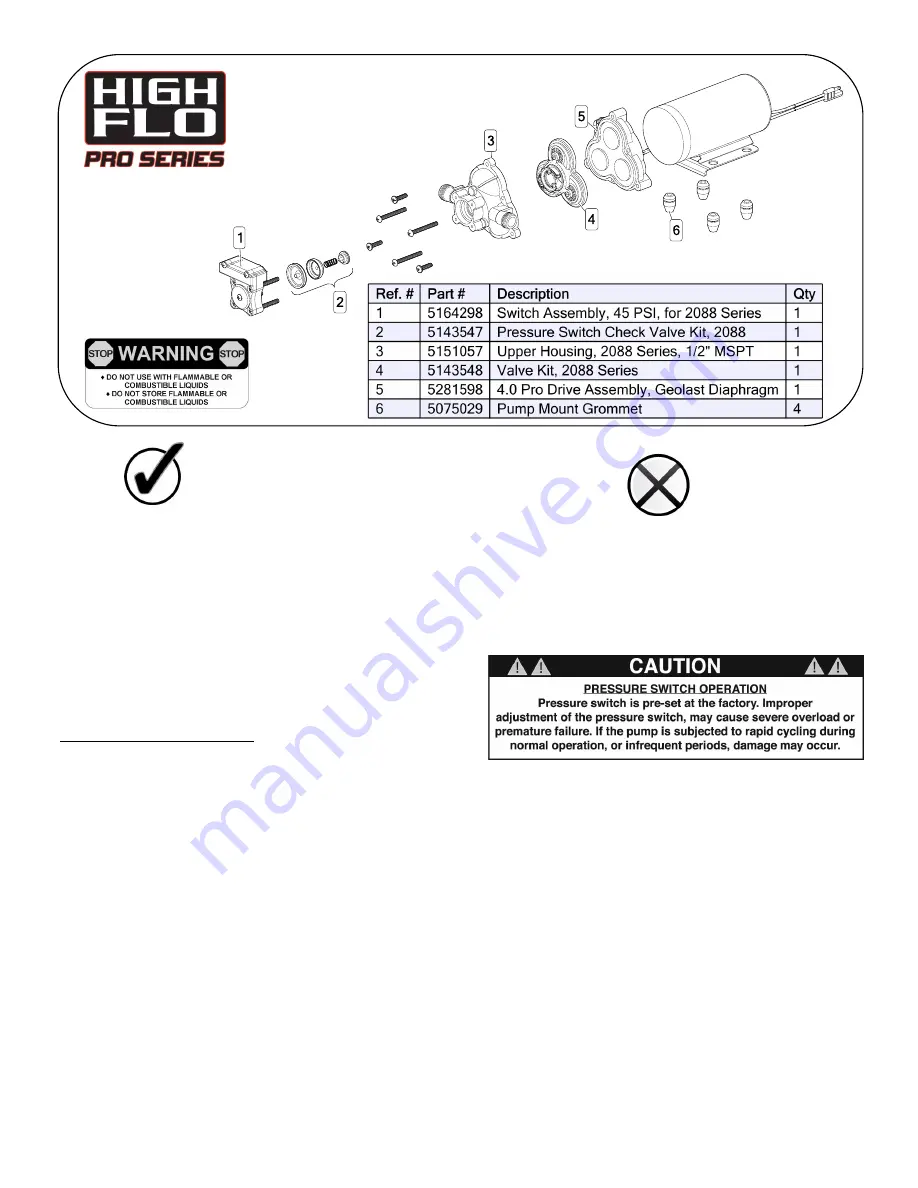
4.0 GPM Pump
Model: 5151073
Available Replacement Parts
(Replacement Pump: 5281326)


