background image

HB9000

1

2

3

4

5

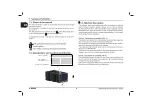
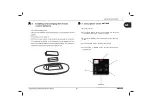
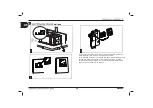
1. Signal receiver

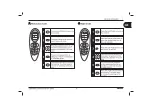
2. Press the ON/OFF button to switch ON or OFFthe air 
    conditioner, it will run in memory mode. 

3. Press the MODE button to select cooling or heating
    mode. 

4. Press the FAN button to select fan speed. 

5. Press the UP or DOWN button to select the desired
    temperature. 

wall pad

wall  pad

Summary of Contents for HB 9000

Page 1: ...9...

Page 2: ...a safe way and understand the hazards involved Children shall not play with the appliance Cleaning and user maintenance shall not be made by children without supervision 2 If the supply cord is damag...

Page 3: ...10 1 9 Routine maintenance 11 2 1 Packing unpacking and handing 12 2 2 Choice of the place of installation 13 2 3 Preparing the opening and fixing 14 2 3 1 Fixing systems 15 2 4 Fitting the infrared r...

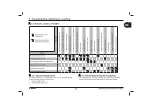
Page 4: ...HB9000 2 brand certificate mode technical specifications manufacturer information fan blower C...

Page 5: ...HB9000 3 Wall pad E Fan blower C...

Page 6: ...HB9000 wall pad...

Page 7: ...HB9000...

Page 8: ...HB9000...

Page 9: ...HB9000...

Page 10: ...HB9000...

Page 11: ...utton to switch ON or OFFthe air conditioner it will run in memory mode 3 Press the MODE button to select cooling or heating mode 4 Press the FAN button to select fan speed 5 Press the UP or DOWN butt...

Page 12: ...HB9000 9000 27 8 296 30 398 86 86 14 734 Btu h Btu h 9000 9000 500W 4 2 925 5 3 1250 1250W 750W 500W 230 50...

Page 13: ...HB9000...

Page 14: ...12 HB9000...

Page 15: ...HB9000...

Page 16: ...HB9000 55 734 398 16 191 51 8 135 4 270 9 206 4 216 46 30 Hole as an option to optimize the preformace of the unit...

Page 17: ...system 3 FIXING HOLE system 3 INLET 2 8 6 191 2 135 4 184 4 OUTLET HB9000 734 398 KEEP THIS DISTANCE BETWEEN THE UNIT AND THE SURROUNDING WALLS 106 70 5 216 46 30 30 200 3 0 TO THE SIDE OF THE EXTERIO...

Page 18: ...HB9000 the a c fixing...

Page 19: ...ion to optimize the performance of the unit Installation 1 Open the side cover EPP and have the foam sticked around the air outlet 2 Make a whole of the indicated size in proper position 3 Fix the gri...

Page 20: ...trol with battery and support and extension cable To fix wall pad on the wall you need to make a diameter 20mm hole for cable to pass through refer to drawing2 Using 2 wooden screws to fix support to...

Page 21: ...HB9000 2 300cm 220V 60Hz...

Page 22: ...HB9000 2 300cm...

Page 23: ...HB9000...

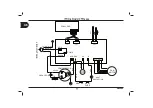
Page 24: ...LACK BLUE FAN MOTOR Yellow Green 4V S N2 N1 N3 N CLMH AC L COMP BROWN BLUE CAPACITOR BLUE ORANGE BROWN S R C COMPRESSOR BROWN CN3 CN2 WALL PAD CN8 HEATER HEAT FUSE HEAT PROTECTION RED WHITE RAT ICT LI...

Page 25: ...HB9000 9000...
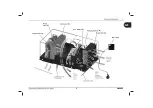
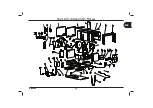
Page 26: ...CONDENSER FAN HIGH PRESSURE PIPE CAPILLARY ASSY AIR OUTLET PLUG MOTOR FIXING STRIP EVAPORATING FAN BLOWER DONDENSER MOTOR SUPPORT MOTOR REINFORCE COMPRESSOR MOTOR BASE EPP EVAPORATOR ASSY THERMOSTAT F...

Reviews: