English
- 39 -
Media Playback via USB Input
You can connect 2.5” and 3.5” inch (hdd with external power
supply) external hard disk drives or USB memory stick to your
TV by using the USB inputs of the TV.
IMPORTANT!
%DFNXSWKH¿OHVRQ\RXUVWRUDJHGHYLFHV
before connecting them to the TV. Manufacturer will
QRWEHUHVSRQVLEOHIRUDQ\¿OHGDPDJHRUGDWDORVV
Certain types of USB devices (e.g. MP3 Players)
or USB hard disk drives/memory sticks may not be
compatible with this TV. The TV supports FAT32 and
NTFS disk formatting but
recording will not be available
with NTFS formatted disks.
While formatting USB hard drives which have
more than 1TB (Tera Byte) storage space you may
experience some problems in the formatting process.
Wait a little while before each plugging and unplugging
DVWKHSOD\HUPD\VWLOOEHUHDGLQJ¿OHV)DLOXUHWRGR
so may cause physical damage to the USB player
and the USB device itself. Do not pull out your drive
ZKLOHSOD\LQJD¿OH
You can use USB hubs with your TV’s USB inputs.
External power supplied USB hubs are recommended
in such a case.
It is recommended to use the TV’s USB input(s)
directly, if you are going to connect a USB hard disk.
Note:
:KHQYLHZLQJLPDJH¿OHVWKH
Media Browser menu
FDQRQO\GLVSOD\LPDJH¿OHVVWRUHGRQWKHFRQQHFWHG
USB device.
Recording a Programme
IMPORTANT:
When using a new USB hard disk
GULYHLWLVUHFRPPHQGHGWKDW\RX¿UVWIRUPDWWKHGLVN
using your TV’s
Format Disk
option in the
Media
Browser>Settings>Recording Settings
menu.
7RUHFRUGDSURJUDPPH\RXVKRXOG¿UVWFRQQHFWD86%
GLVNWR\RXU79ZKLOHWKH79LVVZLWFKHGRႇ<RXVKRXOG
then switch on the TV to enable the recording feature.
To use recording your USB drive should have 2 GB free
space and be USB 2.0 compatible. If the USB drive
is not compatible an error message will be displayed.
To record long duration programmes such as movies, it
is recommended to use USB Hard disk drives (HDD’s).
Recorded programmes are saved into the connected
USB disk. If desired, you can store/copy recordings
RQWR D FRPSXWHU KRZHYHU WKHVH ¿OHV ZLOO QRW EH
available to be played on a computer. You can play
the recordings only via your TV.
Lip Sync delay may occur during the timeshifting. Radio
record is supported. The TV can record programmes
up to ten hours.
Recorded programmes are split into 4GB partitions.
If the writing speed of the connected USB disk is not
VXႈFLHQWWKHUHFRUGLQJPD\IDLODQGWKHWLPHVKLIWLQJ
feature may not be available.
It is recommended to use USB hard disk drives for
recording HD programmes.
Do not pull out the USB/HDD during a recording. This
may harm the connected USB/HDD.
If the AC cord is unplugged while there is an active
USB-recording timer setting, it will be cancelled.
Multipartition support is available. A maximum of two
GLႇHUHQWSDUWLWLRQVDUHVXSSRUWHG7KH¿UVWSDUWLWLRQRI
the USB disk is used for PVR ready features. It also
must be formatted as the primary partition to be used
for the PVR ready features.
Some stream packets may not be recorded because
of signal problems, as a result sometimes videos may
freeze during playback.
Record, Play, Pause, Display (for PlayListDialog) keys
can not be used when teletext is on. If a recording starts
from timer when teletext is on, teletext is automatically
WXUQHGRႇ$OVRWHOHWH[WXVDJHLVGLVDEOHGZKHQWKHUH
is an ongoing recording or playback.
Timeshift Recording
Press
Pause
button while watching a broadcast to
activate timeshifting mode. In timeshifting mode, the
programme is paused and simultaneously recorded to
the connected USB disk.
Press
Play
button again to resume the paused
programme from where you stopped. Press the
Stop
button to stop timeshift recording and return to the
live broadcast.
Timeshift cannot be used while in radio mode.
You cannot use the timeshift fast reverse feature before
advancing the playback with the fast forward option.
Instant Recording
Press
Record
button to start recording an event
instantly while watching a programme. You can press
Record
button on the remote control again to record
the next event after selecting the next programme
from within the EPG. Press
Stop
button to cancel
instant recording.
You can not switch broadcasts or view the media browser
during the recording mode. While recording a programme
or during the timeshifting, a warning message appears
RQWKHVFUHHQLI\RXU86%GHYLFHVSHHGLVQRWVXႈFLHQW
Watching Recorded Programmes
Select
Recordings
from the
Media Browse
r menu.
Select a recorded item from the list (if previously
recorded). Press the
OK
button to view the
Play
Options
. Select an option then press
OK
button.
Note: Viewing main menu and menu items will not be available
during the playback.
Press the
Stop
button to stop a playback and return
to the
Recordings
.
Slow Forward
If you press
Pause
button while watching recorded
programmes, the slow forward feature will be available.
You can use
Rapid advance
button to slow forward.
English
- 40 -
Pressing
Rapid advance
button consecutively will
change slow forwarding speed.
5HFRUGLQJ&RQ¿JXUDWLRQ
Select the
Recording Settings
item in the
Media
Browser>Settings
PHQXWRFRQ¿JXUHWKHUHFRUGLQJ
settings.
Format Disk:
You can use the
Format Disk
feature
for formatting the connected USB disk. Your PIN is
required to use the
Format Disk
feature.
Note:
'HIDXOW3,1FDQEHVHWWR
0000 or 1234
,I\RXKDYH
GHILQHG WKH 3,1LV UHTXHVWHG GHSHQGLQJ RQ WKH FRXQWU\
selection) during the First Time Installation
XVHWKH3,1WKDW
\RXKDYHGH¿QHG
IMPORTANT:
Formatting your USB drive will erase
$//WKHGDWDRQLWDQGLW¶V¿OHV\VWHPZLOOEHFRQYHUWHG
WR)$7,QPRVWFDVHVRSHUDWLRQHUURUVZLOOEH¿[HG
after a format but you will lose ALL your data.
If “
USB disk writing speed too slow to record
”
message is displayed on the screen while starting a
recording, try restarting the recording. If you still get
the same error, it is possible that your USB disk does
not meet the speed requirements. Try connecting
another USB disk.
Media Browser Menu
<RXFDQSOD\SKRWRPXVLFDQGPRYLH¿OHVVWRUHGRQD
USB disk by connecting it to your TV. Connect a USB
disk to one of the USB inputs located on the side of
the TV. Pressing the
Menu
button while in the
Media
Browser
mode will access the
Picture
,
Sound
and
Settings
menu options. Pressing the
Menu
button
again will exit from this screen.
You can set your
Media
Browser
preferences by using the
Settings
menu.
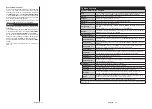
/RRS6KXH0RGH2SHUDWLRQ
Start playback with the
Play
button and activate
$OO¿OHVLQWKHOLVWZLOOEH
continuously played in original
order
Start playback with the
OK
button and activate
7KHVDPH¿OHZLOOEHSOD\HG
continuously (repeat)
Start playback with the
Play
button and activate
$OO¿OHVLQWKHOLVWZLOOEHSOD\HG
once in random order
Start playback with the
Play
button and activate
,
$OO¿OHVLQWKHOLVWZLOOEH
continuously played in the same
random order.
FollowMe TV (if available)
With your mobile device you can stream the current
broadcast from your smart TV using the
FollowMe
TV
feature. Install the appropriate Smart Center
application to your mobile device. Start the application.
For further information on using this feature refer to
the instructions of the application you use.
Note: This application may not be compatible with all mobile
devices. HD channels are not supported and both of the
devices must be connected to the same network.
CEC and CEC RC Passthrough
This function allows to control the CEC-enabled
devices, that are connected through HDMI ports by
using the remote control of the TV.
The
CEC
option in the
System>Settings>More
menu
should be set as
Enabled
DW¿UVW3UHVVWKH
Source
button and select the HDMI input of the connected
CEC device from the
Sources List
menu. When
new CEC source device is connected, it will be listed
in source menu with its own name instead of the
connected HDMI ports name(such as DVD Player,
Recorder 1 etc.).
The TV remote is automatically able to perform the
main functions after the connected HDMI source has
been selected.
To terminate this operation and control the TV via
the remote again, press
Quick Menu
button on the
remote, highlight the
CEC RC Passthrough
and
set as
Off
by pressing Left or Right button. This
feature can also be enabled or disabled under the
System>Settings>More
menu.
The TV supports also ARC(Audio Return Channel)
feature. This feature is an audio link meant to replace
other cables between the TV and the audio system
(A/V receiver or speaker system).
When ARC is active, TV does not mute its other audio
outputs automatically. So you need to decrease TV
volume to zero manually, if you want to hear audio from
connected audio device only (same as other optical or
co-axial digital audio outputs). If you want to change
connected device’s volume level, you should select
that device from the source list. In that case volume
control keys are directed to connected audio device.
Note:
$5&LVVXSSRUWHGRQO\'0,LQSXW


