background image

English

   - 14 -

Record, Play, Pause, Display (for PlayListDialog) keys 

can not be used when teletext is ON. If a recording 

starts from the timer when teletext is ON, teletext 

is automatically turned off. Also teletext usage is 

disabled when there is an ongoing recording or 

playback. 

Timeshift Recording 

Press 


(PAUSE) button while watching a broadcast 

to activate timeshifting mode. In timeshifting mode, 

the programme is paused and simultaneously 

recorded to the connected USB disk. Press   (PLAY) 

button again to resume the paused programme from 

where you stopped. You will see the timeshift gap 

between the real and the timeshifted programme in 

the info bar. 

Instant Recording

Press 

 (RECORD) button to start recording an 

event instantly while watching a programme. You can 

press 

 (RECORD) button on the remote control 

again to record the next event on the EPG. In this 

case, the OSD will display the programmed events 

for recording. Press   (STOP) button to cancel instant 

recording. 
Note: You can not switch broadcasts or view the Media 

Browser during the recording mode.

Watching Recorded Programmes 

In the main menu, use “ ” or “ ” buttons to select the 

Media Browser

. Highlight the 

Recordings Library


using “ ” or “ ” button and press the 

OK

 button to 

enter the Recordings Library. Select a recorded item 

from the list (if previously recorded) by using “ ” or 

“ ”


buttons. Press the 

OK

 button to view the 

Play 

Options

. Select an option by using “ ” or “ ” or 

OK buttons.

Available playback options:

• 

Play from start: Plays the recording from the 

beginning.

• 

Resume: Resumes Playback from the point at which 

you stopped playback previously.

• Play from offset: Specifies a playing point.

Note: Viewing main menu and menu items will not be available 

during the playback.

Press the   (STOP) button to stop a playback and 

return to the Recordings Library.

Slow Forward

If you press   (PAUSE) button while watching 

recorded programmes, the slow forward feature will 

be available. You can use 

 button to slow forward. 

Pressing 

 button consecutively will change slow 

forwarding speed.

Recordings Library

To view the list of recordings, select “

Recordings 

Library

” and press the 

OK

 button. The Recordings 

Library will then be displayed with available recordings. 

All the recordings are kept in a list in the recordings 

library. 

RED button (Delete)

 :Erases the selected recording.

GREEN button (Edit)

: Makes changes on the 

selected recording.

BLUE button (Sort)

: Changes the order of the 

recordings. You can select from a wide range of 

sorting options.

OK button:

 Activates the play options menu:


:

 Resume Playback.

INFO (Details)

: Displays the programme information 

details.

Recording Configuration

Select the Recording Configuration item in the 

Settings menu to configure the recording settings. 

Format Disk

: You can use the Format Disk feature 

for formatting the connected USB disk. IMPORTANT: 

Note that ALL the data stored on the USB disk will 

be lost and the disk format will be converted to 

FAT32 if you activate this feature. If your USB disk 

malfunctions, you can try formatting the USB disk. In 

most cases formatting the USB disk will restore normal 

operation; however, ALL the data stored on the USB 

disk will be lost in such a case. 

Note: 

If “USB is too slow” message is displayed on the 

screen while starting a recording, try restarting the recording. 

If you still get the same error, it is possible that your USB 

disk does not meet the speed requirements. Try connecting 

another USB disk.


Product Safety

• 

Do not drop objects on the product or knock the 

product forcefully. This may result in an electric 

shock or fire.

• Do not use your product near a humidifier or kitchen 

counter. This may result in an electric shock or fire. 

• 

Do not disassemble, repair or modify the product 

or its parts. Doing so may result in damage to the 

product or a malfunction.

Summary of Contents for 40F6050

Page 1: ...40in LED TV 40F6050 Owner s manual happy Finnish Customer Helpline Number 0845 459 5282 ...

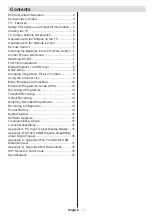
Page 2: ...k Menu 9 Changing Image Size Picture Formats 9 Using the Channel List 9 Menu Features and Functions 10 Electronic Programme Guide EPG 13 Recording a Programme 13 Timeshift Recording 14 Instant Recording 14 Watching Recorded Programmes 14 Recording Configuration 14 Product Safety 14 Digital Teletext 15 Software Upgrade 15 Troubleshooting Tips 15 Licence Notifications 15 Appendix A PC Input Typical ...

Page 3: ... securely attached to the wall in accordance with the installation instructions Screen Occasionally a few non active pixels may appear on the screen as a fixed blue green or red point Please note that this does not affect the performance of your product Take care not to scratch the screen with fingernails or other hard objects Cleaning Before cleaning unplug the TV from the wall socket Do not use ...

Page 4: ...e This device is used to receive and display TV programmmes The different connection options expand the reception and display sources possible various external devices This device is only suitable for operation in dry interiors This appliance is intended solely for private domestic use and may not be used for industrial and commercial purposes We exclude liability in principle if the device is not...

Page 5: ...s programme Viewing Main Menu Menu screen cannot be displayed by using the control switch AV Mode Press the control switch consecutively until the source OSD is displayed on the screen Operation with the Remote Control Press the MENU button on your remote control to display the main menu screen Use the or buttons to select a menu tab and press the OK button to select option Use the or buttons to s...

Page 6: ...al in TXT mode 27 Programme up down 28 Mute 29 Previous programme Now in EPG mode 30 Numeric buttons 31 AV Source TV NOTE The Remote Control range is approximately 7m 23ft Using My button 1 Press MYBUTTON 1 for five seconds when on a desired source channel or link until the MY BUTTON IS SET message is displayed on the screen This confirms that the selected MY BUTTON is now associated with the sele...

Page 7: ...recommend that you plug all your cables into the back of the TV before mounting on the wall Insert or remove the CI module only when the TV is SWITCHED OFF You should refer to the module instruction manual for details of the settings AV Connection Cable supplied Scart Connection back VGA Connection back PC YPbPr Audio Connection back HDMI Connection back side S PDIF Optical Out back S PDIF Side AV...

Page 8: ...hed to standby mode the standby LED can blink to indicate that features such as Standby Search Over Air Download or Timer is active The LED can also blink when you switch on the TV from standby mode First Time Installation When turned on for the first time the language selection menu appears The message Welcome please select your language is displayed and all language options are listed alphabetic...

Page 9: ...types of USB devices e g MP3 Players or USB hard disk drives memory sticks may not be compatible with this TV The TV supports FAT32 and NTFS disk formatting but recording will not be available with NTFS formatted disks Note While formatting a USB hard disk that has 1TB Tera Byte or more file capacity you can experience problems with the formatting process Quickly plugging and unplugging USB device...

Page 10: ... up or down by using or buttons while in 14 9 Zoom Cinema or Subtitle Using the Channel List The TV sorts all stored stations in the Channel List You can edit this channel list set favourites or set active stations to be listed by using the Channel List options Press the MENU button to view the main menu Select the Channel List item by using Left or Right button Press OK to view menu contents Sele...

Page 11: ... set to one of these options Low Medium High or Off Colour Temp Sets the desired colour tone Picture Zoom Sets the picture size to Auto 16 9 Subtitle 14 9 14 9 Zoom 4 3 or Cinema HDMI True Black While watching from a HDMI source this feature will be visible in the Picture Settings menu You can use this feature to enhance the blackness in the picture Film Mode Films are recorded at a different numb...

Page 12: ... the headphone jack you can select this option as Lineout If you have connected headphones to the TV set this option as Headphone Dynamic Bass Enables or disables the Dynamic Bass Surround Sound optional Surround sound mode can be changed as On or Off Digital Out Sets digital audio output type Install and Retune Menu Contents Automatic Channel Scan Retune Digital Aerial Searches and stores aerial ...

Page 13: ... track for blind and visually impaired viewers of visual media including television and movies You can use this feature only if the broadcaster supports the additional narration track Auto TV Off You can set the timeout value of the auto off feature After the timeout value is reached and the TV has not been operated for a selected time the TV will go into standby mode Standby Search optional If yo...

Page 14: ...Timer option The timer will be cancelled Note It is not possible to record two channels at the same time Recording a Programme IMPORTANT When using a new USB hard disk drive it is recommended that you first format the disk using your TV s Format Disk option To record a programme you should first connect a USB disk to your TV while the TV is switched off You should then switch on the TV to enable t...

Page 15: ...gs Library Slow Forward If you press PAUSE button while watching recorded programmes the slow forward feature will be available You can use button to slow forward Pressing button consecutively will change slow forwarding speed Recordings Library To view the list of recordings select Recordings Library and press the OK button The Recordings Library will then be displayed with available recordings A...

Page 16: ...C Do not spray cleaner directly onto the surface of the product This may result in discoloration and cracks and may cause the screen display to peel off Do not let water come into contact with the product when cleaning it Ensure that water does not enter the product This may result in an electric shock or fire Since the surface of the product is easily scratched make sure you clean the product wit...

Page 17: ...0x1024 85Hz 36 1360x768 60Hz 37 1400x1050 60Hz 38 1400x1050 75Hz 39 1400x1050 85Hz 40 1440x900 60Hz 41 1440x900 75Hz 42 1600x1200 60Hz 43 1680x1050 60Hz 44 1920x1080 60Hz 45 1920x1200 60Hz Appendix B AV and HDMI Signal Compatibility Input Signal Types X Not Available O Available In some cases a signal on the TV may not be displayed properly The problem may be an inconsistency with standards from t...

Page 18: ...udio Movie dat mpg mpeg Mpeg1 2 MPEG1 2 Layer 1 2 ts trp tp m2ts MPEG2 vob mkv MPEG1 2 mp4 mov avi asf wmv MPEG2 Music mp3 MPEG1 Layer 1 2 3 MP3 OGG OGG wav LPCM WMA ASF WMA WMA Pro m4a aac AAC HEAAC Photo jpg jpeg Baseline JPEG png Progressive JPEG bmp non interlace png interlace Subtitle sub srt ...

Page 19: ...nds until the red light on the Sky remote control blinks twice 4 Key in 065 The light on the Sky remote control should blink twice 5 Press the STANDBY button on your Sky remote control If your TV switches off press SELECT The light on the Sky remote control blinks twice Now try the other functions Specifications RF AERIAL INPUT 75 Ohm unbalanced OPERATING VOLTAGE 220 240V AC 50 Hz AUDIO OUTPUT POW...

Page 20: ...50238563 ...

Reviews: