


Contact us for assistance: (866) 985-7877 | www.wtliving.com
6
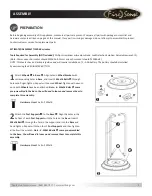
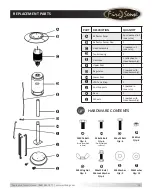
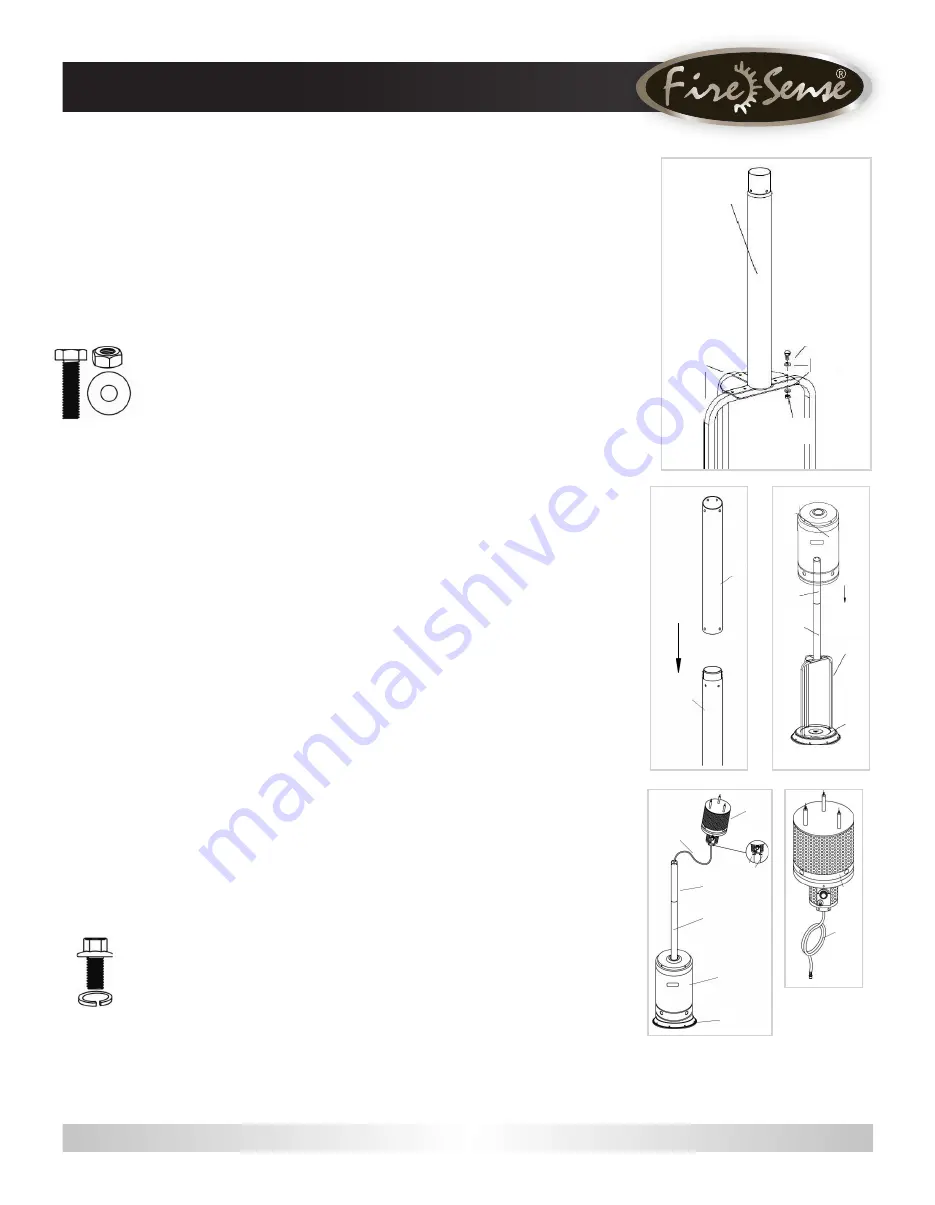
ASSEMBLY
3
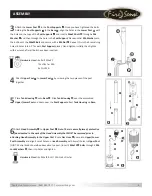
Attach the Lower Post
H
to the Post Supports
J
. Once you have tightened the bolts
holding the Post Supports
J
to the Base
K
, align the holes in the Lower Post
H
with
the holes on the tops of the Post Supports
J
and insert a M6x22 Bolt
O
through a M6
Washer
T
and then through the hole in the Post Support. Place another M6 Washer onto
the bottom of the M6x22 Bolt and secure with a M6 Nut
P
. Repeat this in the 5 remaining
holes (6 holes total—2 for each Post Support piece). Hand-tighten initially, then tighten
with a wrench after all bolts have been inserted.
Hardware Used: 6x Bolt M6x22
12x Washer M6
6x Nut M6
4
Attach Upper Post
F
to Lower Post
H
by screwing the two pieces of the post
together.
5
Place Tank Housing
D
onto Base
K
. Slide Tank Housing
D
over the assembled
Upper/Lower Post and down over the Post Supports. Rest Tank Housing on Base.
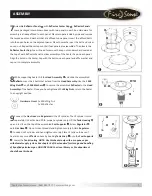
6
Attach Head Assembly
C
to Upper Post
F
. Note: There is a small piece of protective
foam located in the neck of the Head Assembly that MUST be removed prior to
attaching Head Assembly to the Upper Post. Route Gas Hose
E
down into Upper/Lower
Post Assembly and align 4 small holes on Head Assembly with 4 small holes in Upper Post.
[HINT: Control knob should be above decal on post.] Insert 4 M6x12
R
bolts through 4 M6
Lock Washers
R
, then into holes and tighten.
Hardware Used: 4x M6x12 Bolt / M6 Lock Washer
3
4
5
6
6
C
E
D
K
H
F
E
C
K
J
H
F
F
H
D
J
H
O
T
P
R


