Page | 7
3.8
Cabling Requirements
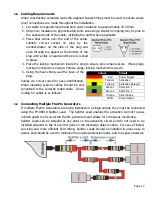
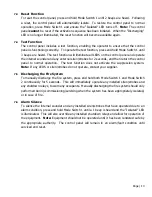
When constructing extension leads the supplied Deutsch Plugs must be used to ensure water-
proof connections are made throughout the installation.
1.
Cut cable to required length and strip outer insulation to approximately 25-30mm.
2.
Strip inner insulation to approximately 6mm and using a Deutsch Crimping tool, fix pins to
the exposed ends of the cable, including the earth where applicable.
3.
Place heat shrink over the end of the cable.
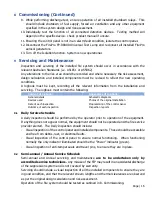
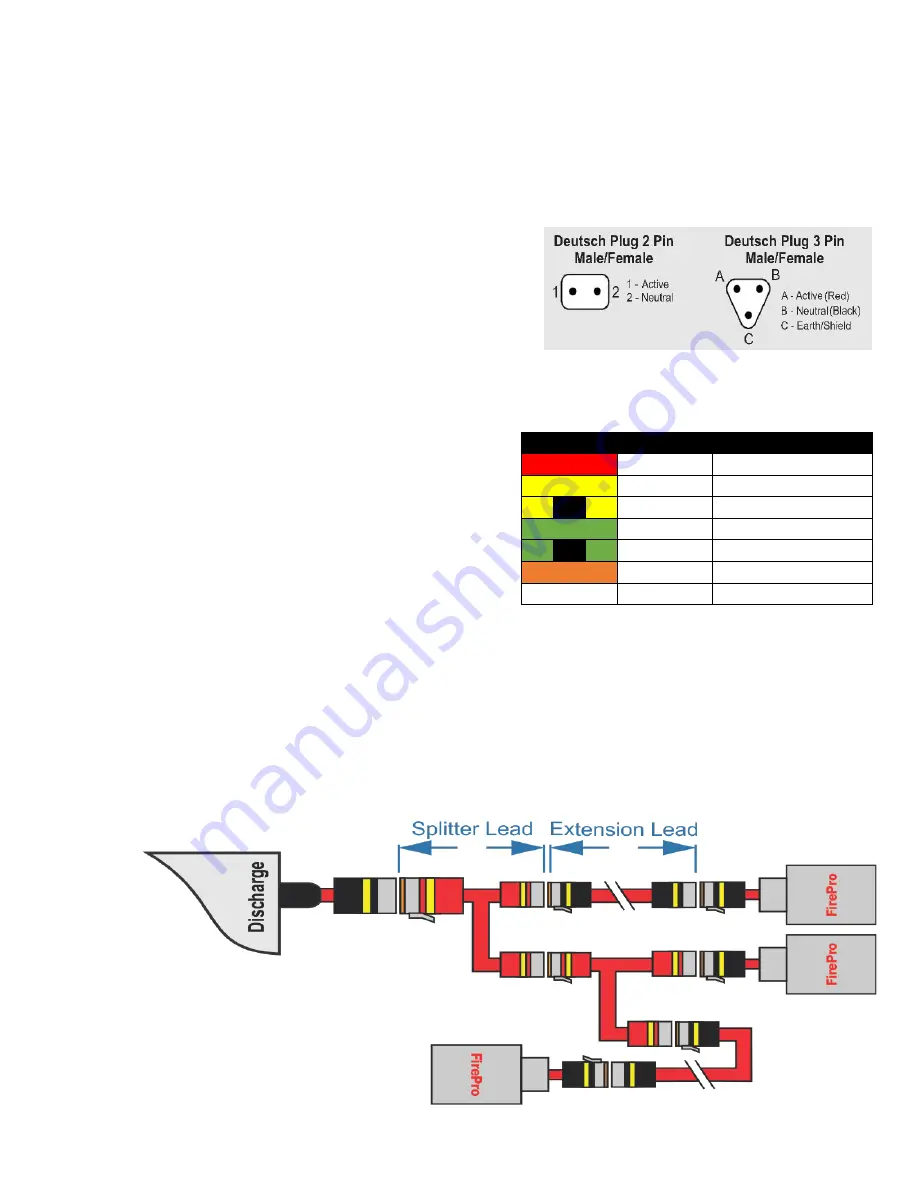
Identify correct socket on plug by the
numbers/letter on the side of the plug and
push through the gasket at the bottom of the
plug until a click is heard and the pin is locked
in place.
4.
Place the locking mechanism inside the plug to ensure pins remain secure. (Male plugs;
locking mechanism is orange. Female plugs; locking mechanism is green).
5.
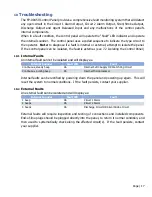
Using the heat shrink, seal the back of the
plug.
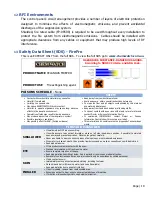
Cables are colour coded for easy identification.
When installing system, cables should be only
connected to the correctly coded cable. Colour
Coding for cables is as follows:
3.9
Connecting Multiple FirePro Generators
If multiple FirePro Generators are being installed on a single output, they must be connected
using the FP-08918 Splitter Lead. The Splitter Lead enables the activation current to pass
uninterrupted to all connected FirePro generators and allows for continuous monitoring.
Splitter Leads can be installed at any point on the activation circuit and do not need to be
installed adjacent to the fire control panel or the discharge delay module. For ease of install,
servicing and more efficient field wiring, Splitter Leads should be installed in areas easy to
access and should be used to minimise the required extension leads, and to bypass obstacles.
Colour
Circuit
Red
Power Supply
Yellow 1
Activation
Yellow 2
Activation Delayed
Green 1
Detection 1
Green 2
Detection 2
Orange
Siren/Strobe
White
Relay Output


