background image

Contact us for assistance:  (866) 985-7877  |   www.

balkenehome.com


ASSEMBLY

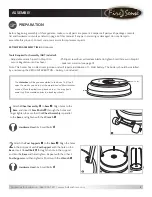
3

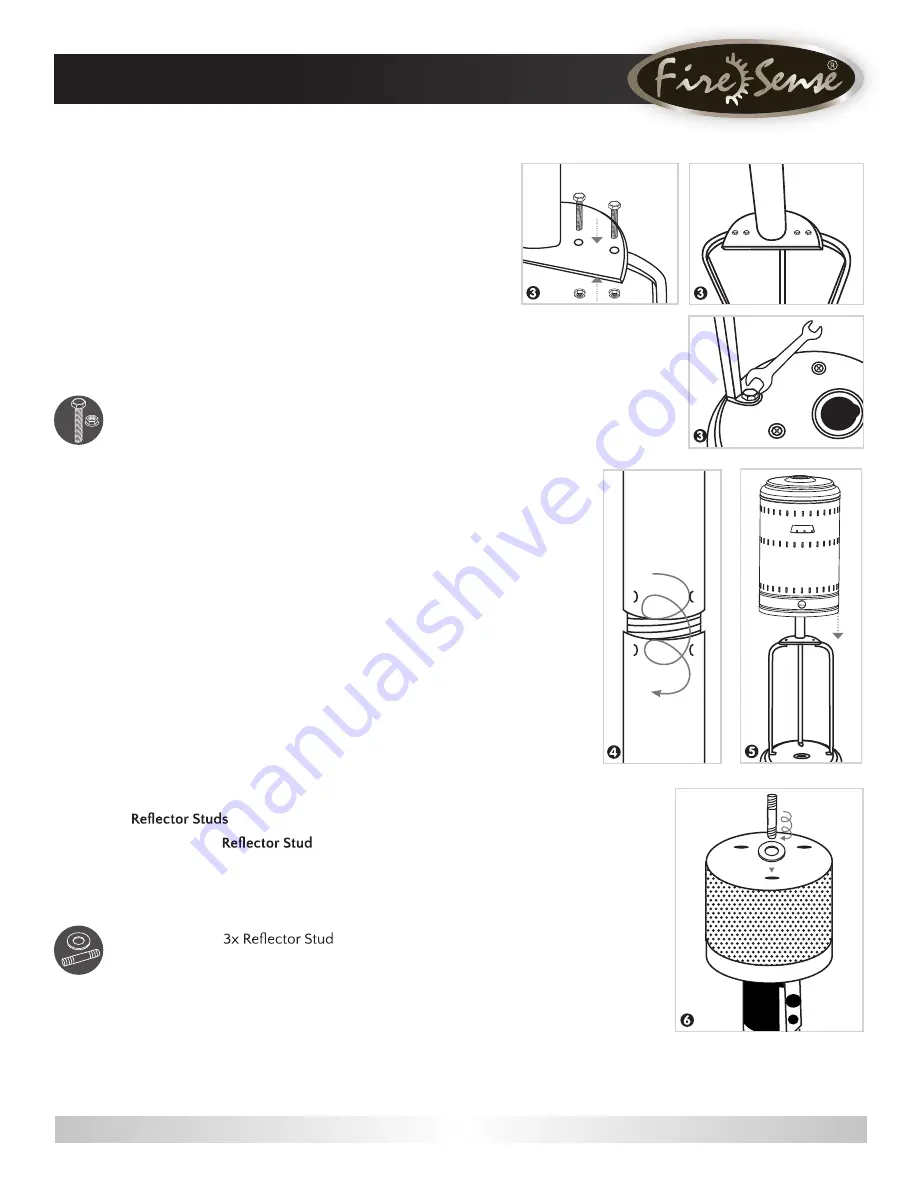
Attach the 

Lower Post


G

 to the 

Post Supports


I

. Once 

you have tightened the bolts holding the 

Post Supports


I


to the 

Base 

J

, align the holes in the 

Lower Post


G

 with the 

holes on the tops of the 

Post Supports

 and insert a 

Large  

Bolt


 through the hole in the 

Post Support

. Secure with a 

Small Flange Nut 

!

. Repeat this in the 5 remaining holes (6 

holes total—2 for each

 Post Support 

piece). Hand tighten 

initially then tighten with the 

Wrench


(


when all bolts 

have been inserted.

Hardware Used:

 6x Large Bolt 


  6x Small Flange Nut 

!

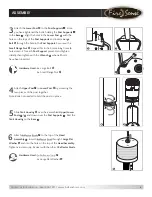
4

Attach 

Upper Post


F

 to 

Lower Post 

G

 by screwing the 

two pieces of the post together.  

Note: Bolts not needed to hold the posts in place.

5

Slide 

Tank Housing


D

 over the assembled 

Upper/Lower 

Posts 

F

/

G

 and down over the 

Post Supports 

I

. Rest the 

Tank Housing

 on the 

Base


J

.

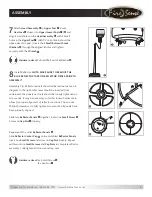
6

Attach  

"

¿

to the top of the 

Head

½

Assembly


C

. Insert 1 

 through 1

 Large Flat

Washer 

#

½

and into the hole on the top of the 

Head Assembly

.

¿

Tighten stud securely. Repeat with the other 2

¿

,gtŠgU¿”³½-¿Å_

¦


Hardware Used:

"

  3x Large Flat Washer 

#

6

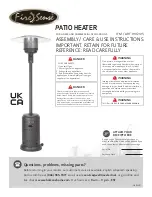
Summary of Contents for 1902415

Page 1: ...t in death serious bodily injury and property loss or damage from hazards t t g g L and or carbon monoxide poisoning Only persons who can understand and follow the instructions should use or service t...

Page 2: ...e and live chat at www balkenehome com Our hours are 9 a m p m EST English Spanish speaking This manual contains important information about the assembly operation and maintenance of this patio heater...

Page 3: ...g T Use as a heating appliance only Never alter in any way to use with any device WARNING Certain materials or items when stored under the heater will be subject to radiant heat and could be seriousl...

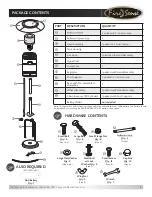
Page 4: ...rtons B 1 C Head Assembly 1 packed in 1 inner carton D Tank Housing 1 E Gas Hose 1 attached to Head Assembly F Upper Post 1 G Lower Post 1 H Regulator 1 packed with Head Assembly I Post Supports 3 pac...

Page 5: ...bolts with the Wrench Hardware Used 3x Small Bolts Waterbox Cap Base PREPARATION Before beginning assembly of this appliance make sure all parts are present Compare all parts with package contents li...

Page 6: ...Support piece Hand tighten initially then tighten with the Wrench when all bolts have been inserted Hardware Used 6x Large Bolt 6x Small Flange Nut 4Attach Upper Post F to Lower Post G by screwing the...

Page 7: ...are Used 4x Small Bolt w Lock Washer 8 g gU NOTE MAKE SURE TO REMOVE THE BLUE REFLECTOR TAPE ON REFLECTOR PIECES PRIOR TO ASSEMBLY g L gt gU g _ Lg _ gg _ y g y U g _ Lg g g_ t _g g g g _ _ Lg g y g g...

Page 8: ...assembled Post Supports I Screw Regulator H onto Gas Hose E Do not cross thread Hand tighten securely then tighten with _ L g g U U _g_ Attach the Regulator to the valve on the LP cylinder and hand t...

Page 9: ...l gas code ANSI Z223 1 NFPA54 natural gas and propane Installation Code CSA B149 1 or propane storage and handling code B149 2 A dented rusted or damaged propane cylinder may be hazardous and should b...

Page 10: ...t attempt to operate this appliance until you have read and understand all Safety Information in this manual and all assembly is complete and leak tests have been performed OPERATING INSTRUCTIONS WARN...

Page 11: ...ast 5 minutes before attempting to re light the heater 8 Turn the gas cylinder valve to OFF or closed If you experience any ignition L g g g U Troubleshooting on page 1u Caution Avoid inhaling fumes g...

Page 12: ...material should not be hung from the heater or placed on or near the heater Any guard or other protective device removed for servicing the heater must be replaced prior to operating the heater _ g _ L...

Page 13: ...g g g y t g T g g _ g g U g _g g_ g g g T g g y g Ug g g g T g g g y g T _g _ gU U g L g Ug _ yg condition can damage heater and render it unsafe for use Clean burner holes by using a heavy duty pipe...

Page 14: ...n gU y Igniter fails Use stick lighter to manually light Gas pressure low with valve open full Replace cylinder or regulator New cylinder or 1st ignition Purge air from lines _g g y Replace hose regul...

Page 15: ...1 30 mbar G30 G31 37 mbar AT CH DE SK PL BE CY DK EE FI FR HU IT LT NL NO SE SI SK RO HR TR BG IS LU MT G30 28 30 mbar G 31 37 mbar BE CH CY CZ ES FR GB GR IT IT LT LU LV PT SK SI 13 5 kW 13 5 kW 5 05...

Page 16: ...inner carton J Base with Pre assembled Waterbox 1 K Wheel Assembly 1 packed with Head Assembly L Chain Secures LPG Cylinder 1 packed with Post Supports A B C D E F G H I J K L Questions problems miss...

Page 17: ...h guarantees that cannot be excluded under the Australian Consumer Law You are entitled to a replacement or refund for a major failure and for compensation for any other reasonably foreseeable loss or...

Reviews: