© 2020 Carrier
41
THE AUTO CONFIG MENU
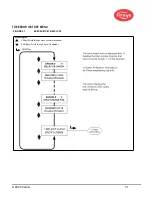
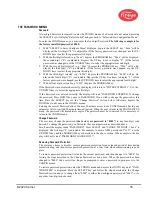
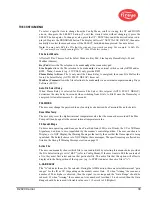
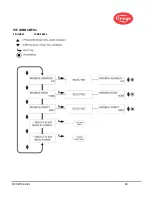
Auto Configuration is an automatic calibration function whereby the InSight Series 4 scanner scans
the flame flicker frequency spectrum with flame ON, and with flame OFF (background radiation
present). The scanner will then select the sensor gain, and bandpass frequency for optimum flame
ON: OFF discrimination.
Auto Config is performed in 3 steps:
1.
Run the target flame at the low firing rate. Enter the Automatic Config menu loop, and the GAIN
RANGE value for the appropriate file (A, B, C, or D) is displayed. P r es s t h e S E L EC T k ey an d th e
U V A I M (o r IR A I M ) v a lu e i s d i s p lay ed o n th e b o tto m ro w . Ad ju s t th e GA I N
R A N GE an d p hysically aim the scanner for o p t i m u m peak signal strength as described in the
“Aim Scanner” section below. Press the PROGRAM or SELECT key when complete.
2.
Press the DOWN key until the appropriate “START LEARN... ON” message is displayed then press
SELECT. Press PROGRAM and the scanner will memorize the flame ON condition as described in
the “Learn ON” section below. Press the DOWN key when complete.
3.
Turn the target flame off. Press the DOWN key until the appropriate “START LEARN... OFF” mes-
sage is displayed then press SELECT. Press PROGRAM and the scanner will memorize the flame
OFF condition as described in the “Learn OFF” section below. Press the DOWN key when complete.
Note: For proper operation, both a Learn Flame ON and a Learn Flame OFF procedure must be
performed.
AIM SCANNER
Scroll to “SELECT to ENTER AUTOMATIC CONFIG” and press the SELECT key. The GAIN RANGE
value for the appropriate file (A, B, C, or D) is displayed. P r e s s th e S E L EC T k ey an d th e UV AI M (o r
I R A IM ) v alu e i s d i s p l ay e d o n th e b o t to m ro w . The AIM value represents the flame flicker
intensity of the flame for
the entire flicker frequency spectrum
as sensed by the UV sensor or IR sensor.
Run the flame at low fire rate and observe the signal intensity.
The AIM number should be at its peak (highest numerically) when the scanner is aimed at the primary
combustion zone (first 1/3) of the flame.
Aim the scanner at the first 1/3 of the flame to maximize the intensity reading. (Allow the scanner reading
to stabilize at least two seconds after each movement).
If the AIM reading is 10 or less, the intensity is marginal and it may be necessary to increase the GAIN
RANGE. Pressing the UP (or Down) key will increase (or decrease) the GAIN RANGE as well as
the UV (or IR) AIM value. The scanner has selectable GAIN RANGE values from 1 (lowest) to 10
(highest). The AIM Value should be set between 11 and 25, with an optimum value of 18. Use the
Up and Down keys to adjust the GAIN RANGE to achieve these AIM values.
Note: In rare applications where the flame is extremely bright, it is possible to saturate the sensor.
The symptom could be a very low signal, an erratic signal, or no signal at all. In this situation, the
installation of a sight-pipe orifice kit (P/N 53-121) is recommended.
START LEARN FR ON
To begin LEARN Flame ON, make sure flame is at LOW Fire position and press the PROGRAM
key. A prompt will display “MAKE SURE FLAME AT LOW EMISSION, PRESS PROG KEY TO
START LEARN ON.”. When the LEARN has completed, press any key to continue.
START LEARN FR OFF
To begin LEARN Flame OFF, make sure flame is OFF, then press PROGRAM key. A prompt will
display “MAKE SURE FLAME IS OFF! THEN…PRESS PROG KEY TO START LEARN OFF.”.
When the LEARN has completed, press any key to continue.
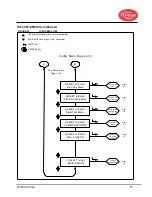
SELECT to Exit BACK to CONFIG
Return to top of the Config Menu
SELECT to Exit BACK to MAIN
Return to top of the Main Status Menu
Summary of Contents for InSight 4 Series
Page 19: ... 2020 Carrier 19 Figure 14 WIRING DIAGRAM 95UVS4 1 95IRS4 1 with 59 547 cable ...
Page 27: ... 2020 Carrier 27 THE MAIN STATUS MENU FIGURE 20 MAIN STATUS MENU LOOP ...
Page 36: ... 2020 Carrier 36 THE CONFIG MENU FIGURE 23 CONFIG MENU LOOP ...
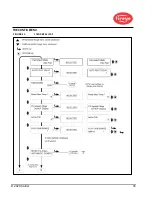
Page 40: ... 2020 Carrier 40 THE AUTO CONFIG MENU FIGURE 25 AUTO CONFIG MENU LOOP ...
Page 43: ... 2020 Carrier 43 THE FILE COPY MENU FIGURE 26 FILE COPY MENU LOOP ...
Page 45: ... 2020 Carrier 45 THE 4 20 mA MENU FIGURE 27 4 20mA MENU LOOP ...
Page 47: ... 2020 Carrier 47 THE DATE TIME MENU FIGURE 28 DATE TIME MENU LOOP ...
Page 49: ... 2020 Carrier 49 THE COMMS MENU FIGURE 29 COMMS MENU ...
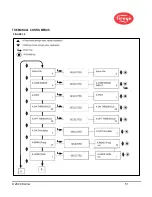
Page 51: ... 2020 Carrier 51 THE MANUAL CONFIG MENUS FIGURE 30 ...
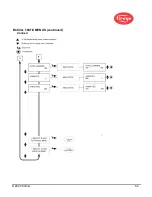
Page 52: ... 2020 Carrier 52 MANUAL CONFIG MENUS continued FIGURE 31 ...


