C
C
h
h
a
a
p
p
t
t
e
e
r
r
2
2
H
H
a
a
r
r
d
d
w
w
a
a
r
r
e
e
I
I
n
n
s
s
t
t
a
a
l
l
l
l
a
a
t
t
i
i
o
o
n
n
a
a
n
n
d
d
U
U
p
p
g
g
r
r
a
a
d
d
i
i
n
n
g
g
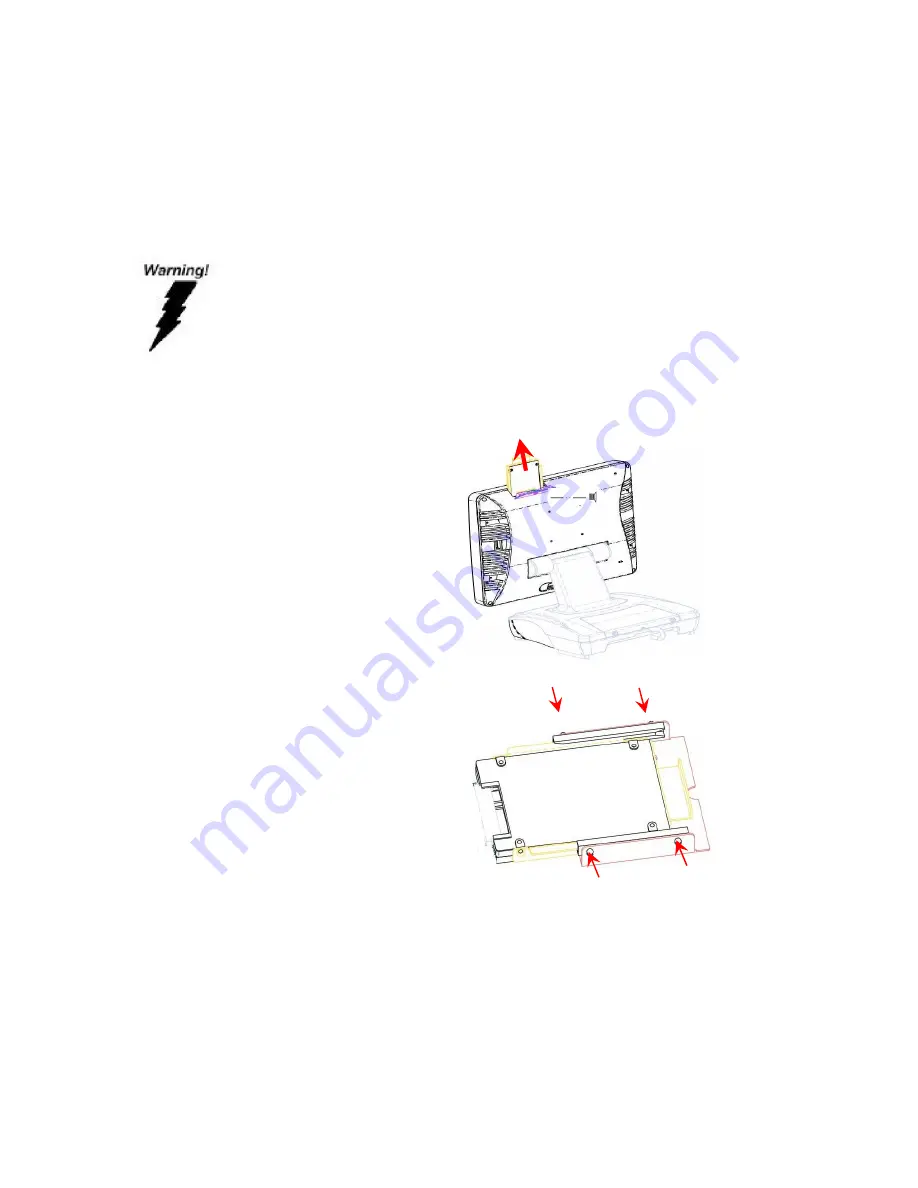
2.5” Hard Disk Drive Installation
1. Turn off power and remove power cord from the system
2. Unscrew the
maintenance cover at the
top of the unit
3. Open the cover and pull
out the HDD tray
4. Remove 4 screws to
change HDD. Fasten
back 4 screws and put
the tray back.
5. Restore the maintenance cover to the system.
6. Fix the cover with the screw.
7. Connect the power cord to the system.
Do not remove the rear cover until you have verified that no power is
supplied to the system. Power must be switched off and the power cord
must be unplugged. Every time you service the system, you should be
aware of this.
Summary of Contents for RT-665D
Page 5: ...Cash Drawer Port Is Not Functioning Properly 49 USB Device Is Not Functioning Properly 49...
Page 7: ...A Quick Tour for RT 665D Before you start take a moment to become familiar with RT 665D...
Page 8: ...RT 665D Dimension...
Page 9: ...Rear I O Panel...
Page 32: ......
Page 35: ...RT 665D 35 Step 6 Select Finish to complete the installation...


