background image


15 

V.  Troubleshooting 


My hard drive isn’t recognized 

Check cables and connections.  Ensure the 7-pin eSATA cable is properly oriented to the 

connectors on the computer and the external enclosure.  Ensure the enclosure is properly 
powered.  Make sure the hard drive(s) has been initialized for use with the OS. 


The Activity light does not blink 

The miniSwap activity light will not blink with most SSD devices and may not work with some 

2.5” SATA hard disks that do not have the correct pin configuration.  


Does the miniSwap/ES work with all PPC and Intel based Macintosh computers? 

No, the miniSwap/ES only works with computers with at least one PCI, PCI-X or PCIe slot 

available.  If your system lacks PCI, PCI-X or PCIe slots you cannot install the SeriTek/2SE4, 
SeriTek/e6G, SeriTek/2ME4-E, SeriTek/6G or the SeriTek/2SM2-E host adapter. 


Drive is difficult to insert or eject? 

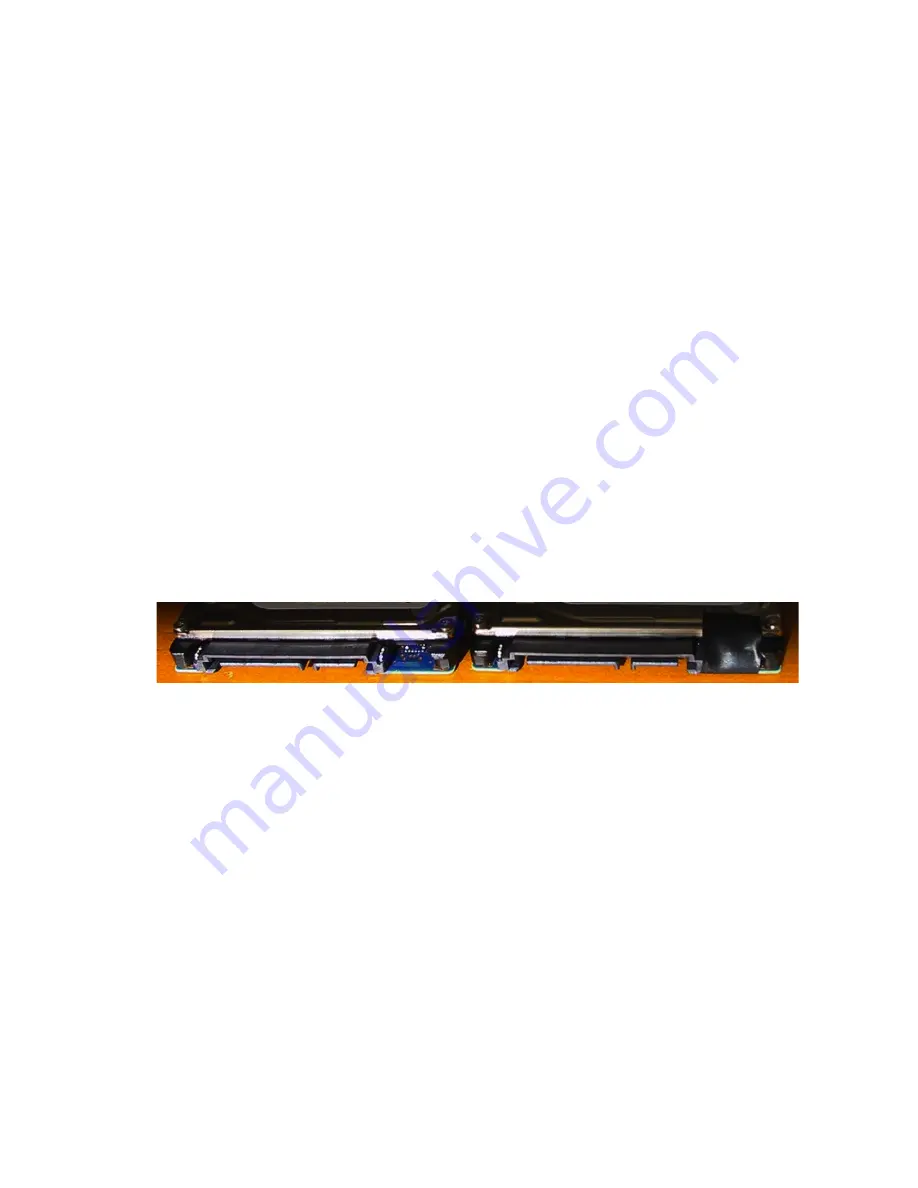
If the selected 2.5” SATA HDD has a notch in the rear left side, it may cause the disk eject 

arm to become stuck and the bay door difficult to open. 

Do not force the door open 

as this 

may damage the miniSwap. If the drive is difficult to eject, take the three screws off of each 
side of the miniSwap and remove the top. Next, push the drive forward with your finger to 
eject the drive.  

 
You can fill the notch if you wish to continue to use the drive with the miniSwap. One option 

is to use a knife to cut a small section of wood from a wooden paint stick to fill the gap.  Black 
electrical tape can be used to hold the wood in place. With this modification completed the 
drive will eject properly. Do not fill the gap with any substance that conducts electricity, as 
this can damage the HDD. 


Summary of Contents for miniSwap/ES

Page 1: ...1 Store and Share your Digital Creations miniSwap ES Dual Bay Hot Swap 2 5 External Serial ATA Enclosure User Manual...

Page 2: ...or from the use of this manual that may result from such errors including but not limited to loss of data or profits Before installing the miniSwap ES or any other hardware or software you are respons...

Page 3: ...9 Drive Installation 10 Power Operation 12 III Hot Swapping Hard Drives 13 General Hot Swap Guidelines 13 IV Sleeping Wake Up Procedures 14 V Troubleshooting 15 VI Product Support 15 VII Product Warr...

Page 4: ...r maximum durability and heat dissipation For maximum performance each hard disk is provided its own direct connect eSATA connector The unique Trayless design allows customers to easily hot swap bare...

Page 5: ...iSwap ES User s Manual Part number ES e6G also includes One SeriTek e6G 2 port PCI Express external SATA PM host adapter Part number ES 2SE2 also includes One SeriTek 2SE2 E 2 port PCI Express externa...

Page 6: ...ased RAID solutions Can be configured as JBOD or RAID and used with multiple miniSwap ES enclosures Power and Activity LEDs for each hard drive Aluminum case for maximum durability and heat dissipatio...

Page 7: ...tible with most operating system and host adapter based RAID solutions RAID arrays can span across multiple enclosures Software RAID 0 OR RAID 1 can be configured Advanced Power Features Digital power...

Page 8: ...PCIe PCI X and PCI to SATA host adapters Such as SeriTek e6G SeriTek 2ME4 E SeriTek 6G SeriTek 2SM2 E and SeriTek 2SE4 with shielded eSATA I type receptacle 2 5 SATA 1 5G 3G 6G hard drive or SSD any...

Page 9: ...se or a port access cover to discharge any built up static electricity from your body Make sure to handle the hard drives around the edges to avoid damage by static electricity Getting Started This se...

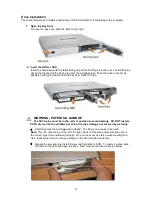
Page 10: ...POTENTIAL DAMAGE The SATA pins must be in the correct position to avoid damage DO NOT insert a PATA device into the miniSwap as this will cause damage not covered by warranty Carefully press the mini...

Page 11: ...erial ATA Connector Types L shaped I shaped eSATA Figure 3 Serial ATA Cable Connectors Ship with the miniSwap ES Both ends of the cable have eSATA type I connectors Making the SATA Connections Caution...

Page 12: ...he mode Front Panel Status Lights Activity Lights On the front of the miniSwap ES Dual Bay Enclosure are two multi color status activity lights These lights appear on the right side of each bay door T...

Page 13: ...e before removing it As a general rule power down the miniSwap ES external enclosure after powering down the computer Power on the external enclosure before powering on the computer If RAID volumes sp...

Page 14: ...stored in cache memory To reconnect the external hard drive reconnect it and Windows will automatically detect it If you are re attaching a hard drive after the remove disable operation as explained...

Page 15: ...not install the SeriTek 2SE4 SeriTek e6G SeriTek 2ME4 E SeriTek 6G or the SeriTek 2SM2 E host adapter Drive is difficult to insert or eject If the selected 2 5 SATA HDD has a notch in the rear left si...

Page 16: ...Tek is not responsible for lost or damaged packages FirmTek reserves the right to determine whether the product is to be repaired or replaced with refurbished parts or with a new or refurbished produc...

Page 17: ...nt generates uses and can radiate radio frequency energy and if not installed and used in accordance with the instruction manual may cause harmful interference to radio communications However there is...

Reviews: