S
ERVICE
M
ODEL
400-CE R
ESTAURANT
R
ANGES
C
ALIBRATION OF
O
VEN
T
HERMOSTAT
The oven thermostat control is carefully calibrated at the factory so that its dial settings closely match actual oven
temperatures. Field recalibration is seldom necessary, and should not be resorted to unless considerable experience
with unexpected cooking results definitely proves that the control is not maintaining the temperatures to which the dial
is set.
Do not recalibrate the oven thermostat until after the oven bypass flame has been adjusted (see previous procedure).
When checking the oven temperature, use a test instrument or a reliable mercury thermometer positioned in the
center of the oven. The oven bottom must be in place. For convection ovens, the blower baffle must be in place.
Proceed as follows:
1. Place the thermometer or the thermocouple of the test instrument on an oven rack in the center of the oven.
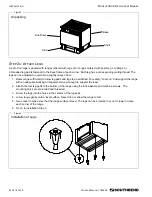
2. Remove the thermostat knob and push out its metal insert (see illustration on page 27).
3. Replace the thermostat knob and turn it to the 200°C (400°F) mark. Check that the oven burner comes on.
4. After oven burner has been on about 15 minutes, check the oven temperature. Open the oven door for as
short a time as possible. Use a flashlight, if necessary, to see the thermometer or test instrument clearly.
5. Continue to check the temperature at five-minute intervals until two successive readings are within 3°C (5°F)
of each other. If successive readings continue to vary too much, first check the bypass-flame level. If the
temperature still will not stabilize, replace the oven thermostat.
6. If the stable, measured oven temperature is in the range 194°C to 226°C (390°F to 410°F) it is not necessary
to change the thermostat calibration. If it is outside of the temperature range, continue with this procedure.
7. Look into the thermostat knob to see the calibration screw in the stem (see illustration on page 27). Arrows
near the screw indicate which way to turn the screw to make the oven temperature higher or lower. If
necessary, scrape the paint seal off the screw. While holding the thermostat knob firmly to prevent the stem
from turning, insert a screwdriver through center of the knob, push the calibration screw inward, and turn the
screw in the appropriate direction that will increase or decrease the oven temperature to make the measured
temperature agree with the dial setting. Turn the screw only in small increments until the stable, measured
oven temperature is in the range 194°C to 226°C (390°F to 410°F).
8. Turn the thermostat knob to the 230°C (450°F) mark. Allow the oven to heat until two successive readings
made five minutes apart are within 3°C (5°F) of each other. If the stable, measured oven temperature is now in
the range 224°C to 236°C (440°F to 460°F) it is not necessary to further adjust change the thermostat
calibration. If the oven temperature cannot be set correctly, replace the thermostat.
9. Replace the knob insert that was removed in Step 2.
C
ONVERSION FROM
O
NE
T
YPE OF
G
AS TO
A
NOTHER
Each range is shipped adjusted and equipped for a specific type of gas (either natural gas or propane). To convert a
range from one type of gas to another, do the following:
1. Refer to service procedures to access all burner orifices.
2. Refer to instructions included with conversion kit.
3. Follow all steps as indicated in the conversion kit.
4. Check for leaks and proper manifold pressure (the procedure is on page 24).
5. Re-light all pilots and check for proper operation.
Note: A kit for conversion to a different type of gas may be purchased from Southbend.
P
AGE
26
OF
40
O
WNER
’
S
M
ANUAL
1182499
Summary of Contents for Southbend 436A-CE
Page 37: ...MODEL 400 CE RESTAURANT RANGES Notes PAGE 36 OF 40 OWNER S MANUAL 1182499...
Page 38: ...MODEL 400 CE RESTAURANT RANGES Notes OWNER S MANUAL 1182499 PAGE 37 OF 40...
Page 39: ...MODEL 400 CE RESTAURANT RANGES Notes PAGE 38 OF 40 OWNER S MANUAL 1182499...
Page 40: ...MODEL 400 CE RESTAURANT RANGES Notes OWNER S MANUAL 1182499 PAGE 39 OF 40...


