background image

3  


Contents: 

Filling Siphon 

22


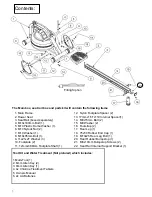
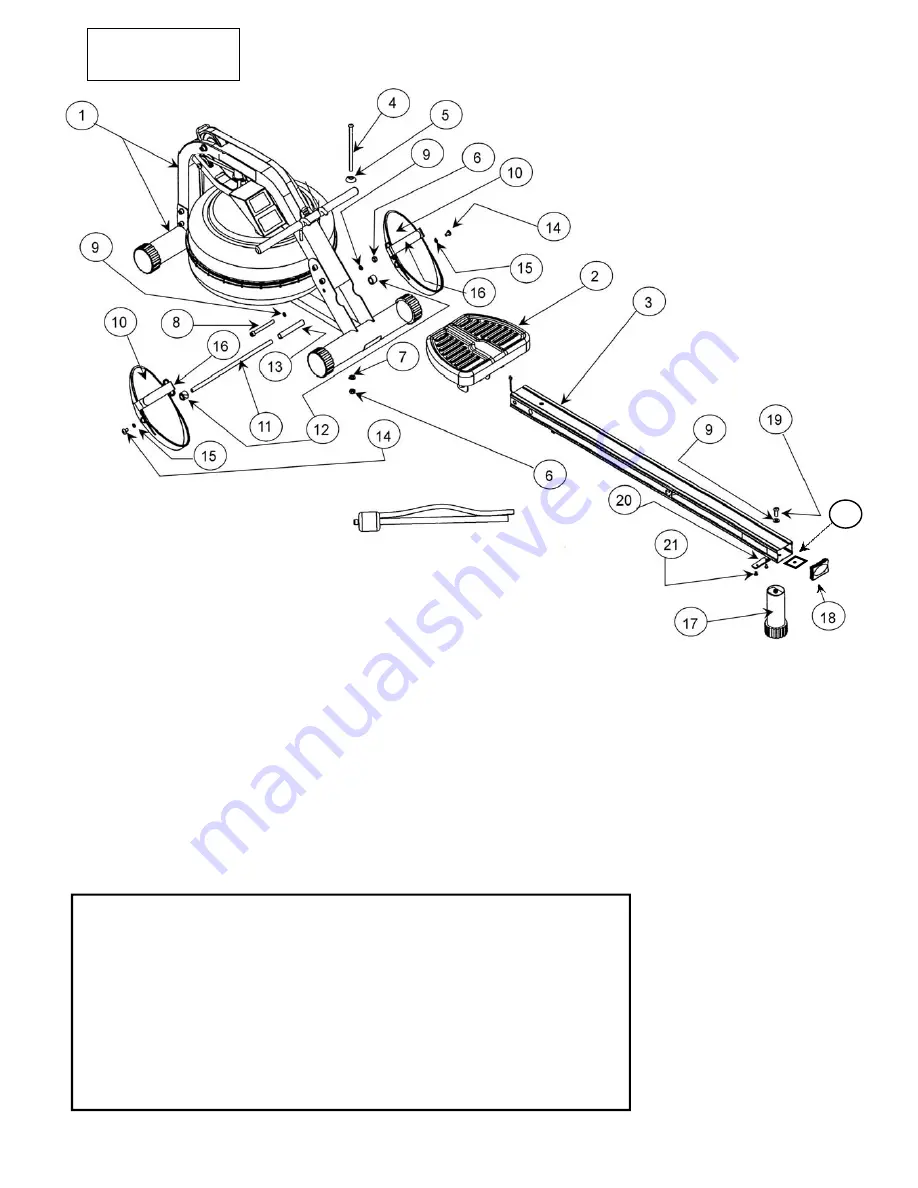
The Main box, seat rail box and parts kit will contain the following items 

1. Main Frame. 
2. Rower Seat 
3. Seat Rail (boxed separately) 
4. M10x180mm Bolt (1). 
5. M10 Plastic Dome Washer (1). 
6. M10 Nylock Nut (2). 
7. M10 Washer (1). 
8. M10x95mm Bolt (1). 
9. 11x21x2T Washer (3) 
10. Footplate (2) 
11. 12mmx388mm Footplate Shaft (1) 

12.  Nylon Footplate Spacer (2) 
13. 17mmx1.5Tx110 Internal Spacer(1) 
14.  M8x15mm Bolt (2) 
15.  M8 Washer (2) 
16.  Footstrap (2) 
17.  Rear Leg (1) 
18.  75x50 Rubber End Cap (1) 
19.  M10x25 Rear Leg Bolt (1) 
20.  Rear Rubber Bumpstop (1) 
21.  M6x10mm Bumpstop Screws (2) 
22.  Seat Rail Internal Support Bracket (1) 


Tool Kit and Water Treatment (Not pictured) which includes: 

 
1. Multi-Tool  (1) 
2. 6mm Allen Key (2) 
3. 8mm Allen Key (1) 
4. 4x Chlorine Treatment Tablets 
5. Owners Manual  
6. 2x AA Batteries 

Summary of Contents for Neptune Challenge

Page 1: ...Owners Manual...

Page 2: ...1 As with any piece of fitness equipment consult a physician before beginning your Neptune Challenge Rower exercise program 2 Follow instructions provided in this manual for correct foot position and...

Page 3: ...late 2 11 12mmx388mm Footplate Shaft 1 12 Nylon Footplate Spacer 2 13 17mmx1 5Tx110 Internal Spacer 1 14 M8x15mm Bolt 2 15 M8 Washer 2 16 Footstrap 2 17 Rear Leg 1 18 75x50 Rubber End Cap 1 19 M10x25...

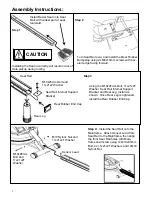
Page 4: ...nternal Support Bracket Rear Leg Seat Rail M10x25mm Bolt and 11x21x2 Washer Using the M10x25mm Bolt 11x21x2T Washer Seat Rail Internal Support Bracket and Rear Leg install as shown Once Rear Leg is ti...

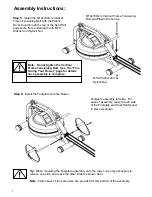
Page 5: ...our Rower page for details once assembly is complete Tip When mounting the Footplate assembly onto the rower it is only necessary to remove one side and leave the other intact as shown here Note 2 All...

Page 6: ...Leg as your guideline tighten the Vertical Frame Tensioning Bolt until the Mid Leg rises approximately 3 5mm off the floor The Mid Leg should just touch the ground during a rowing stroke Mid Leg 3 5mm...

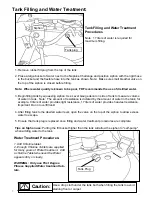
Page 7: ...tant Do not overfill tank 4 After filling tank to the desired water level open the valve on the top of the siphon to allow excess water to escape 5 Ensure that tank plug is replaced once filling and w...

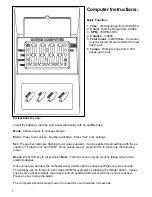
Page 8: ...ess when digits are flashing to set values upward Can be applied for all settings with the ex ception of Total Count and SPM Once values are set press Enter to move into the following mode Reset Press...

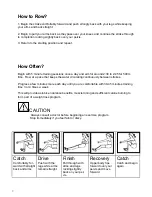
Page 9: ...inning an exercise program Stop immediately if you feel faint or dizzy Catch Comfortably for ward with straight back and arms Drive Push with the legs while arms remain straight Finish Pull through wi...

Page 10: ...the Mainframe under bungee tension alone then simply tie off at previous position If the return is too slack experiment by tightening the tension in small increments and testing until the correct tens...

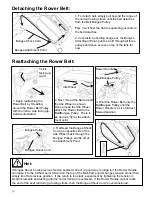
Page 11: ...Cord Bungee Attachment Point Pull Bungee through un til seated securely Removing the Bungee Shock Cord First move the Rowing Handle to it s farthest forward point on the Mainframe then cut the plastic...

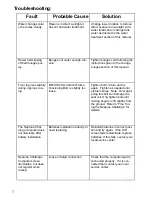
Page 12: ...tly too loose Tighten bolt 1 2 turn and try again Tighten as needed until problem stops Note Over tight ening this bolt can damage the seat rail Only tighten bolt until mid leg begins to lift slightly...

Page 13: ...13...

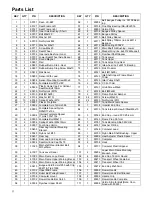
Page 14: ...32 Screw M3x20 25 10 60149 Spring Washer M10 81 24 60133 Nut Nylock M3 26 2 90901 Plastic Footplate 82 1 60137 Tank Main Frame Spacer 27 1 90902 Footplate Axle 12mmx388 83 1 60138 Impeller End Cap 28...

Page 15: ...efect in materials or work manship within 1 year of the original purchase Specific Inclusions Bungee recoil cord Hand grips foot straps Polyester rowing belt Seat All pulleys rollers bearings All rubb...

Reviews: