PERFECT WALKER II UNBOX & SET-UP GUIDE
3
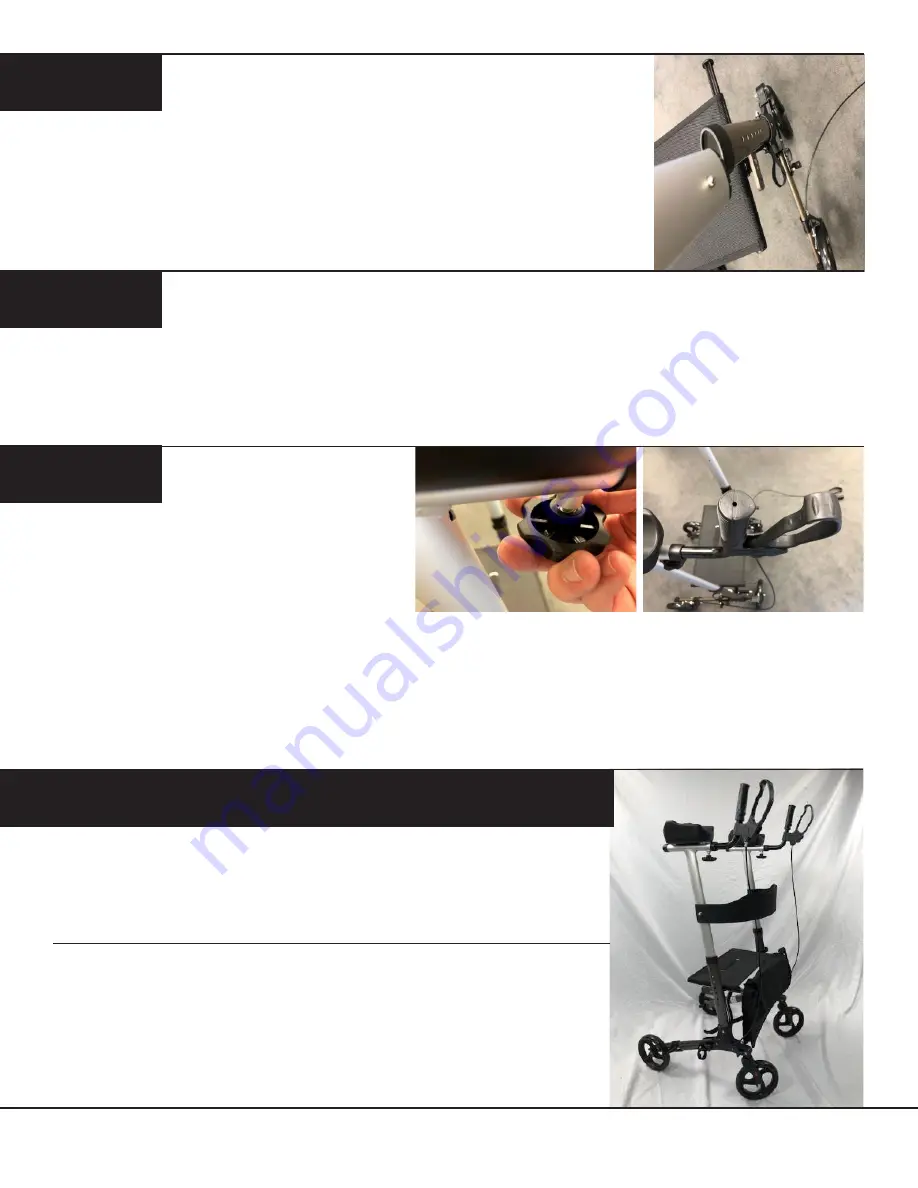
Insert the upper arms (identified with the push pins on one side of
each arm) into the right and left posts. The proper position for each
is with the push pins to the outside and the thumbwheel below the
arm cuffs facing forward.
The push pins on each arm are the way to adjust the arms for an appropriate height. This can be
done as a last step.
Insert the handles into the front of the
arm tubes. You may need to loosen the
thumbwheels under the arms to allow the
handles to be properly inserted into the
arm supports. These are adjustable. Once you have determined the appropriate length, lock the
handles into place by firmly tightening the thumbwheels in the upper arms.
At this step, check all thumbwheels for tightness and that the seat is locked firmly into place. This
ensures that the frame of the walker will remain open during use as well as when sitting in the seat.
STEP 6
STEP 7
STEP 8
Your fully assembled Perfect Walker II will look like this…the
storage bag under the seat attaches to the posts in front of the
seat using the loops on either side of the bag.
The Perfect Walker II is now ready for use. Please use it only
in accordance with its intended use as a device to assist
walking. Please note that the specified user weight may not
exceed 300 pounds and it will only hold one user at a time,
particularly when seated on the walker’s seat.
FULLY ASSEMBLED PERFECT WALKER II


