321144
92
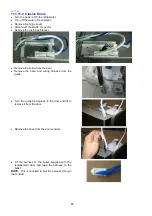
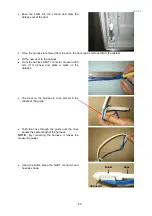
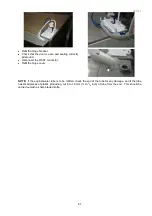
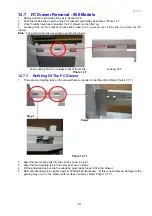
Photo 12.7.1.1
Photo 12.7.1.2
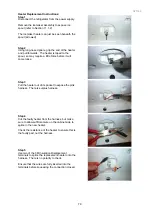
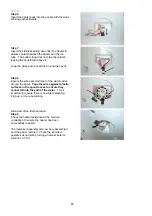
6. Place the anti-wracking pinion on an angle and slide both pinion gears into position on the slide.
7. Fit the locking tab into position as shown in Photo 12.7.1.2
12.8 PC Fan Motor - “T” Models
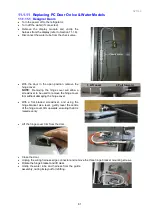
1. Disconnect the refrigerator from the power supply.
2. Remove all PC shelving.
3. Remove the bottom PC air duct cover.
4. Remove the polystyrene duct cover insulation.
5. Disconnect the low ambient heater.
6. Remove 1 screw from the top duct cover and unclip.
7. Unplug the PC fan motor plug.
8. Withdraw the fan downwards.
9. Refit in reverse order.
NOTE:
When refitting the PC fan motor, ensure there is a loop in
the wiring harness between the fan motor and its housing.
12.9 PC Fan Motor - “B” Models
1. Disconnect the refrigerator from the power supply.
2. Remove all PC shelving.
3. Remove the duct grill in the PC.
4. Remove the PC duct cover and polystyrene insulation.
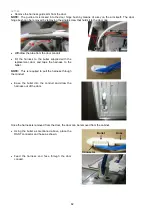
5. Using 2 fingers, withdraw the fan motor upwards. It is mounted horizontally in the divider partition.
6. With the motor out, this will expose a small multi plug and socket connection to the fan motor and wiring
harness. Unplug.
7. To refit back together, fit the wiring harness multi plug first into the pocket of the divider partition.
8. Using your 2 fingers, slip the motor back into the divider partition to fit horizontally.
NOTE:
The back of the fan motor faces upwards.
9. Refit the duct covers and test.
12.10 Defrost Element Replacement
1. Disconnect the refrigerator from the power supply.
2. Remove all the bins from the freezer and remove the FC drawer (900 Models).
3. Remove the FC cover by removing two screws. Removal of the icemaker will make removal of the FC
cover easier (Ice & Water models). (Refer Removing Icemaker, Section 11.1.2.)
4. Remove the fan grille cover. This unclips with the aid of a small screwdriver.
5. Unplug the fan motor and remove the FC sensor.
6. Lift the evaporator upwards to clear the bottom of the liner drain and pull the bottom edge of the
evaporator forward.
7. Remove the cable ties from the thermal fuses.
8. Disconnect the element from the connector.
9. Remove the end deflectors from both ends of the evaporator.
10. Using long nose pliers, bend the aluminium tabs to remove the defrost element.
11. Remove the thermal fuses from the air deflectors.
12. Refit the element in reverse order.
12.11 Thermal Fuse
This is part of the element assembly and is to be replaced as part of the defrost heater element assembly.
Having a trip temperature of 72
O
C (161
O
F), they are not resettable.
Summary of Contents for 635 Active Smart
Page 1: ...321144 Service Manual 635 680 790 900 Active Smart Refrigerator Freezer R134a R600a Systems...
Page 2: ...321144 2...
Page 96: ...321144 96 Photo 12 22 5...
Page 100: ...321144 100 Diagram 12 25...
Page 108: ...321144 108 13 11 Embraco Compressor Fitted With External Overload Diagram 13 11...
Page 114: ...321144 114 14 2 Non Ice Water Models Wiring Diagram...
Page 116: ...321144 116 14 4 Ice Water Models Wiring Diagram...
Page 117: ...321144 117 14 5 900 Models Power Control Module Wiring Connections Reciprocating Compressor...
Page 118: ...321144 118 14 6 900 Models Wiring Diagram Reciprocating Compressor...
Page 119: ...321144 119 14 7 900 Models Power Control Module Wiring Connections VC Compressor...
Page 120: ...321144 120 14 8 900 Models Wiring Diagram VC Compressor...
Page 121: ...321144 121 14 9 B Model Wiring Route Diagram 14 9...
Page 122: ...321144 122 14 10 T Model Wiring Route Diagram 14 10...
Page 145: ......


