background image

5

Installation instructions

Control panel

DELAY OFF SWITCH

: Enables the island canopy to remain on a low, mid or high speed for five 

minutes, to clear away all residual cooking odours before switching off automatically.

Fig.5 Control panel

Fan On/Off 

Mid Speed

High Speed

Delay Off Switch

Light On/Off

Getting started quickly

10

  Strip the plastic protective film off the two chimney pieces and place these over the corners. 

Note: Fisher & Paykel logo to go to the front of the product. The lower chimney will rest on top 
of the canopy hood and the upper chimney will be extended and secured to the ceiling bracket. 
To ensure that the upper chimney does not slip inside the lower chimney, secure it so that the 
upper chimney is showing. Duct tape or placing two screws/nails through the upper chimney 
securing holes will do this.

11

  Offer the island canopy, angle brackets, chimneys and ducting up to the ceiling bracket and 

secure in place with eight screws provided, one per side per corner. The dimension between the 
filters and the cooking surface should be in line with those suggested in the ‘Height of island 
canopy’ section. An additional person will be required for this operation or a simple support 
frame manufactured to the correct dimensions will aid assembly of the island canopy.

12

  Finish assembling the ducting, ensuring the path is as short, straight and smooth as possible.

13

  Connect to the supply and switch on the power using switch/socket outside the island canopy.

14

  Slide the upper chimney piece up to the ceiling and secure in place with four screws supplied.

Summary of Contents for HI120DMB1

Page 1: ...Designer series island canopy NZ AU GB IE HI120DXB1 HI120DMB1 models Installation instructions and User guide ...

Page 2: ...r care 8 Contents Important SAVETHESEINSTRUCTIONS The models shown in this User Guide may not be available in all markets and are subject to change at any time For current details about model and specification availability in your country please visit our local website listed on the back cover or contact your local Fisher Paykel dealer ...

Page 3: ...ower off prior to installation servicing or cleaning the island canopy Never use the island canopy without the filters in place Stainless steel is very easily damaged during installation if abraded or knocked by tools It is recommended to protect the top of the canopy with cardboard or polystyrene during the installation to minimise the risk of damage occurring A power outlet should be within 750 ...

Page 4: ...ts 1 x installation instructions 4 x aluminium mesh filters 4 x 12 x 40 mm screw 30 x 6 x self tapping screw 2 spare Typical equipment required Electric drill Screwdriver Duct tape Jig saw Ladder Ducting Tape measure Drill bits Spirit level Accessories Accessory Part Number Chimney ext 3048 mm 10 ceiling SS 89094 Chimney ext 3048 mm 10 IR 89095 Recirculation kit RR1744 Replacement charcoal filter ...

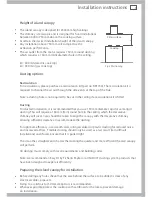
Page 5: ...will require a 160 mm min round hole in the ceiling which the decorative chimney will cover Care should be taken to align the canopy with the decorative chimney allowing sufficient clearance to accommodate the ducting For optimum efficiency use smooth wall solid galvanized or plastic ducting for reduced noise and increased airflow Flexible ducting should only be used as a last resort ie in difficu...

Page 6: ... the ceiling and into the truss b If securing to any other ceiling type please use appropriate fasteners and follow their instructions of use carefully 5 For the ducting mark out and cut a Ø160 mm min hole in the ceiling 6 Fix the ceiling bracket to the ceiling using the screws supplied 7 Using duct tape secure the ducting to the top of the motor housing Tape the power plug to the top of the ducti...

Page 7: ...cure it so that the upper chimney is showing Duct tape or placing two screws nails through the upper chimney securing holes will do this 11 Offer the island canopy angle brackets chimneys and ducting up to the ceiling bracket and secure in place with eight screws provided one per side per corner The dimension between the filters and the cooking surface should be in line with those suggested in the...

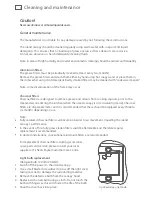
Page 8: ...ing vapours prior to the cleansed air re entering the kitchen when the island canopy is in recirculating mode Charcoal filters are disposable items and it is recommended that these should be replaced every three to six months depending on use Note Fully saturated charcoal filters can become a barrier to air movement impeding the island canopy s performance In the event of fire fully grease laden f...

Page 9: ...ther than 1 Normal domestic use or 2 Use in accordance with the Product s User Guide C Defects to the Product caused by accident neglect misuse or Act of God D The cost of repairs carried out by non authorised repairers or the cost of correcting such unauthorised repairs E Normal recommended maintenance as set out in the Product s User Guide F Repairs when the appliance has been dismantled repaire...

Page 10: ...iance Your dealer or our Customer Care Centre can recommend an Authorised Service Centre in your area In Australia if you need assistance Call the Fisher Paykel Customer Care Centre and talk to one of our Customer Care Consultants Toll Free 13 00 650 590 Fax 07 3826 9298 Email customer care fp com au Postal Address PO Box 798 Cleveland QLD 4163 If you need service Fisher Paykel Australia Pty Ltd h...

Page 11: ... number serial number date of purchase and a description of the problem This information is needed in order to better respond to your request for assistance Product Details Fisher Paykel Appliances Ltd Model Serial No Date of Purchase Purchaser Dealer Suburb Town Country ...

Page 12: ...ntinuous product improvement these specifications may change at any time You should therefore check with your Dealer to ensure this booklet correctly describes the product currently available www fisherpaykel co nz www fp com au www fisherpaykel co uk www fisherpaykel ie NZ AU GB IE Designer series island canopy Installation instructions and user guide Published 02 2009 Part No 400006 E ...

Reviews: