background image

9

OPERATING INSTRUCTIONS

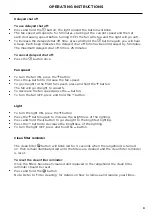
Delayed shut off 

To use delayed shut off:

Press and hold the   button, the light around the button will blink. 

The fan speed will operate for 5 minutes, starting at the current speed and then at 
each decreasing speed before turning OFF (the fan will stop and the light will go out).

To increase the delayed shut off time, press and hold the   button again, you will hear 
a beep. Each beep indicates the delayed shut off time has been increased by 5 minutes. 
The maximum delayed shut off time is 25 minutes.

To cancel delayed shut off:

Press the   button once.

Fan speed

To turn the fan ON, press the   button.

Press the   button to increase the fan speed.

To go straight to the MAX fan speed, press and hold the   button.  
The fan will go straight to speed 5.

To decrease the fan speed press the   button.

To turn the fan OFF, press and hold the   button.

Light

To turn the light ON, press the   button.

Press the   button again to increase the brightness of the lighting.

Press and hold the   button to go straight to the brightest lighting.

Press the   button to decrease the brightness of the lighting.

To turn the light OFF, press and hold the   button.

Clean filter reminder 

The clean filter 

 button will blink red for 3 seconds when the rangehood is turned 

on, then remain illuminated red until the filters are cleaned and the clean filter reminder 
is reset.

To reset the clean filter reminder:

Once the filters have been cleaned and replaced in the rangehood the clean filter 
reminder should be reset.

Press and hold the 

 button.

Note: Refer to ‘Filter cleaning’ for details on how to remove and replace your filters.

Summary of Contents for HPB12048-2

Page 1: ...INTEGRATED RANGEHOOD HPB6028 1 HPB7528 1 HPB7548 1 HPB9028 1 HPB9048 1 HPB9048 2 HPB12048 2 models USER GUIDE NZ AU ROW ...

Page 2: ......

Page 3: ... go to our website fisherpaykel com or contact your local Fisher Paykel dealer Registration Register your product with us so we can provide you with the best service possible To register your product visit our website fisherpaykel com Introduction 3 Safety and warnings 4 Special features 6 For best performance 7 Operating instructions 8 Cleaning and maintenance 12 Troubleshooting 15 Parts and acce...

Page 4: ......

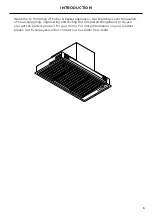
Page 5: ...liances Our team has spent thousands of hours designing engineering and testing this Integrated Rangehood to ensure you get the perfect product for your home For more information on your product please visit fisherpaykel com or contact our Customer Care team ...

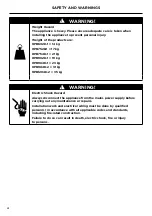
Page 6: ...B9028 1 19 kg HPB9048 1 23 kg HPB9048 2 31 kg HPB12048 2 35 kg WARNING Electric Shock Hazard Always disconnect the appliance from the mains power supply before carrying out any maintenance or repairs Installation work and electrical wiring must be done by qualified person s in accordance with all applicable codes and standards including fire rated construction Failure to do so can result in death ...

Page 7: ...sion You must read the details concerning the method and frequency of cleaning There is a fire risk if cleaning is not carried out in accordance with the instructions Never leave frying food unattended since grease can overheat and catch fire The risk of fire is even greater in the case of used oil Do not flambé under the rangehood Never use the rangehood without the filters in place During an ele...

Page 8: ...ate to remind you to clean the filters Refer to the Cleaning and maintenance section of this user guide for details of how to clean your filters Delayed shut off This feature allows you to delay the shut off on the rangehood for up to 25 minutes This enables you to continue to remove steam and cooking odours after cooking is complete Heat guard When excessive heat is detected in the cooking area a...

Page 9: ...ler surfaces Other factors like ambient temperature humidity natural ventilation of the room size of the cookware and how the induction cooktop is being used also influence condensation For example rapid boiling on high cooktop heat settings like PowerBoost increases the rate at which water is evaporated increasing the likelihood of condensation It is important to understand that neither the range...

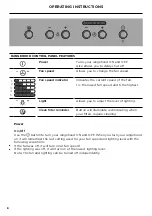
Page 10: ... to adjust the level of lighting Clean filter reminder Button will illuminate red indicating when your filters require cleaning Power On Off Use the button to turn your rangehood ON and OFF When you turn your rangehood on it will remember the last setting used for your fan speed and lighting level with the following exceptions If the fan was off it will turn on at fan speed 1 If the lighting was o...

Page 11: ...press and hold the button The fan will go straight to speed 5 To decrease the fan speed press the button To turn the fan OFF press and hold the button Light To turn the light ON press the button Press the button again to increase the brightness of the lighting Press and hold the button to go straight to the brightest lighting Press the button to decrease the brightness of the lighting To turn the ...

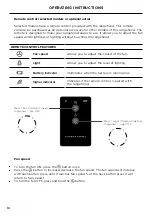
Page 12: ...djust the speed of the fan Light Allows you to adjust the level of lighting Battery indicator Illuminates when the battery is running low Signal indicator Indicates if the remote control is paired with the rangehood OPERATING INSTRUCTIONS Press Fan ON adjust speed Long press Fan OFF Press Light ON adjust lighting Long press Light OFF Fan speed To turn the fan ON press the button once Press the but...

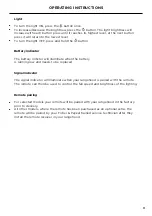
Page 13: ... illuminate when the battery is running low and needs to be replaced Signal indicator The signal indicator will illuminate when your rangehood is paired with the remote The remote can then be used to control the fan speed and brightness of the lighting Remote pairing For selected models your remote will be paired with your rangehood in the factory prior to delivery All other models where the remot...

Page 14: ...ANT Wear gloves to protect against sharp edges Clean your rangehood regularly to avoid the build up of grease Grease deposits are corrosive and may damage the rangehood Use warm water with a mild liquid detergent and a clean soft cloth to wipe down all surfaces of the rangehood Do NOT use the following to clean your rangehood they will damage and or discolour the surfaces Corrosive chemicals Abras...

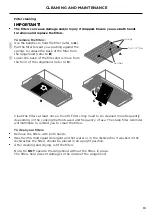
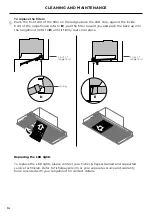
Page 15: ...to C Clean the filters at least once a month Filters may need to be cleaned more frequently depending on the cooking methods used and frequency of use The clean filter reminder will illuminate to remind you to clean the filters To clean your filters Remove the filters with both hands Wash with a mild liquid detergent and hot water or in the dishwasher If washed in the dishwasher the filters should...

Page 16: ... separate service and warranty book provided with your rangehood for contact details To replace the filters 1 Place the front end of the filter on the ledge above the LED strip against the inside front of the rangehood refer to D pull the filter toward you and push the back up into the rangehood refer to E until it firmly seats into place Front of rangehood D E Front of rangehood spring ...

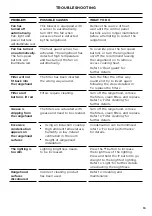
Page 17: ...nsert again following the steps detailed in To replace the filters Filter alert button is lit red Filters require cleaning Turn off the rangehood remove the filters clean filters and replace Refer to Filter cleaning for further details Grease is dripping from the rangehood The filters are saturated with grease and need to be cleaned Turn off the rangehood remove the filters clean filters and repla...

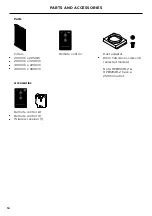
Page 18: ...m x 225mm 200mm x 300mm 400mm x 225mm 400mm x 300mm Remote control Parts Accessories Remote control kit Remote control 1 Wireless receiver 1 Duct adapter 8mm T20 drive screws 4 selected models Note HPB9048 2 HPB12048 2 have a 250mm outlet ...

Page 19: ...ur manufacturer s warranty and contacts for servicing please refer to your separate service and warranty book provided with your rangehood Complete and keep for safe reference Model Serial No Purchase Date Purchaser Dealer Suburb Town Country ...

Page 20: ...cations in this document apply to the specific products and models described at the date of issue Under our policy of continuous product improvement these specifications may change at any time You should therefore check with your Dealer to ensure this document correctly describes the product currently available ...

Reviews: