

31
US
CA
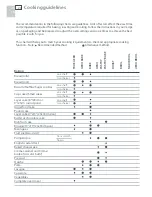
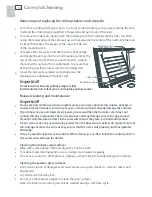
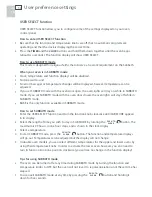
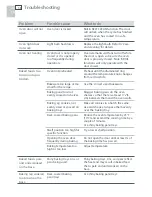
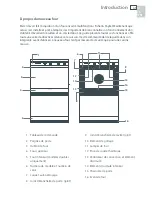
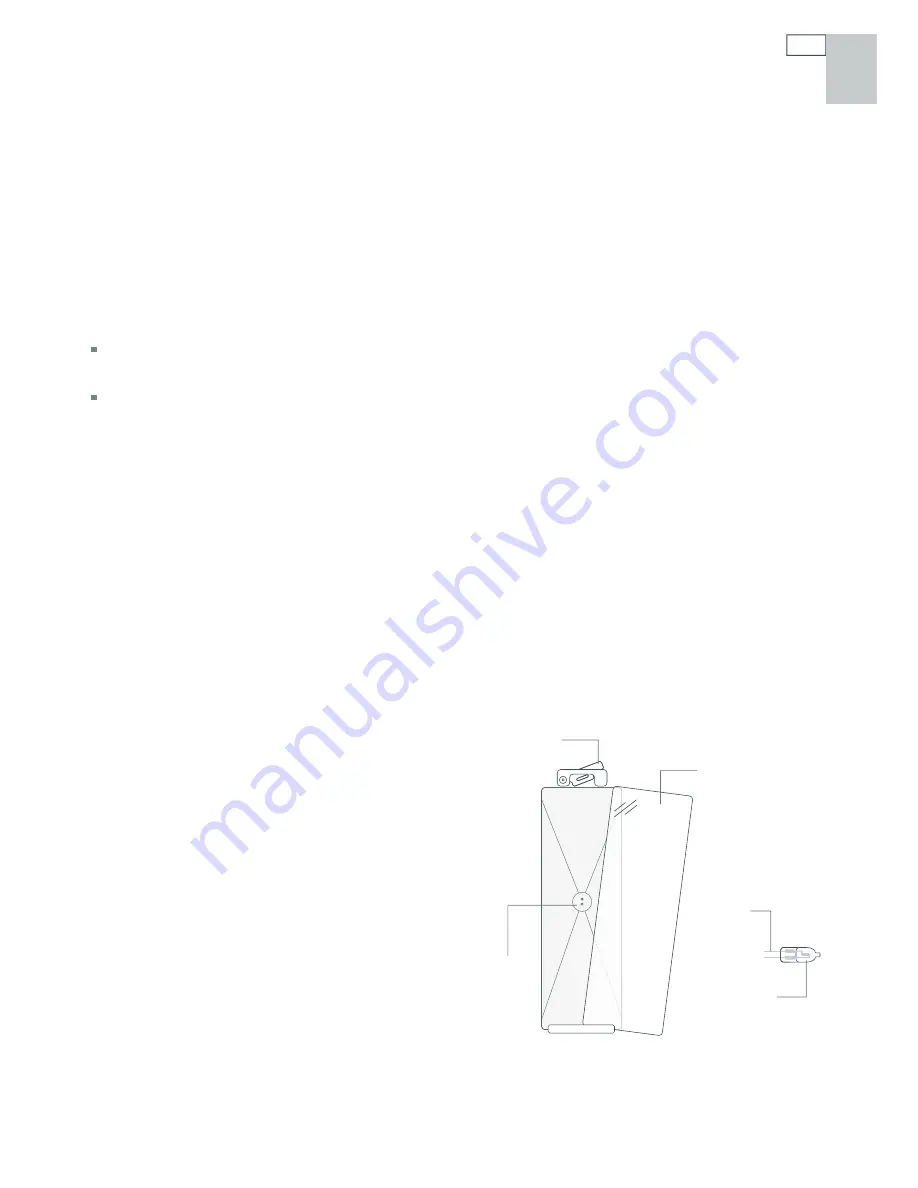
Plate glass cover
Retainer clip
Sockets for
the pins
Pins
Replacement bulb
Cleaning the porcelain enamel surfaces
The oven interior and inner door liners are porcelain enamel and are cleaned during the self-
clean cycle.
Cleaning the sliding shelves
Important!
Never leave the sliding shelves in the oven during a self-clean cycle. If you do leave them in the oven, the
slides will no longer run smoothly. If you need to relubricate the slides, wipe them with a few drops of
cooking oil on a paper towel.
Apply chrome cleaners with a damp sponge or cloth following manufacturer directions. Wipe
and dry. For hard-to-remove food soil, use a dampened soap-filled non-metal pad, wipe and dry.
Do not wash the sliding shelves in the dishwasher. Do not immerse them in soapy water, or use
oven cleaner on them. Removing the white lubricating grease will reduce the life of the shelf
slides and prevent them from running smoothly.
Cleaning the broil/roast system and side racks
Clean these using a solution of detergent and hot water. They are also dishwasher safe.
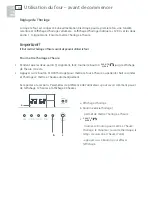
Changing the oven light bulbs
The oven is illuminated by three 12 volt/20 watt halogen bulbs. These have a very long life, but if
you should need to replace one, use only a replacement bulb purchased from your nearest Fisher
& Paykel dealer and follow these steps:
1
Allow the oven to cool completely and then turn it off
at the wall
.
2
Take out the shelves and side racks (see ‘Removing
and replacing the sliding shelves and side racks’)
and use a small flat-head screwdriver to twist
and lift the retainer clip at the top of the glass
light cover while holding the glass to prevent it
falling. The clip pivots counterclockwise (see the
diagram).
3
Carefully lift the glass cover out of the lower
support and pull out the faulty bulb.
4
Holding the replacement bulb in a soft cloth or
tissue (touching the bulb will reduce its life span),
insert the new bulb.
5
Reposition the glass cover and twist the top clip
back in place. The procedure is the same for the
light in the roof of the oven cavity.
Note: oven bulb replacement is not covered by
your warranty.
Care and cleaning


