


Service Manual 547226: OB30
December 2012
71
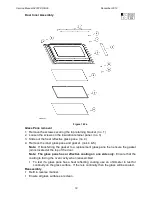
Door Hinge removal
1. Remove the heat reflective glass pane. (no. 1, refer previous)
2. Remove the door hinge retaining screw near the top of the stanchion.
3. Lift the door hinge and hinge stanchion enough to clear the edge of the door cap.
(no. 8)
Caution: The inner edges of the stainless steel door cap are sharp.
4. Separate the door hinge from the hinge stanchion. (no. 7)
Reassembly
Refit in reverse manner.
Note: If the upper hinge arm is not loaded, use an
adjustable spanner to lower the upper arm so that
the loading clip from the lower arm can be fitted.
Figure 7.22c
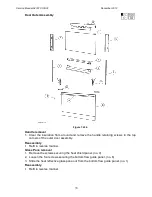
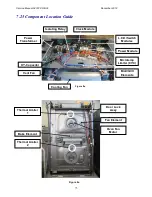
7.23
Meat Probe Socket
Location: Left hand side of the oven cavity
1. Remove the oven from the joinery cavity. (refer
to Section 7.1)
2. Remove the switch service panel adjacent to
the meat probe socket.
3. Remove the retaining nut securing the socket to
the inside of the oven.
4. Remove the meat probe socket through the
inspection hole.
Figure 7.23a
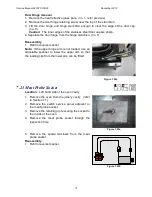
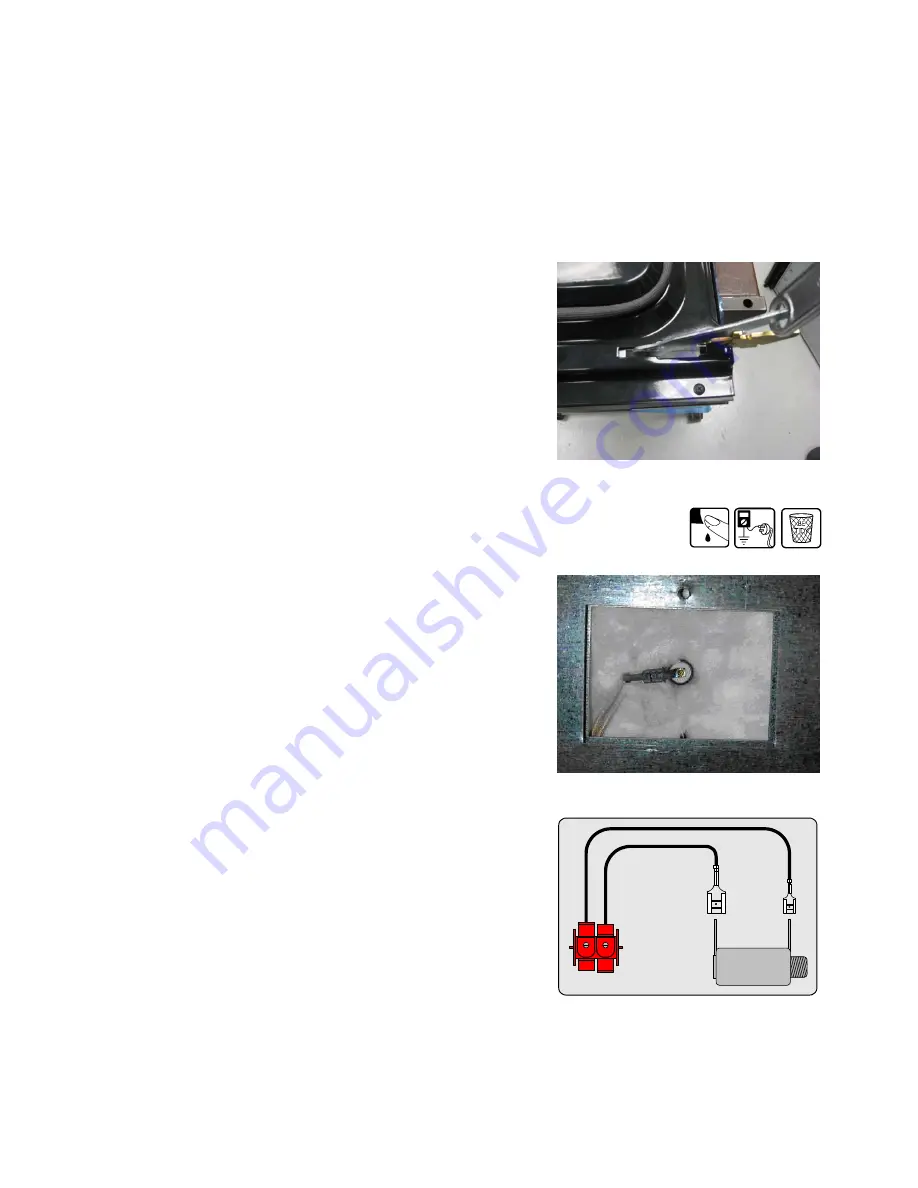
5. Remove the spade terminals from the meat
probe socket.
Reassembly
Refit in reverse manner.
Figure 7.23b
Summary of Contents for OB30DDEPX1
Page 2: ......
Page 45: ...Service Manual 547226 OB30 December 2012 45 6 2 Single Oven Wiring Schematic ...
Page 47: ...Service Manual 547226 OB30 December 2012 47 Neutral Circuit ...
Page 48: ...Service Manual 547226 OB30 December 2012 48 Generic High Voltage Circuit ...
Page 49: ...Service Manual 547226 OB30 December 2012 49 Generic Low Voltage Lock Circuit ...
Page 50: ...Service Manual 547226 OB30 December 2012 50 Lighting and Earth Circuit ...
Page 52: ...Service Manual 547226 OB30 December 2012 52 Neutral Circuit ...
Page 53: ...Service Manual 547226 OB30 December 2012 53 Generic High Voltage Circuit ...
Page 54: ...Service Manual 547226 OB30 December 2012 54 Generic Low Voltage Lock Circuit ...
Page 55: ...Service Manual 547226 OB30 December 2012 55 Lighting Earth Circuit ...
Page 74: ...Service Manual 547226 OB30 December 2012 74 8 N O T E S ...


