background image

13

!3

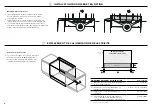
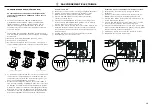
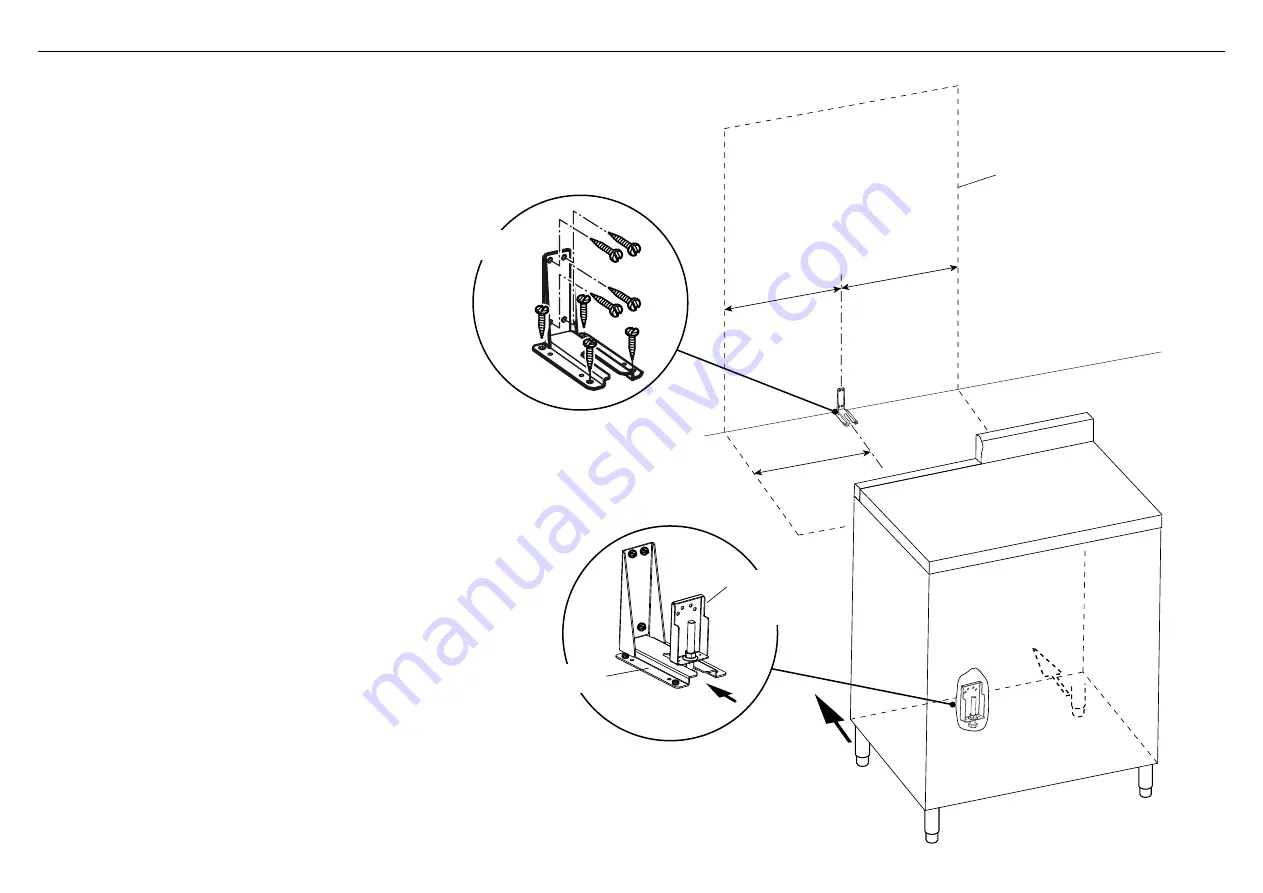
INSTALLATION DU SUPPORT ANTIBASCULEMENT

=

=

Ligne pointillée illustrant la 
position de la cuisinière installée

14 15/16”

(380 mm)

Support de 
stabilité

Support ajustable
avec boulon
installé 
correctement

Support 
de stabilité

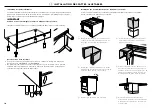
3

  Fixez le support de stabilité en place. Vous pouvez le 

fixer comme suit :


Au sol OU au mur arrière à l’aide de 4 vis (fournies).


Au sol ET sur la paroi arrière par 8 vis (fournies).


Il y a 8 vis à bois et 8 vis avec douilles en plastique 
fournies avec la gamme dans deux kits séparés. 
Utilisez les vis appropriées en fonction du type de 
matériau sur le sol et / ou le mur.


Si vous utilisez les ancrages de manchon en plastique: 
percez des trous de 5/16” (8 mm) de diamètre et insérez 
les ancrages fournis avant de fixer le support de stabilité 
avec les vis.

4

  Faites glisser la cuisinière en place, en vous assurant que 

le boulon se trouve sur les fentes du support réglable 
sous le support de stabilité.


Ajustez la longueur du boulon si nécessaire. Assurez-vous 
que les deux écrous sont bien serrés après tout réglage.

IMPORTANT!


Utilisez les vis appropriées pour fixer le support de 
stabilité en place en fonction du type de matériau sur le 
sol et / ou le mur.


Avant de percer et de percer des trous ou d’insérer 
des vis dans le sol ou le mur, vérifiez que vous 
n’endommagez pas les câbles ou les tuyaux.

Summary of Contents for OR30SDE

Page 1: ...OR30SDI Induction OR30SDE Glass Ceramic models FREESTANDING COOKER INSTALLATION GUIDE US CA 591507C 02 19 ...

Page 2: ...flammable materials on or near this appliance If the power supply cable is damaged it must be replaced by the manufacturer its service agent or similarly qualified person in order to avoid a hazard A circuit breaker is recommended Do not use adaptors reducers or branching devices to connect the oven to the mains electricity supply as they can cause overheating and burning Improper installation adj...

Page 3: ...y reach of children as these may cause serious injuries Make sure you recycle the packaging material Before disposing of any appliance make sure that it can no longer be used and that all hazardous parts are removed or made harmless so that children playing with the old appliance cannot harm themselves GENERAL INSTALLATION INFORMATION Cleaning and servicing Service should only be performed by an a...

Page 4: ...ppliance 2 PARTS SUPPLIED FOR INSTALLATION 3 TOOLS NEEDED FOR INSTALLATION NOT SUPPLIED WITH THE APPLIANCE Screwdriver Pencil Tape measure Suitable protective gloves Hammer Adjustable wrench Adjustable pliers Drill Anti tip bracket 1 Bolt 1 Threaded nuts 2 Small screws and washers 2 Wood screws 8 Ground lead 3 wire permanent connection Can be used in US only for Canada it is mandatory to connect t...

Page 5: ...ing damage If any damage is detected call the shipper and initiate a damage claim Fisher Paykel is not responsible for shipping damage DO NOT discard any packing material until the range has been inspected Remove the outer carton and any packing material from range Some models are supplied with a protective film on steel and aluminum parts This film must be removed before installing or using the a...

Page 6: ...8 max 37 5 8 956 B Overall width of range 29 7 8 759 29 7 8 759 C Overall depth of range from front of range to rear of island trim backguard excluding handles and dials 25 1 4 641 25 1 4 641 D Height from top of cooktop to top of Island trim fitted Backguard optional Level with cooktop 3 76 Level with cooktop 3 76 E Height of chassis excluding adjustable feet 32 1 8 816 32 1 8 816 F Adjustable fe...

Page 7: ...p of the cooking surface and the bottom of an unprotected wood or metal cabinet or D 24 610mm minimum when bottom of wood or metal cabinet is protected by not less than thick flame retardant millboard covered with not less than No 28 MSG sheet steel 0 015 thick stainless steel 0 024 thick aluminum or 0 020 thick copper CLEARANCE DIMENSIONS OR30SDI OR30SDE inches mm inches mm A Minimum width of ven...

Page 8: ...rea from floor 2 3 16 4 1 8 55 105 C Width of electrical supply areas 29 1 2 749 D Depth of supply area ie maximum protrusion of electrical connection from wall 3 15 16 100 Depending on adjustment of feet Island trim and backguard It is mandatory to install and use the appliance with either the island trim or the optional backguard correctly in place The island trim is already fitted to the applia...

Page 9: ...ated or air conditioned household air when maximum ventilation is not required Normally the maximum blower speed is only required when grilling or using the self cleaning cycle If a custom hood canopy contains any combustible materials eg a wood covering it must be a minimum of 30 762mm above the cooking surface Due to a high volume of ventilation air a source of make up air outside replacement ai...

Page 10: ...to tip the range again to make larger adjustments Fitting the adjustable feet covers optional If using the adjustable feet covers fit these while the range is tipped over 1 FITTING THE ADJUSTABLE FEET 3 Note gently bend the edges of the inner cover to adjust the tension between the two parts if needed 4 Attach the feet covers to the base of the range using the supplied screws Ensure that the mount...

Page 11: ...ensure two people carry out this manoeuvre to prevent damage to the adjustable feet Be careful do not lift the range by the oven door handle the hob rail or the cooktop trim as this may damage the appliance When moving range to its final position DO NOT DRAG Lift feet clear of floor ...

Page 12: ...he adjustable bracket to the back of the range centered on the lower edge using the two supplied screws and washers The anti tip bracket has two components the adjustable bracket the stability bracket IMPORTANT You must install both parts of the anti tip bracket and ensure they are properly fitted together to prevent the range from tipping To fit the anti tip bracket 1 2 3 ...

Page 13: ...he the plastic sleeve anchors drill 5 16 8mm diameter holes and insert the supplied anchors before attaching the stability bracket with the screws 4 Slide the range into place ensuring the bolt on the adjustable bracket slots under the stability bracket Adjust the length of the bolt as necessary Ensure the two nuts are well tightened after any adjustments IMPORTANT Use the proper screws to fix the...

Page 14: ...ical supply is available a 50 amp maximum circuit protection is required fused on both sides of the line Replacing the power cord Replacements should only be made by qualified electrical technicians If replacing the power cord use only a suitable UL or CSA approved one Tighten the power cord using the power cord strain relief bracket supplied with the appliance Allow enough slack to easily attach ...

Page 15: ...easy reference 4 Wire Connection 1 Loosen the L1 black L2 red and neutral white screws 2 Mount the conduit fitting to the 1 1 8 29mm hole in the strain relief bracket 3 Secure the neutral white power lead to the center terminal and tighten the screw 4 Secure the L1 black and the L2 red power leads to the terminals immediately to the left L1 and right L2 of the neutral terminal Tighten the screws 5...

Page 16: ...on Company Installation Date OPERATION All internal packing materials removed Check inside the oven Dials turn correctly and freely Oven and cooktop displays are functioning correctly and oven and cooking zones can be turned on Oven door hinges seated and door opens and closes properly Copyright Fisher Paykel Appliances 2019 All rights reserved The product specifications in this booklet apply to t...

Page 17: ...Modèles à induction OR30SDI et en verre céramique OR30SDE CUISINIÈRE NON ENCASTRÉE GUIDE D INSTALLATION US CA 591507C 02 19 ...

Page 18: ...celui ci Si le câble d alimentation électrique est endommagé vous devez le faire remplacer par le fabricant un agent de service ou une personne possédant des compétences similaires afin d éviter tout danger Un disjoncteur est recommandé N utilisez pas d adaptateurs de raccords réducteurs ou de dispositifs de branchement pour raccorder le four à l alimentation électrique car ils pourraient causer u...

Page 19: ...angereuses de façon à ce que les enfants ne puissent pas se blesser en jouant avec cet appareil INFORMATIONS D INSTALLATION GÉNÉRALES Nettoyage et entretien Les travaux d entretien ou de réparation doivent être effectués uniquement par un technicien autorisé qualifié Déconnectez l alimentation électrique de l appareil avant de procéder à l entretien Lors du retrait de l appareil pour le nettoyage ...

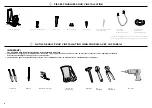
Page 20: ...ation de cet appareil 2 PIÈCES FOURNIES POUR L INSTALLATION 3 OUTILS REQUIS POUR L INSTALLATION NON FOURNIS AVEC L APPAREIL Tournevis Crayon Ruban à mesurer Gants de protection Marteau Clé ajustable Pinces ajustables Perceuse Anti tip bracket 1 Boulon 1 Écrous filetés 2 Petites vis et rondelles 2 Vis à bois 8 Vis et chevilles à douille en plastique 8 Fil de masse Connexion permanente à 3 fils Rond...

Page 21: ...dommage communiquez avec l expéditeur pour effectuer une demande d indemnisation Fisher Paykel n est pas responsable des dommages causés lors de l expédition NE mettez PAS au rebut les matériaux d emballage avant d avoir terminé l inspection de la cuisinière Retirez la boîte extérieure et tous les matériaux d emballage de la cuisinière Certains modèles sont livrés avec une pellicule protectrice su...

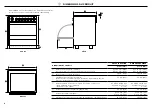
Page 22: ...759 29 7 8 759 C Profondeur hors tout de la cuisinière du devant de la cuisinière jusqu à l arrière de la garniture d îlot du dosseret excluant les poignées et les boutons 25 1 4 641 25 1 4 641 D Hauteur entre le dessus de la surface de cuisson et le dessus De la garniture d îlot installée Du dosseret en option Au même niveau que la surface de cuisson 3 76 Au même niveau que la surface de cuisson ...

Page 23: ...t le dessous d une armoire non protégée en métal ou bois ou un dégagement minimal D 24 610 mm lorsque le dessous de l armoire en métal ou bois est protégé par un panneau de celloderme ignifuge d au moins 6 mm d épaisseur recouvert d une tôle d acier n 28 MSG minimum d acier inoxydable de 0 015 0 4 mm d aluminium de 0 024 0 6 mm ou de cuivre de 0 020 0 5 mm DIMENSIONS DE DÉGAGEMENT OR30 À INDUCTION...

Page 24: ...on électrique avec fiche à 4 broches avec mise à la terre NEMA 14 50P doit présenter une longueur minimale de 48 1 220 mm depuis l arrière de l appareil 9 EMPLACEMENT DE L ALIMENTATION EN ÉLECTRICITÉ Emplacement final de la cuisinière contre le mur Côté gauche de la cavité Plancher Électricité D B A A C DIMENSIONS DES ZONES D ALIMENTATION pouces mm A Distance entre les côtés de la cuisinière et la...

Page 25: ...par exemple un revêtement en bois elle doit se trouver à un minimum de 36 914 mm au dessus de la surface de cuisson En raison du volume élevé d air de ventilation il est nécessaire d assurer une source d air d appoint air de remplacement provenant de l extérieur conforme aux codes et règlements locaux Installation au mur Installation en îlot Hotte incombustible Hotte incombustible Hotte incl combu...

Page 26: ...er des ajustements plus importants Installation des revêtements de pattes ajustables en option Si vous souhaitez utiliser les revêtements de pattes ajustables installez les pendant que la cuisinière est basculée vers l arrière 1 INSTALLATION DES PATTES AJUSTABLES 3 Remarque pliez délicatement les bords du panneau interne pour ajuster la tension entre les deux pièces si nécessaire 4 Fixez les revêt...

Page 27: ...cale par deux personnes Soyez prudent ne soulevez pas la cuisinière par la poignée du four lorsque vous l élevez en position verticale Lors du déplacement de la cuisinière à son emplacement final NE LA FAITES PAS GLISSER Soulevez la en veillant à ce que les pattes ne touchent pas au sol 2 DÉPLACEMENT DE LA CUISINIÈRE ...

Page 28: ...e à l arrière de la cuisinière centré sur le rebord inférieur à l aide des deux vis fournies Le support antibasculement est constitué de deux composants le support ajustable le support de stabilité IMPORTANT Vous devez installer les deux pièces du support antibasculement et vous assurer qu elles sont bien installées ensemble pour éviter le basculement de la cuisinière Pour installer le support ant...

Page 29: ... matériau sur le sol et ou le mur Si vous utilisez les ancrages de manchon en plastique percez des trous de 5 16 8 mm de diamètre et insérez les ancrages fournis avant de fixer le support de stabilité avec les vis 4 Faites glisser la cuisinière en place en vous assurant que le boulon se trouve sur les fentes du support réglable sous le support de stabilité Ajustez la longueur du boulon si nécessai...

Page 30: ...on de circuit à fusible de 50 A maximum est requise aux deux extrémités du câble électrique Remplacement du cordon d alimentation Les remplacements ne doivent être effectués que par un technicien électrique qualifié Si le cordon d alimentation doit être remplacé utilisez uniquement un cordon UL ou CSA approuvé Serrez le cordon d alimentation en utilisant le support serre câble fourni avec l appare...

Page 31: ...étaire l emplacement du disjoncteur Marquez le pour faciliter la consultation Connexion à 4 fils 1 Desserrez les vis L1 noire L2 rouge et neutre blanche 2 Montez le raccord de conduit sur le trou de 1 1 8 po 29mm dans le support de décharge de traction 3 Fixez le fil d alimentation neutre blanc à la borne centrale et serrez la vis 4 Fixez les fils d alimentation L1 noire et L2 rouge aux bornes sit...

Page 32: ...te de l installation FONCTIONNEMENT Tous les matériaux d emballage internes ont été retirés Vérifiez l intérieur du four Les boutons tournent correctement et librement Les afficheurs de four et surface de cuisson fonctionnent correctement et les zones de cuisson et le four peuvent être allumés Les charnières de la porte sont bien logées et la porte ouvre et ferme correctement Droit d auteur Fisher...

Reviews: