26
USINg yOUR wATER DISPENSER / ICE MAKER – ICE & wATER
Removing and replacing the ice box
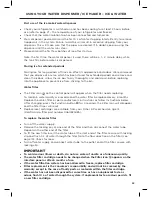
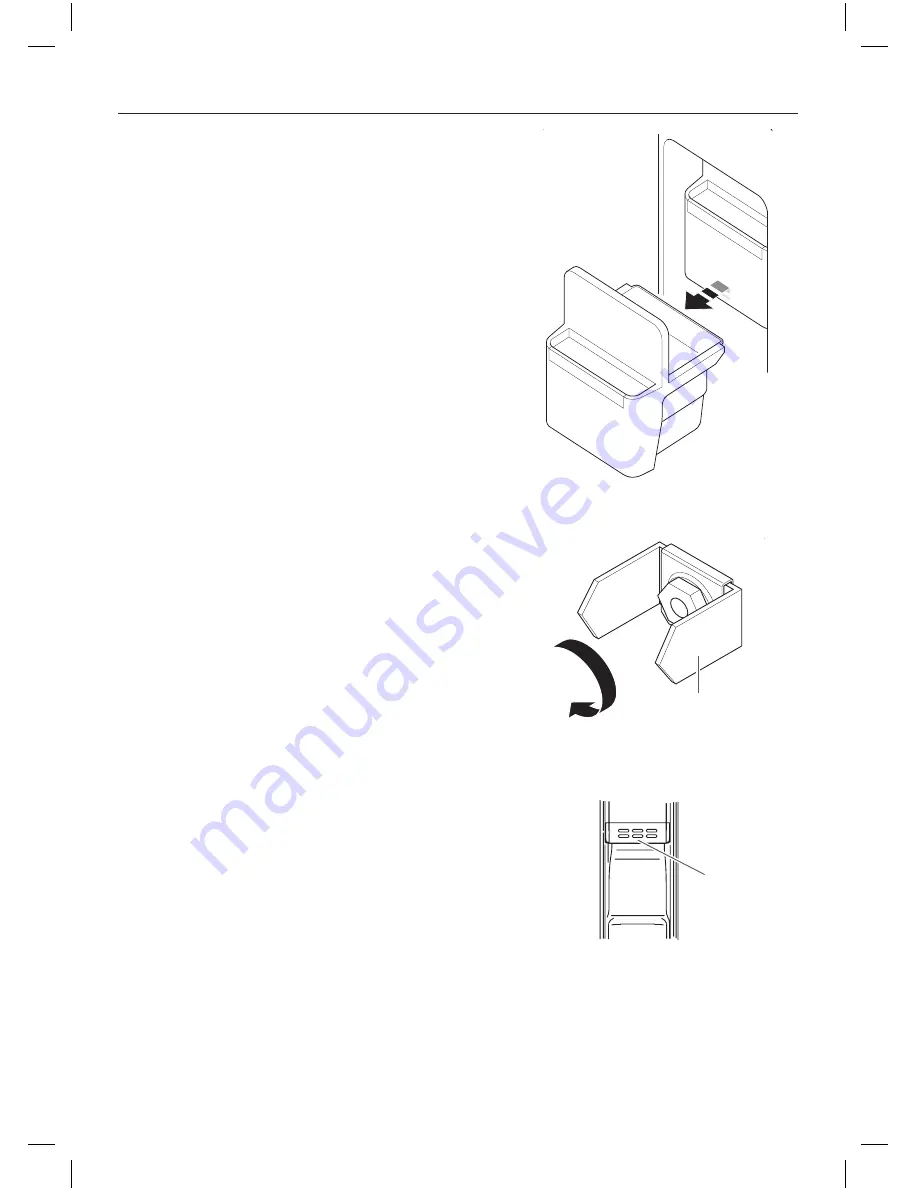
To remove the icebox, lift the box and then
pull towards you, releasing the unit (Fig. 11).
Note: water moisture may have condensed
and frozen the icebox in place.
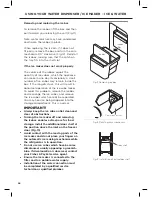
When replacing the ice bin, if it does not
fit easily, remove the box and turn the cam
mechanism 90° clockwise (Fig. 12). Reinstall
the icebox, making sure that the catch on
the tray fits into the shelf slot.
If the ice maker does not work properly
The volume of the icebox equals the
quantity of ice cubes, which the appliance
can make in one day. Occasionally a small
number of ice cubes may remain inside the
box. If the ice gets stuck, this will result in
abnormal operation of the ice cube maker.
To avoid this problem, remove the icebox
and rearrange the ice cubes, and remove
the ice cubes which cannot be separated.
You may hear ice being dropped into the
storage compartment. This is normal.
ImpORTANT!
●
●
Always keep the ice cube outlet clean and
clear of obstructions.
●
●
Turning the ice maker off and removing
the icebox enables extra space for food
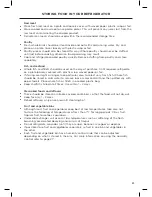
storage. Install the additional door shelf at
the position above the inlet on the freezer
door (fig. 13).
●
●
Avoid contact with the moving parts of the
ice maker and do not place your fingers on
the automatic ice making mechanism while
the refrigerator is in operation.
●
●
Do not use ice cubes which have become
discoloured, usually appearing a greenish-
blue. If discolouration is observed, contact
your fisher & Paykel service agent.
●
●
Ensure the ice maker is connected to the
filter and to a potable water supply.
●
●
Installation of the water connection must
be completed by a qualified service
technician or qualified plumber.
Fig. 11 Removing icebox
Icebox
Icebox
Fig. 12 Rotating cam mechanism
Cam mechanism
Fig. 13 Installation of extra door shelf
Door shelf

