R32 ATW Service Manual
63
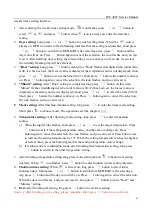
weekly timer setting interface.
1.
After entering the weekly timer setting mode,
icon flashes, press
or
button to
select
or
, and press
button, when
icon is always on, enter the start time
setting.
2.
Days setting:
Long press
or
button to switch setting items. When the
icon is
always on,
SUN
icon starts to flash (flashing indicates that the setting is adjustable), short press
or
button to switch from
SUN
-
SAT
. After selecting a day, press
button and the
day icon will be on. Press
button again to cancel the selection, the icon flashes, and you can
reset it. After finishing days setting, the selected day’s icon is always on (if no day is selected,
the currently flashing day will be selected).
3.
“Hour” setting:
Long press
button, at this time "Hour" flashes (left digital tube, initial value
is 08, if it has been set, the last set value is displayed, the temperature unit is not displayed), short
press
or
button to select the time (00-23), short press
button, the number is always
on. Press
button again to cancel the selection, the icon flashes, and you can reset it.
4.
“Minute” setting:
After “Hour” setting is completed, long press
button. At this time,
“Minute” flashes (middle digital tube, initial value is 00, if it has been set, the last set value is
displayed, temperature unit is not displayed), short press
or
to select the time (00-59).
Short press
button, the number is always on. Press
button again to cancel the selection,
the icon flashes, and you can reset it.
5.
Mode setting:
After finishing minutes setting, long press
to enter the timer mode setting.
Short press
to choose mode. The operations are like chapter
6.
Temperature setting:
After finishing mode setting, long press
to enter temperature
setting.
a)
When the digital tube flashes, short press
or
to set the target temperature. Press
button to select the setting temperature value, and the value is always on. Press
button again to cancel the selection, the icon flashes, and you can reset it. Press button once
to increase the setting temperature by 1°C. When the setting temperature reaches the highest
or lowest value, press the button again that the setting temperature won’t change.
b)
If setting mode is combination mode, after finishing first temperature setting, long press
button to switch to the other temperature setting.
7.
After finishing temperature setting, long press mode setting button
to back timer setting
interface. When
icon flashes, press
button to enter shutdown timer setting interface.
8.
Shutdown time setting:
When
is always on, long press
button to select timer
shutdown days. Short press
or
button to switch from
SUN
-
SAT
. After selecting a
day, press
button and the day icon will be on. Press
button again to cancel the selection.
When the days icon flashes, and you can reset it. Long press
button to enter “Hour” and
“Minutes” setting.
9.
Exit:
After finishing all setting, long press
button to exit timer setting.
Notes: 1. After finishing every setting, please remember short press
button to save the set,
Summary of Contents for FHIF-WHS-120CE3
Page 2: ......
Page 9: ...R32 ATW Service Manual 7 1 2 2 Hydronic module FHIF WHS 120CE3 FHIF WHS 160CE3...
Page 18: ...R32 ATW Service Manual 16 Pic 4 3 Domestic hot water mode operation range...
Page 23: ...R32 ATW Service Manual 21 8 System diagram...
Page 28: ...R32 ATW Service Manual 26 Main PCB 3 Hydronic module Main PCB...
Page 29: ...R32 ATW Service Manual 27 Filter board...
Page 34: ...R32 ATW Service Manual 32 Model FHOF WHS 160CE3 3F...
Page 35: ...R32 ATW Service Manual 33 Single unit installation More than one unit installation Unit mm...
Page 46: ...R32 ATW Service Manual 44 HEATING MODE COOLING MODE...
Page 47: ...R32 ATW Service Manual 45 HEATING MODE WITHOUT COOLING MODE DHW MODE WITHOUT COOLING MODE...
Page 48: ...R32 ATW Service Manual 46 HEATING MODE WITHOUT DHW MODE AND DHW TANK ONLY DHW MODE...
Page 56: ...R32 ATW Service Manual 54 When the unit has error code alarm port has a 220V output...
Page 59: ...R32 ATW Service Manual 57...


