background image


15 


7 Installation details 


7.1 Installation instructions   


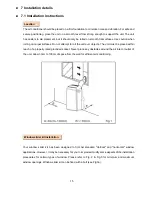
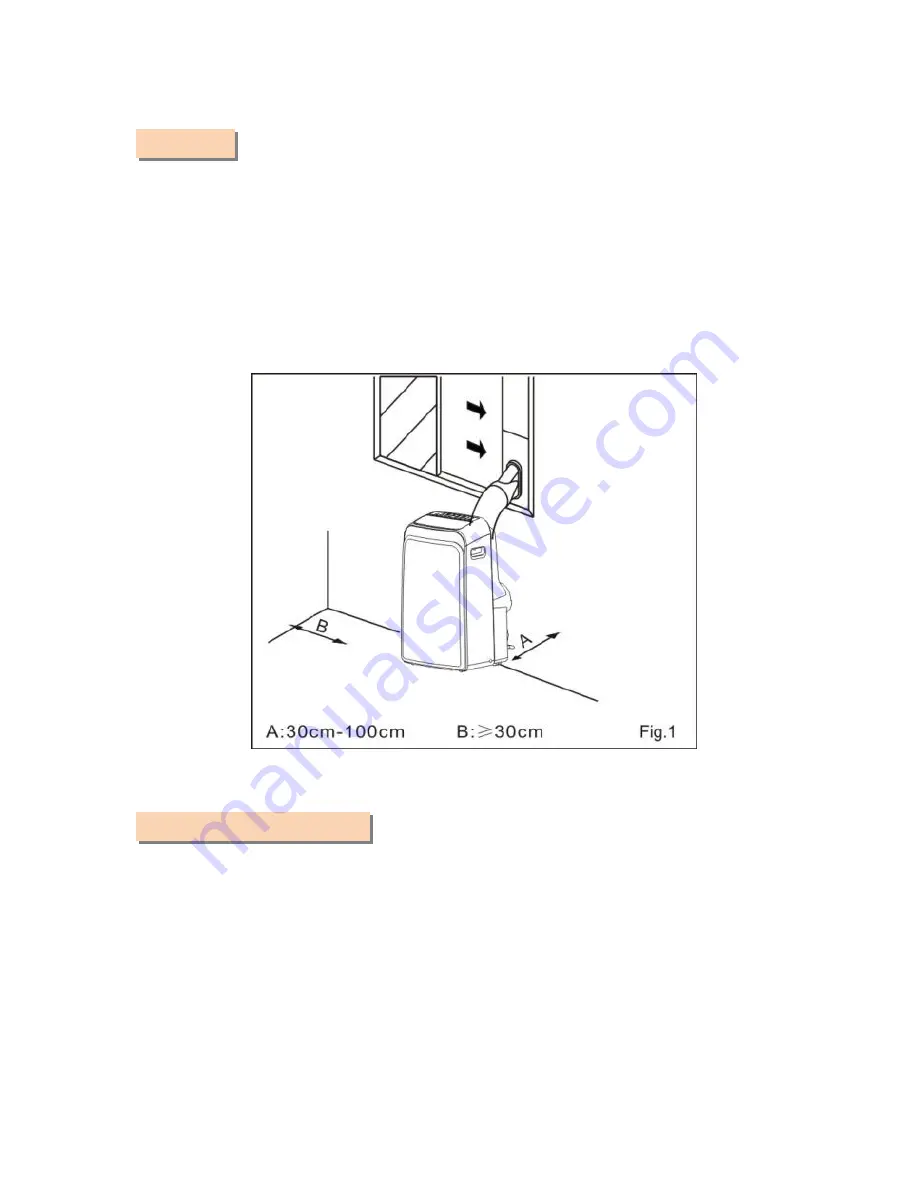
The air conditioner should be placed on a firm foundation to minimize noise and vibration. For safe and 

secure positioning, place the unit on a smooth, level floor strong enough to support the unit. The unit 

has casters to aid placement, but it should only be rolled on smooth, flat surfaces. Use caution when 

rolling on carpet surfaces. Do not attempt to roll the unit over objects. The unit must be placed within 

reach of a properly rated grounded socket. Never place any obstacles around the air inlet or outlet of 

the unit. Allow 30cm to 100cm of space from the wall for efficient air-conditioning. 


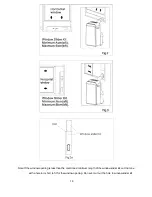
Your  window  slider  kit  has  been  designed  to  fit  most  standard  "Vertical"  and  "horizontal"  window 

applications. However, it may be necessary for you to improvise/modify some aspects of the installation 

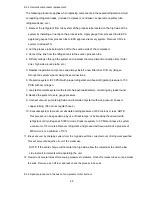
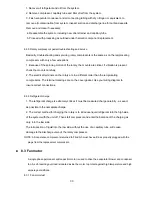
procedures  for  certain  types  of  window.  Please  refer  to  Fig.  2  &  Fig.3  for  minimum  and  maximum 

window openings. Window slider kit can be fixed with a bolt (see Fig.3a). 


Location


Window slider kit Installation


Summary of Contents for FP-120AE-R

Page 1: ...SERVICE MANUAL Room Air Conditioner Portable Type FP 120AE R NOTE Before servicing the unit please read this at first Always contact with your service center if meet problem FI_SM_FP 120AE R_141103 ...

Page 2: ...ment 11 6 3 Protection function 11 6 4 Fan only mode function requirement 11 6 5 Cooling mode function requirement 11 6 6 Drying mode 12 6 7 Sensor malfunction 14 6 8 Some standard functions synopsis 14 7 Installation details 15 7 1 Installation instructions 15 7 2 Care and maintenance 24 8 Basic test procedure 26 8 1 Defective compressor 26 8 2 Sealed refrigeration system repairs 28 8 3 Fan motor...
Page 3: ...fire or electric shock Install the panel and the cover of control box securely There is risk of fire of electric shock Always install a dedicated circuit and breaker Improper wiring or installation may cause fore or electric shock Use the correctly rated breaker of fuse There is risk of fire or electric shock Do not modify or extend the power cable There is risk of fire or electric shock Do not in...

Page 4: ...er appliance near the power cable There is risk of fire and electric shock Do not allow water to run into electric parts It may cause fire failure of the product or electric shock Do not store or use flammable gas or combustible near the product There is risk of fire or failure of product Do not use the product in a tightly closed space for a long time Oxygen deficiency could occur When flammable ...

Page 5: ...e to ensure that nobody could step on or fall onto the outdoor unit This could result in personal injury and product damage CAUTION Always check for gas refrigerant leakage after installation or repair of product Low refrigerant levels may cause failure of product Install the drain hose to ensure that water is drained away properly A bad connection may cause water leakage Keep level even when inst...
Page 6: ...ly Clean the filter every two weeks or more often if necessary A dirty filter reduces the efficiency of the air conditioner and could cause product malfunction or damage Do not insert hands or other object through air inlet or outlet while the product is operated There are sharp and moving parts that could cause personal injury Do not drink the water drained from the product It is not sanitary cou...

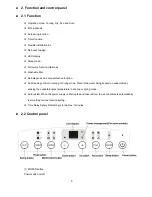
Page 7: ... diagnosis and auto protection function Anti freezing control in cooling or drying mode Prevent the water being freezed on evaporator by sensing the evaporator pipe temperature in cooling or drying mode Auto restart When the power supply is interrupted and then restore the air conditioners automatically restore the previous function setting Time Delay Safety Restarting is for approx 3 minutes 2 2 ...

Page 8: ... other press and hold the Up and Down buttons at the same time for 3 seconds 5 MODE select button Select the appropriate operating mode Each time you press the button a mode is selected in a sequence that goes from AUTO COOL DRY FAN The mode indicator light illuminates under the different mode settings 6 TIMER button Used to initiate the AUTO ON start time and AUTO OFF stop time program in conjuct...

Page 9: ...e remote display is actual temperature at its location The remote control will send this signal to the air conditioner every 3 minutes interval until press the Follow Me Temp Sensing button again If the unit does not receive the Follow Me Temp Sensing signal during any 7 minutes interval the unit will beep to indicate the Follow Me Temp Sensing mode has ended 10 POWER MANAGEMENT feature optional W...

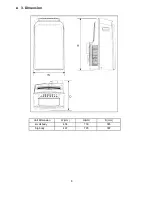
Page 10: ...8 3 Dimension Unit Dimension W mm H mm D mm small body 454 700 365 big body 467 765 397 ...

Page 11: ...on of the important components and their function in what is called the refrigeration system 1 This will help to understand the refrigeration cycle and the flow of the refrigerant in the cooling cycle LIQUID SIDE GAS SIDE EVAPORATOR CONDENSER COMPRESSOR CAPILIARY TUBE ...

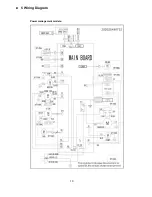
Page 12: ...10 5 Wiring Diagram Power management models ...

Page 13: ...unction requirement 6 4 1 The compressor and outdoor fan are OFF at Fan only mode except P1 protection 6 4 2 The speed of indoor fan can be optionally chosen as High Mid Low 6 4 3 The TS can t be controlled and the LED displays as T1 6 4 4 The ION TIMER functions are valid at the fan only mode 6 5 Cooling mode function requirement 6 5 1 The speed of indoor fan can be optionally selected as High Mi...

Page 14: ...or power management models Entering into the only cooling mode indoor fan motor operates immediately and keeps moving for 30 minutes at lease Compressor operates and indoor fan motor keeps moving Compressor stops operation indoor fan motor shuts off after a delay of 30 minutes 6 5 5 The ION TIMER functions are valid at the cooling mode 6 6 Drying mode 6 6 1 The unit operates at drying mode If TA 1...

Page 15: ...2 The speed can t be controlled at drying mode and the indoor fan motor operates at low speed 6 6 3 Power management for power management models Entering into drying mode indoor fan motor operates immediately and keeps moving for 30 minutes at lease Compressor operates and indoor fan motor keeps moving Compressor stops operation indoor fan motor shuts off after a delay of 30 minutes 6 6 4 The ION ...

Page 16: ... program Press or hold the UP or DOWN button to change the Auto time by 0 5 hour increments up to 10 hours then at 1 hour increments up to 24 hours The control will count down the time remaining until start The system will automatically revert back to display the previous temper ature setting if there is no operation in a five seconds period 6 8 2 Sleep function Press this button the selected temp...

Page 17: ...er objects The unit must be placed within reach of a properly rated grounded socket Never place any obstacles around the air inlet or outlet of the unit Allow 30cm to 100cm of space from the wall for efficient air conditioning Your window slider kit has been designed to fit most standard Vertical and horizontal window applications However it may be necessary for you to improvise modify some aspect...

Page 18: ...ote If the window opening is less than the mentioned minimum length of the window slider kit cut that one with a hole in it short to fit for the window opening Do never cut out the hole in window slider kit ...

Page 19: ...ig 4 2 Attach the window slider kit to the window stool Adjust the length of the window slider kit according to the width of window shorten the adjustable window kit if the width of window is less than 26 5 Type I or 22 1 Type II inches Open the window sash and place the window slider kit on the window stool Fig 5 Installation in a double hung sash window ...
Page 20: ...w as in Fig 6 4 Close the window sash securely against the window 5 Cut the foam seal to an appropriate length and sealing the open gap between the top window sash and outer window sash Show as in Fig 7 1 Cut the foam seal adhesive type to the proper length and attach it to the window frame See Fig 8 Installation in a sliding sash window ...

Page 21: ... width of window Short the adjustable window kit if the width of window is less than 26 5 Type I or 22 1 Type II inches Open the window sash and place the window slider kit on the window stool See Fig 9 3 Cut the foam seal adhesive type to the proper length and attach it on the top of the window Show as in Fig 10 ...

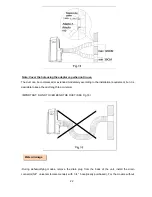
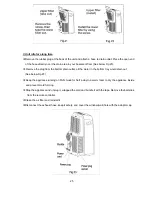
Page 22: ... the top window sash and outer window sash Show as in Fig 11 The exhaust hose and adaptor must be installed or removed in accordance with the usage mode 1 Install the window Exhaust adaptor B onto the exhaust hose as shown in Fig 12 or Fig 13 Refer to the Cool or Auto mode Install Fan dehumidify mode Remove Exhaust hose installation ...

Page 23: ...nstallation See Fig 14 The exhaust hose can be installed into the wall Not applicable to the units without adaptor A expansion plugs and wooden screws of Accessories 1 Prepare a hole in the wall Install the wall Exhaust adaptor A onto the wall outside by using 4 expansion plugs and wooden screws be sure to fix thoroughly See Fig 15 2 Attach the Exhaust hose to wall Exhaust adaptor A ...

Page 24: ...installation requirement but it is desirable to keep the duct length to a minimum IMPORTANT DO NOT OVER BEND THE DUCT SEE Fig 16 During dehumidifying modes remove the drain plug from the back of the unit install the drain connector 5 8 universal female mender with 3 4 hose locally purchased For the models without Water drainage ...

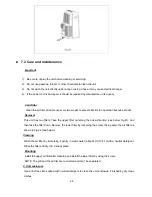
Page 25: ...el or down to let the water flow smoothly Do never let it up When the water level of the bottom tray reaches a predetermined level the unit beeps 8 times the digital display area shows P1 At this time the air conditioning dehumidification process will immediately stop However the fan motor will continue to operate this is normal Carefully move the unit to a drain location Remove the bottom drain p...

Page 26: ...it has two filters Take the upper filter out along the arrow direction see below Fig 21 and then take the filter down Remove the lower filter by loosening the screw taking down the air filter as shown in Fig 22 see below Cleaning Wash the air filter by immersing it gently in warm water about 40 104 with a neutral detergent Rinse the filter and dry it in a shady place Mounting Install the upper air...

Page 27: ...utlet all the water in the bottom tray would drain out See below Fig 23 Keep the appliance running on FAN mode for half a day in a warm room to dry the appliance inside and prevent mold forming Stop the appliance and unplug it wrapped the cord and bundle it with the tape Remove the batteries from the remote controller Clean the air filter and reinstall it Disconnect the exhaust hose keep it safety...

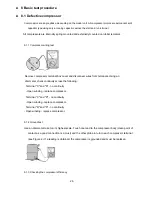
Page 28: ...wires from terminals Using an ohmmeter check continuity across the following Terminal C and S no continuity Open winding replace compressor Terminal C and R no continuity Open winding replace compressor Terminal R and S no continuity Open winding replace compressor 8 1 2 Ground test Use an ohmmeter to set on its highest scale Touch one lead to the compressor body clean point of contact as a good c...

Page 29: ...e compressor terminal box adjacent to the compressor body The overload is wired in series with the common motor terminal The overload senses both major amperage and compressor temperature High motor temperature or amperage heats the disc causing it to open and break the circuit to the common motor terminal Heat generated within the compressor shell is usually due to 1 High amperage 2 Low refrigera...

Page 30: ... 1 Voltmeter 2 Ammeter 3 Ohmmeter 4 E P A Approved Refrigerant Recovery System 5 Vacuum Pump capable of 200 microns or less vacuum 6 Acetylene Welder 7 Electronic Halogen Leak Detector G E Type H 6 or equivalent 8 Accurate refrigerant charge measuring device such as a Balance Scales 1 2 oz accuracy b Charging Board 1 2 oz accuracy 9 High Pressure Gauge 0 400 lbs 10 Low Pressure Gauge 30 150 lbs 11...

Page 31: ...ant pressure to 150 PSIG with dry nitrogen 7 Leak test complete system with electric halogen leak detector correcting any leaks found 8 Reduce the system to zero gauge pressure 9 Connect vacuum pump to high side and low side of system with deep vacuum hoses or copper tubing Do not use regular hoses 10 Evacuate system to maximum absolute holding pressure of 200 microns or less NOTE This process can...

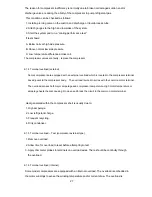
Page 32: ... order than the reciprocating compressors The terminal markings are on the cover gasket Use your wiring diagram to insure correct connections 8 2 6 Refrigerant charge 1 The refrigerant charge is extremely critical It must be measured charge carefully as exact as possible to the nameplate charge 2 The correct method for charging the rotary is to introduce liquid refrigerant into the high side of th...

Page 33: ...capacitor motor such as the compressor and fan motor A single capacitor can be used for each motor or a dual rated capacitor can be used for both The capacitor s primary function is to reduce the line current while greatly improving the torque characteristics of a motor The capacitor also reduces the line current to the motor by improving the power factor of the load Run capacitor hook up line sid...

Page 34: ... Resistance KΩ 10 62 2756 17 14 6181 44 4 3874 9 58 7079 18 13 918 45 4 2126 8 56 3694 19 13 2631 46 4 0459 7 52 2438 20 12 6431 47 3 8867 6 49 3161 21 12 0561 48 3 7348 5 46 5725 22 11 5 49 3 5896 4 44 23 10 9731 50 3 451 3 41 5878 24 10 4736 51 3 3185 2 39 8239 25 10 52 3 1918 1 37 1988 26 9 5507 53 3 0707 0 35 2024 27 9 1245 54 2 959 1 33 3269 28 8 7198 55 2 8442 2 31 5635 29 8 3357 56 2 7382 3...

Page 35: ... lower than the set temperature Cooling mode Reset the temperature 2 Not cool enough The windows or doors in the room are not closed Make sure all the windows and doors are closed There are heat sources inside the room Remove the heat sources if possible Exhaust air duct is not connected or blocked Connect the duct and make sure it can function properly Temperature setting is too high Decrease the...

Reviews: